> For the complete documentation index, see [llms.txt](https://docs.geopard.tech/geopard-tutorials/llms.txt). Markdown versions of documentation pages are available by appending `.md` to page URLs; this page is available as [Markdown](https://docs.geopard.tech/geopard-tutorials/tr/gis-kisa-ipuclari/qgis-yield-data-manipulations.md).
# QGIS: Verim Verisi İşlemleri
GeoPard'a içe aktarmadan veya analiz etmeden önce verim verisini QGIS'te hazırlayın ve temizleyin.
GENEL BAKIŞ
Verim monitöründen alınan verilerle ilgili aşağıdaki sorunları gidermeye yönelik adım adım açıklama:
1. Shapefile'da projeksiyon dosyası (.prj) eksik
2. Shapefile'daki her öznitelik için dönüştürme kurallarını uygulama (kg/ha'dan bu/ac'ye örnek)
Kullanılacak yazılım QGIS'tir ([BAĞLANTI](https://qgis.org/en/site/forusers/download.html)).
İndirme ve kurulum gereklidir.
### PROJEKSİYON DOSYASI EKSİK
1. Verim verilerinin bulunduğu shapefile'ı açın. Dosyayı QGIS penceresine sürükleyin.
2. Shapefile, Katmanlar bölümünde ek işlemler için kullanılabilir hâle gelir.
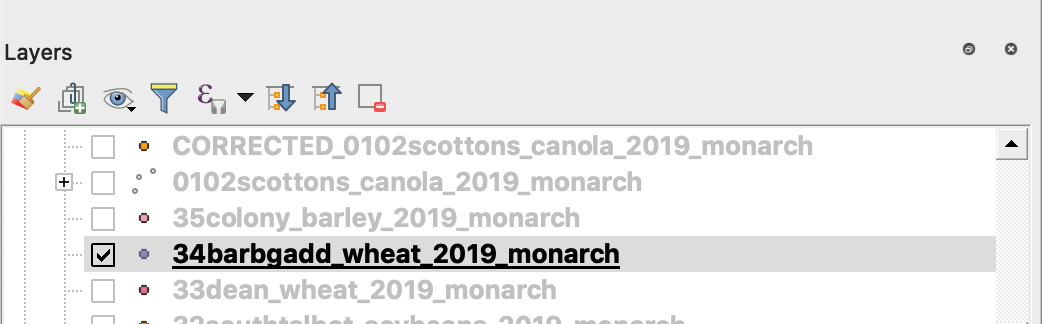
3. Kaydetme işlemini başlatın
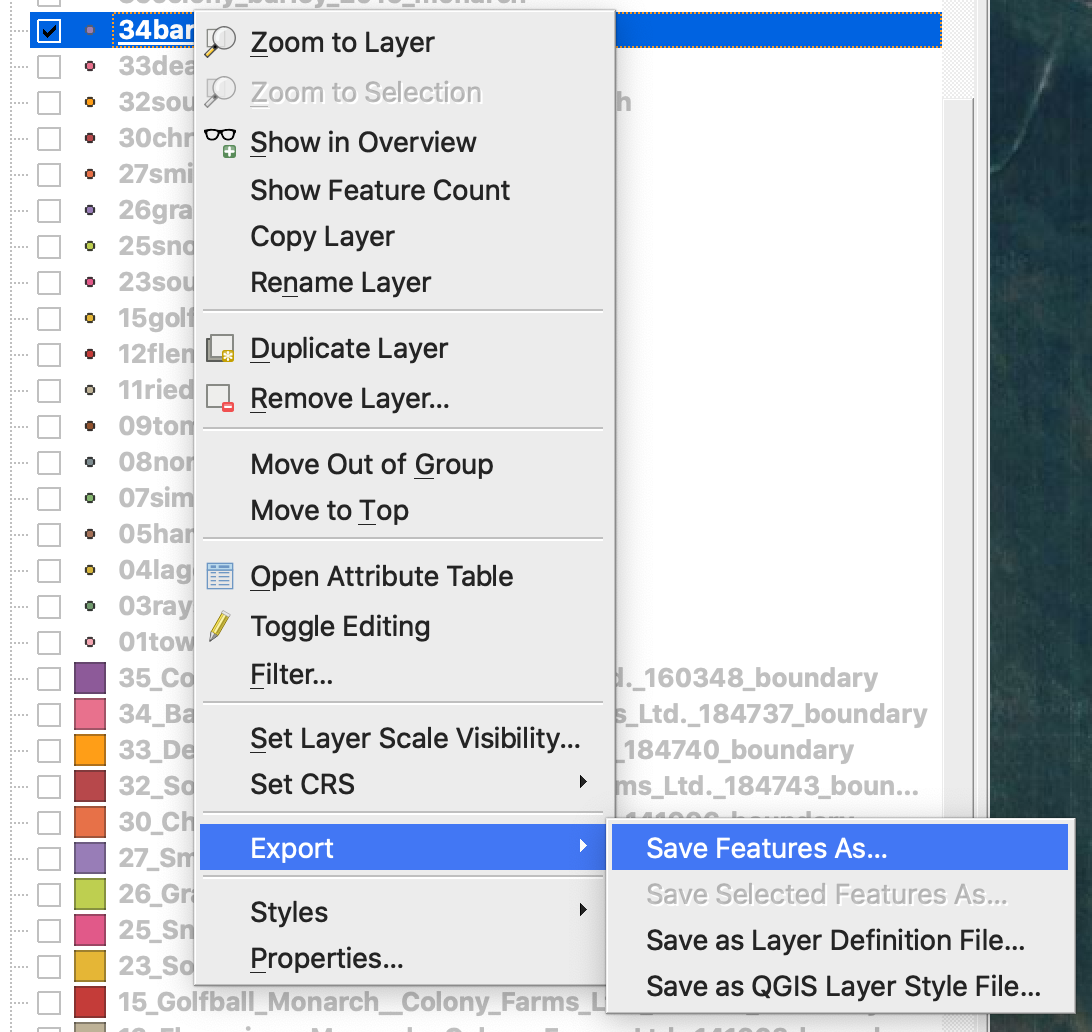
4. 1. Shapefile'a sağ tıklayın
2. Dışa Aktar -> Objeyi Farklı Kaydet... seçeneğini belirleyin
4. Şunları seçin:
5. 1. Biçim -> ESRI Shapefile,
2. Dosya adı -> … seçeneğine tıklayın ve tercih ettiğiniz dizini ve dosya adını belirleyin,
3. Koordinat referans sistemi (CRS) -> EPSG:4326
4. Kodlama -> UTF8
5. Kaydedilen dosyayı haritaya ekle (dosyayı doğrudan QGIS'te görmek istiyorsanız isteğe bağlıdır)
6. Geometri türü -> Nokta
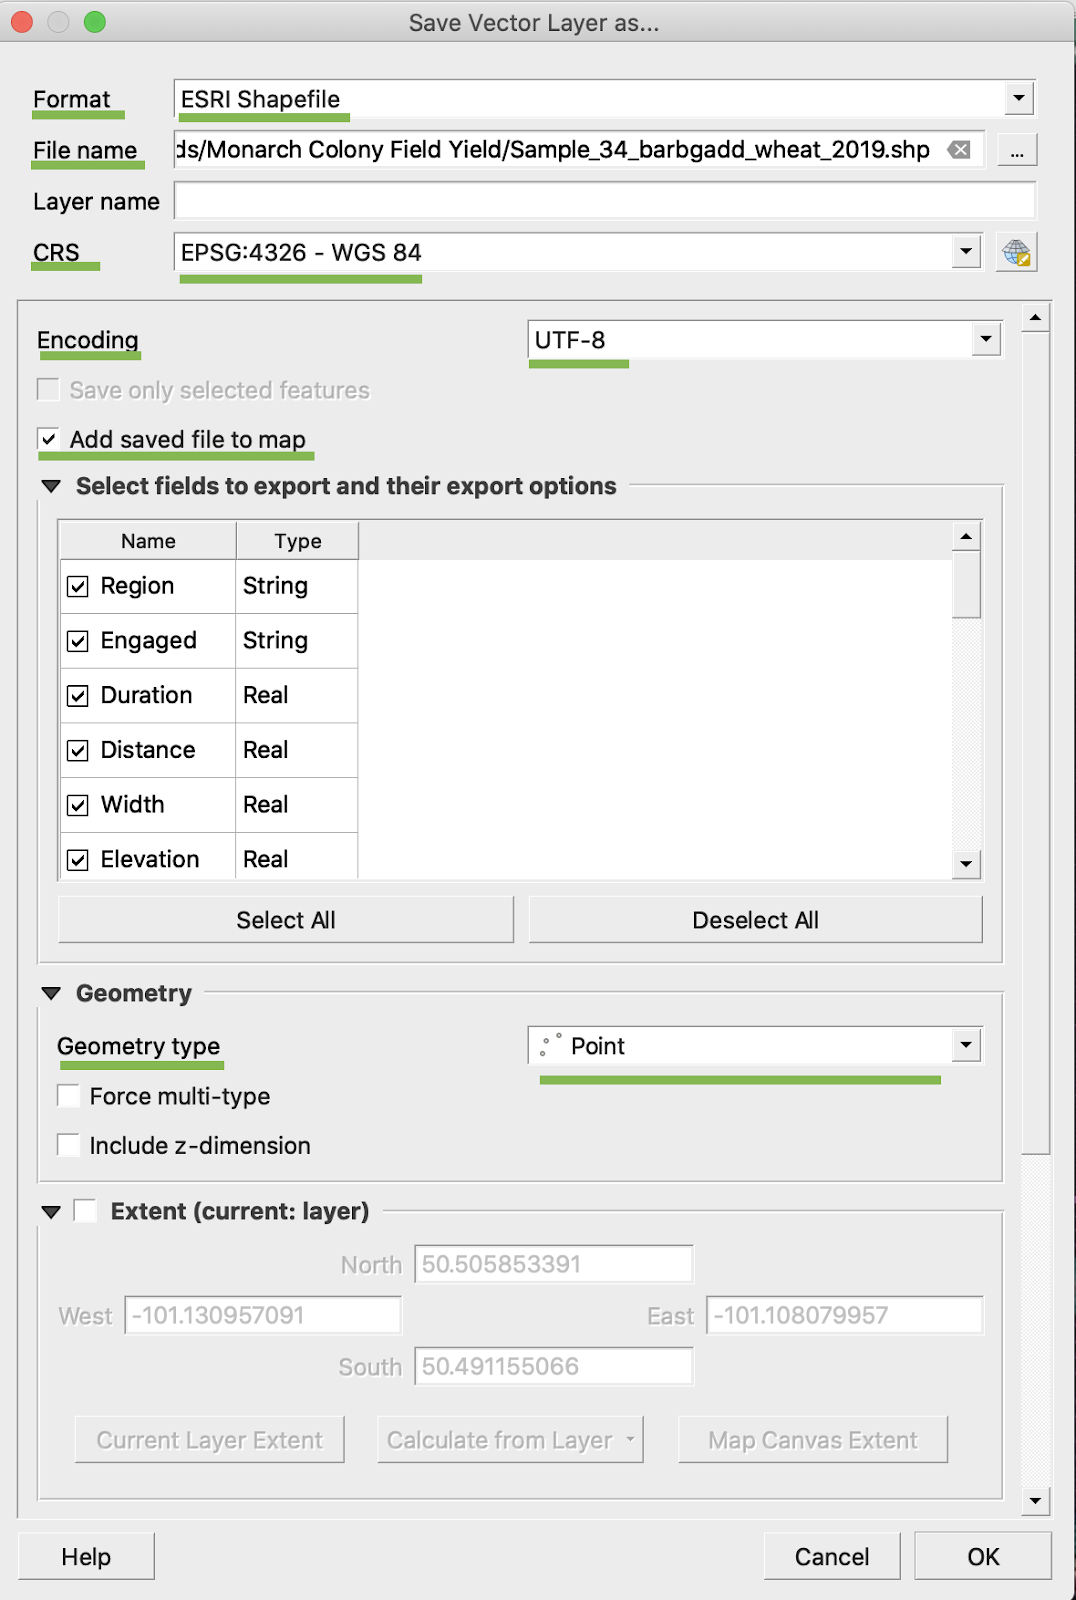
5. Tamam'a tıklayın
6. Aynı verim verilerini içeren ek bir shapefile oluşturulur. Projeksiyon dosyası (.prj) eklenir.
\
### BU/AC DÖNÜŞÜMÜ
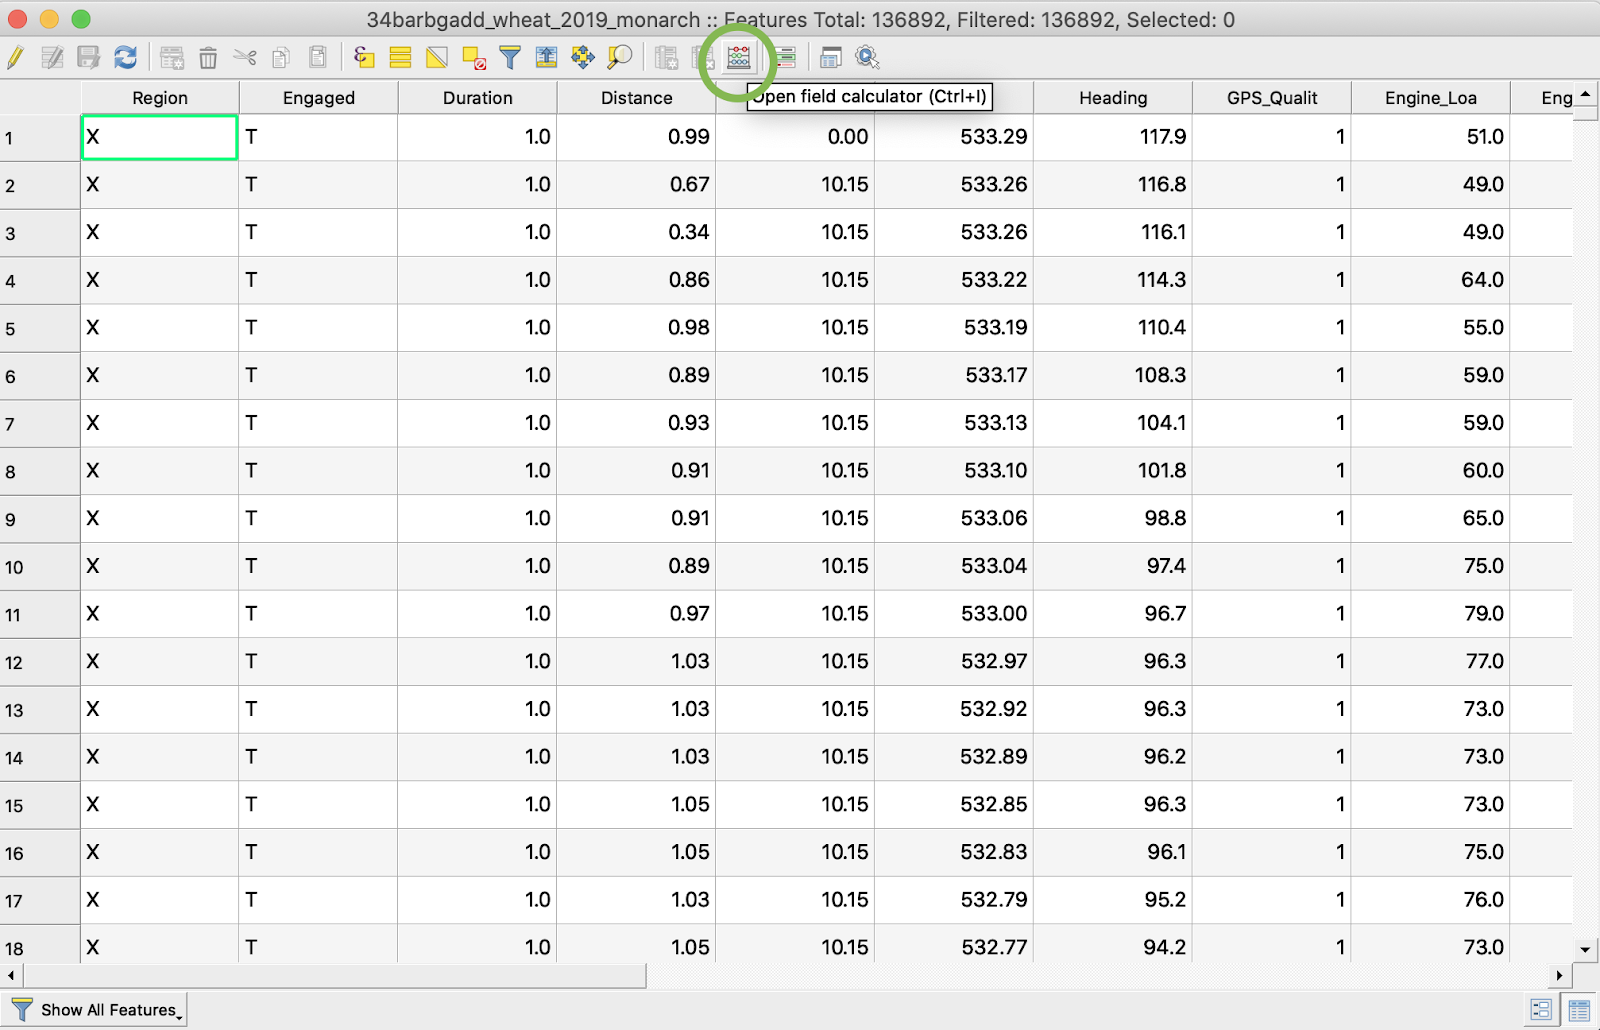
1. Shapefile'a sağ tıklayın ve Öznitelik Tablosunu Aç seçeneğini belirleyin
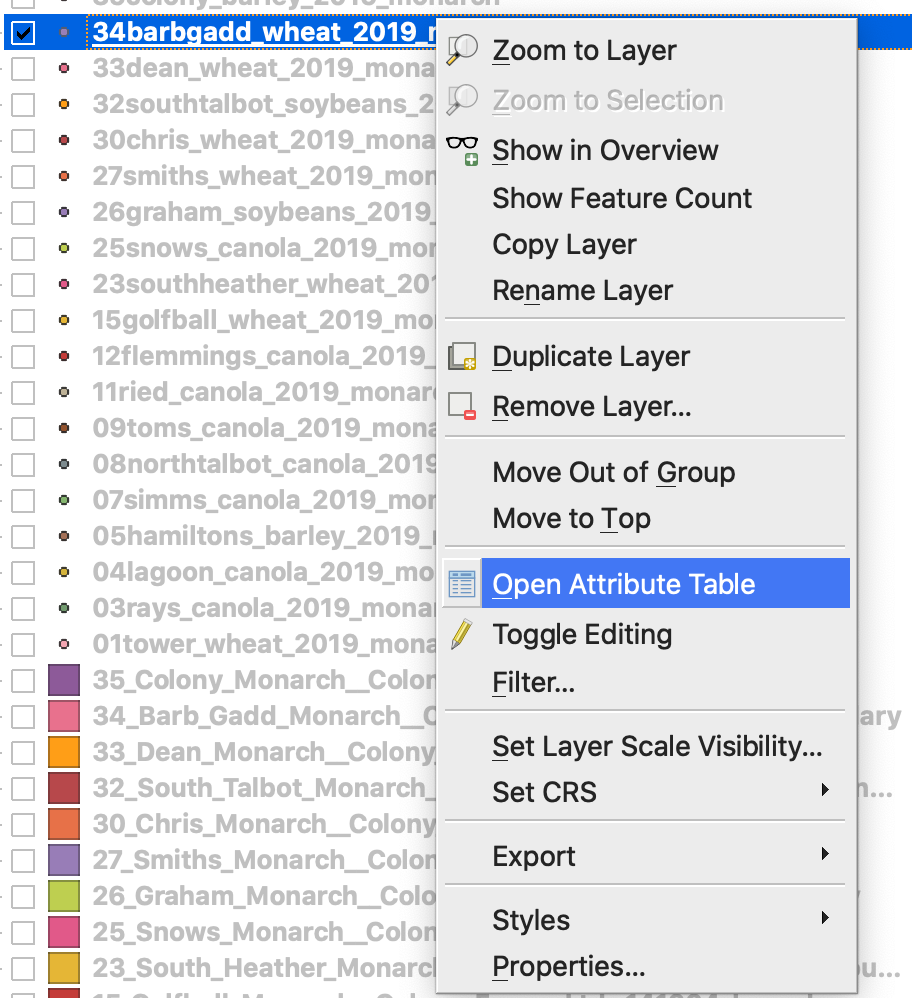
2. Alan hesaplayıcısını aç'a tıklayın
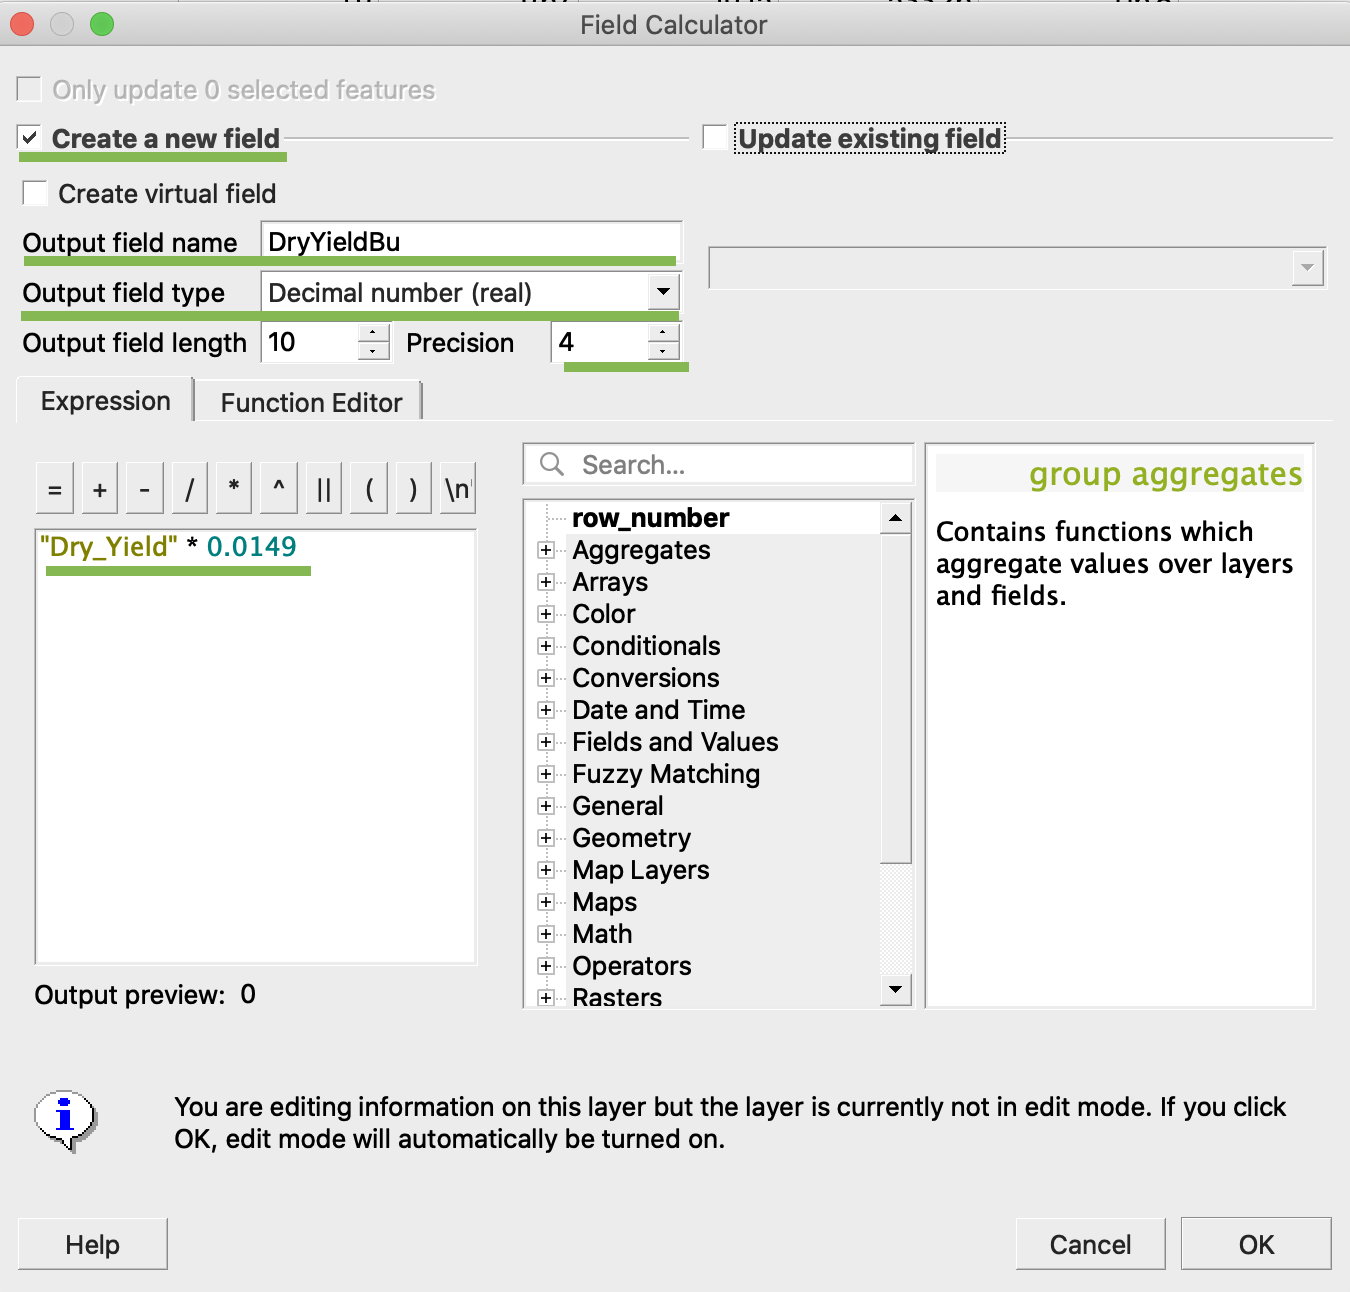
3. Yeni bir alan oluşturun
4. 1. Yeni bir alan oluştur seçeneğini işaretleyin
2. Çıktı alanı adı -> DryYieldBu girin
3. Çıktı alanı türü -> Ondalık sayı (gerçek) seçin
4. Hassasiyet'i -> 4 olarak değiştirin
5. kg/ha'yı bu/ac'ye dönüştürmek için şu kuralı girin -> "Dry\_Yield" \* 0.0149
4. Tamam'a tıklayın
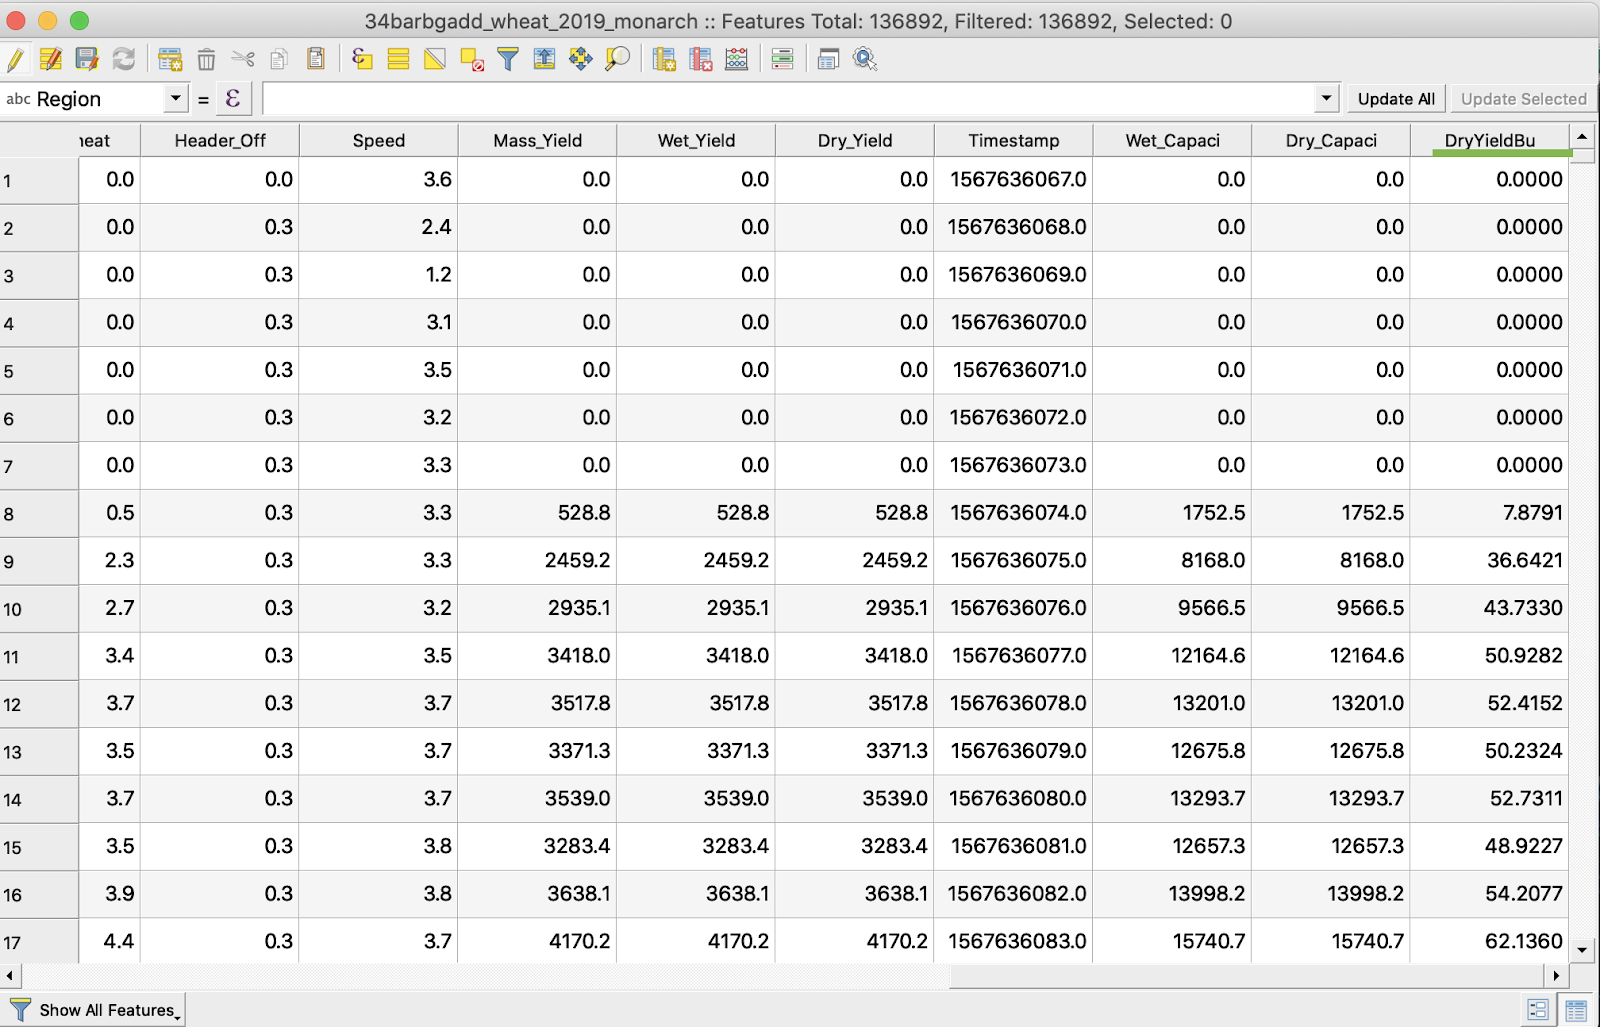
5. Tabloda DryYieldBu adlı ek bir öznitelik görünür
6. Değişiklikleri kaydedin
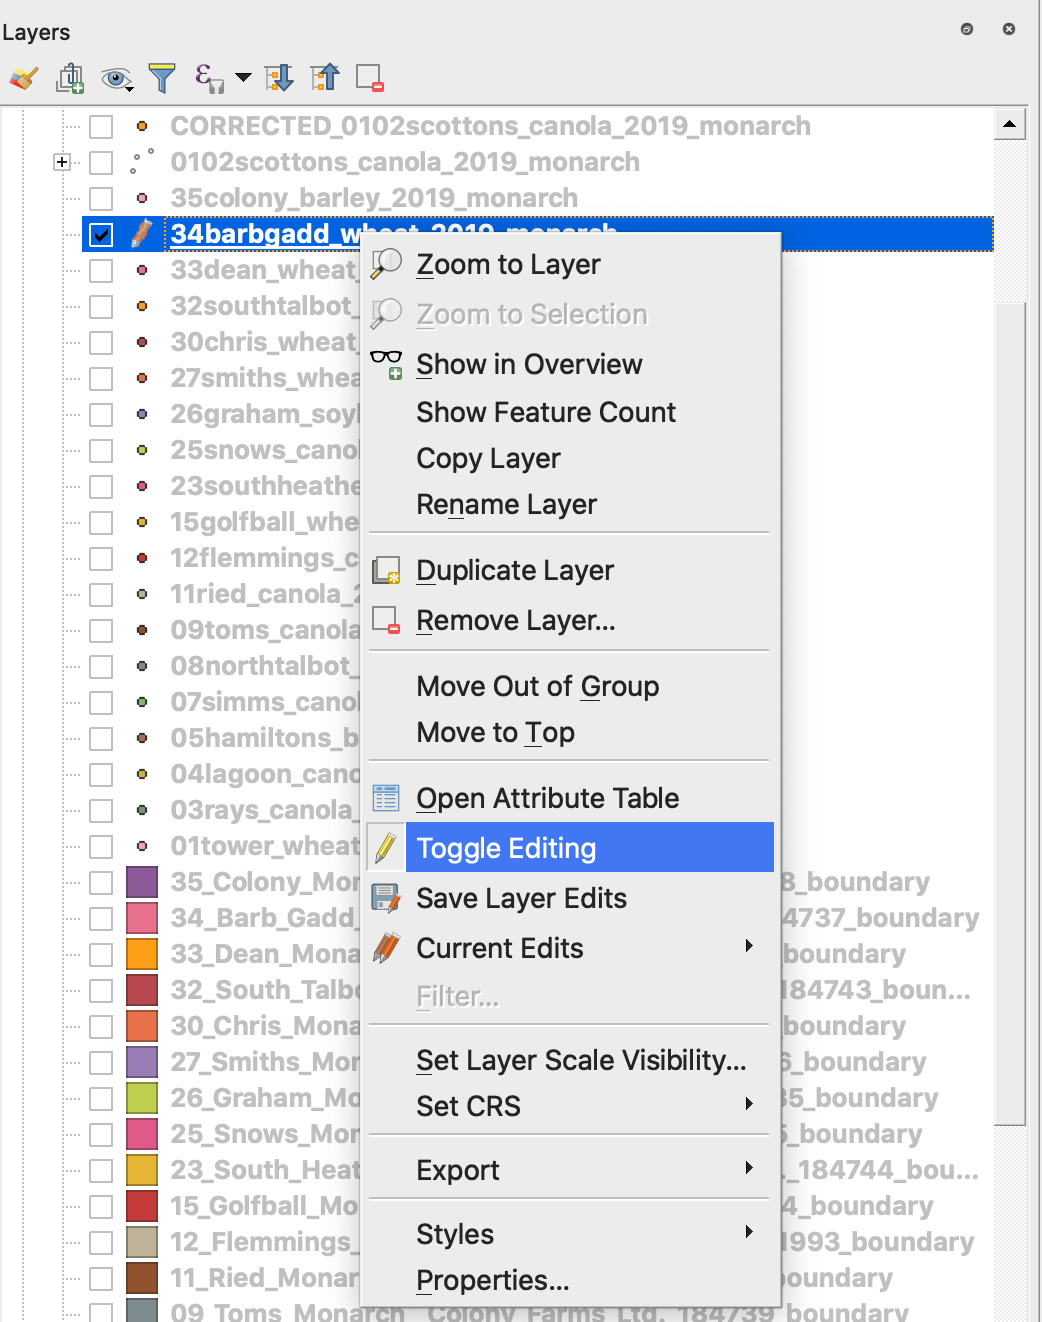
7. 1. İlgili shapefile'a sağ tıklayın
2. Düzenlemeyi Aç/Kapat seçeneğini belirleyin
\
\
\
7. Değişiklikleri kaydetmeyi onaylayın
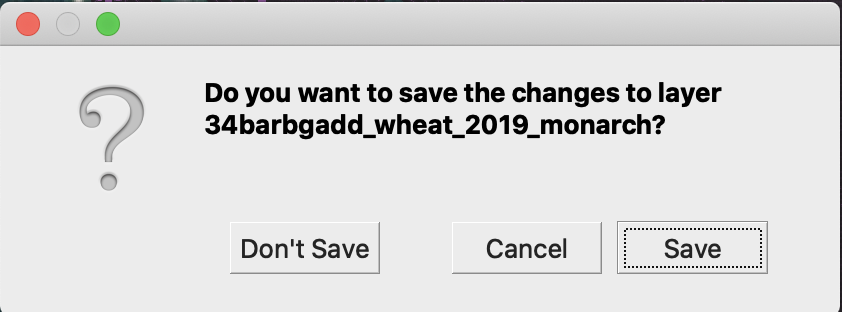
İlgili shapefile'ın yanında artık kalem simgesi görünmez. Shapefile'daki veriler güncellenmiştir.
---
# Agent Instructions
This documentation is published with GitBook. GitBook is the documentation platform designed so that both humans and AI agents can read, navigate, and reason over technical content effectively. Learn more at gitbook.com.
## Querying This Documentation
If you need additional information that is not directly available in this page, you can query the documentation by asking a question.
Perform an HTTP GET request on the following URL with the `ask` and `goal` query parameters:
```
GET https://docs.geopard.tech/geopard-tutorials/tr/gis-kisa-ipuclari/qgis-yield-data-manipulations.md?ask=&goal=
```
`ask` is the immediate question: it should be specific, self-contained, and written in natural language.
`goal` is what the user is ultimately trying to achieve, the reason they need the answer. Sharing it helps GitBook give you a better, more relevant answer. A goal is most helpful when it describes the outcome the user wants rather than restating the question. For example, with `ask=how do I create an API token`, a goal like `automate deployments from our CI pipeline` lets GitBook tailor the answer to that use case.
The response will contain a direct answer to the question and relevant excerpts and sources from the documentation.
Use this mechanism when the answer is not explicitly present in the current page, you need clarification or additional context, or you want to retrieve related documentation sections.