> For the complete documentation index, see [llms.txt](https://docs.geopard.tech/geopard-tutorials/llms.txt). Markdown versions of documentation pages are available by appending `.md` to page URLs; this page is available as [Markdown](https://docs.geopard.tech/geopard-tutorials/swe/produktvandring-webbapp/john-deere-operations-center-integration/4.-import-into-geopard-from-john-deere-operations-center.md).
# 4. Importera till GeoPard från John Deere Operations Center
Importera gränser, fält och agronomiska dataset från John Deere till GeoPard.
3\. Importera till GeoPard
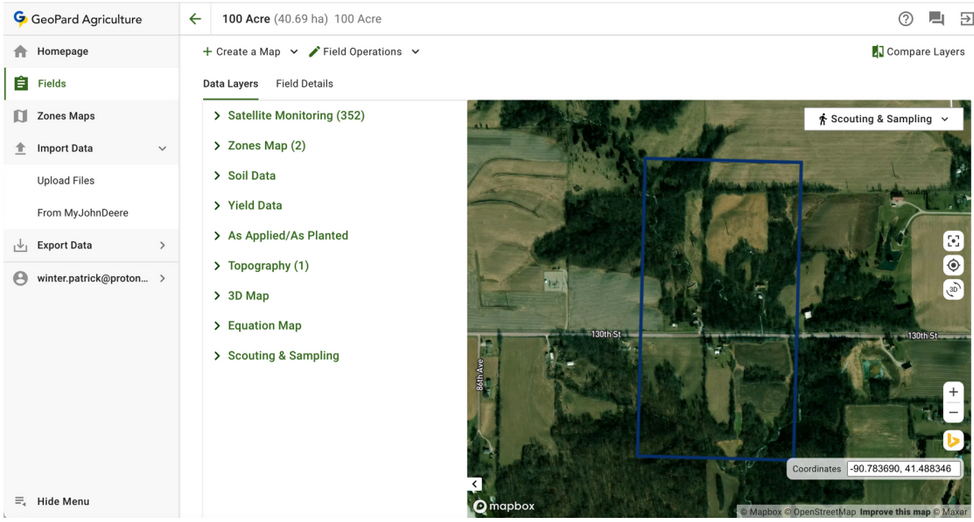
3.1 GeoPards kunder kan importera data (fältgränser, skördedata, data för sådd och data för spridning) från John Deere Operations Center till GeoPard. Första steget är att [logga in](https://app.geopard.tech/auth/sign-in) och gå till fliken **Importera från MyJohnDeere** När importen är klar är GeoPard-fältet kopplat till John Deere-fältet. Nya fälttillgångar i GeoPard (zonkartor, topografikartor och ekvationskartor) skickas automatiskt till John Deere Operations Center när de har skapats. Se avsnitt 4.14: Leta efter synkroniserade data från GeoPard-fältet i John Deere-fältet.
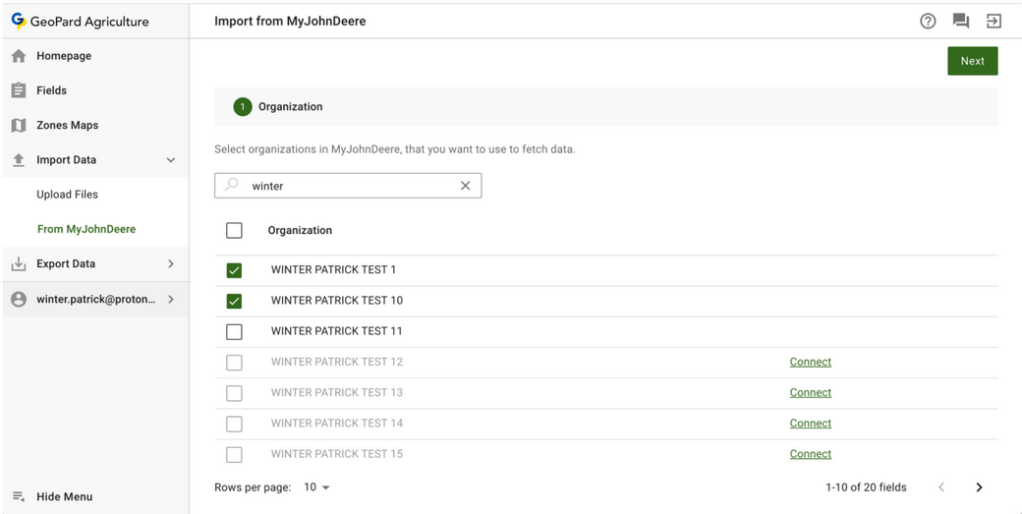
3.2 Användaren väljer vilken John Deere-organisation GeoPard ska hämta data från och klickar på knappen **Nästa** Användaren kan söka med text. Om John Deere-organisationen är inaktiverad ( **namnet visas i grått**) ska användaren ge GeoPard åtkomst till John Deere Operations Center. Se avsnitt [**2. Ansluta GeoPard-profilen till en John Deere-organisation**](https://docs.geopard.tech/geopard-tutorials/swe/produktvandring-webbapp/john-deere-operations-center-integration/3.-connect-to-john-deere-organizations.md).
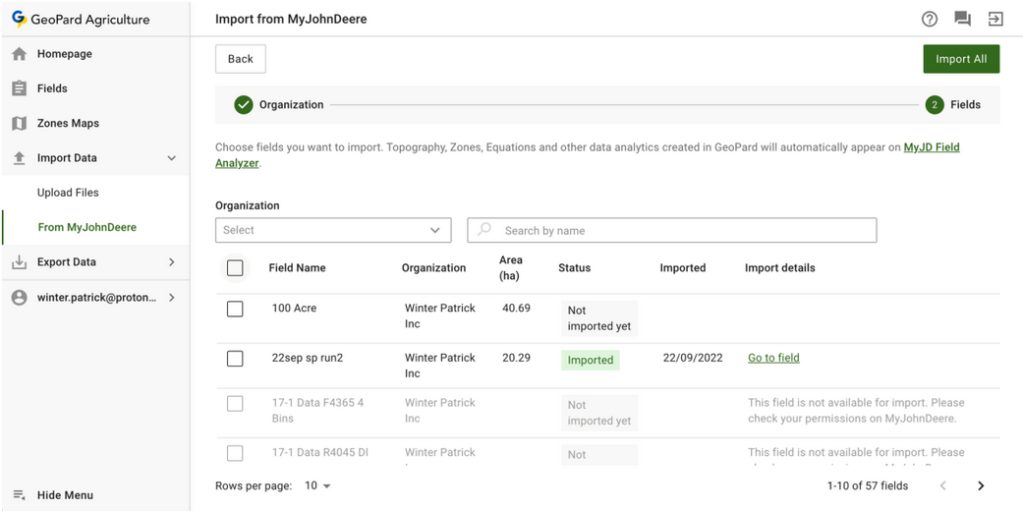
3.3 Om användaren vill importera all tillgänglig data klickar hen på knappen **Importera alla** eller använder urvalsfunktionen (avsnitt 4.4).
3.4 Om användaren vill importera specifika data väljer hen först datauppsättningarna. Det går också att filtrera tillgångar.
3.5 När urvalet är klart klickar användaren på knappen **Importera markerade** .
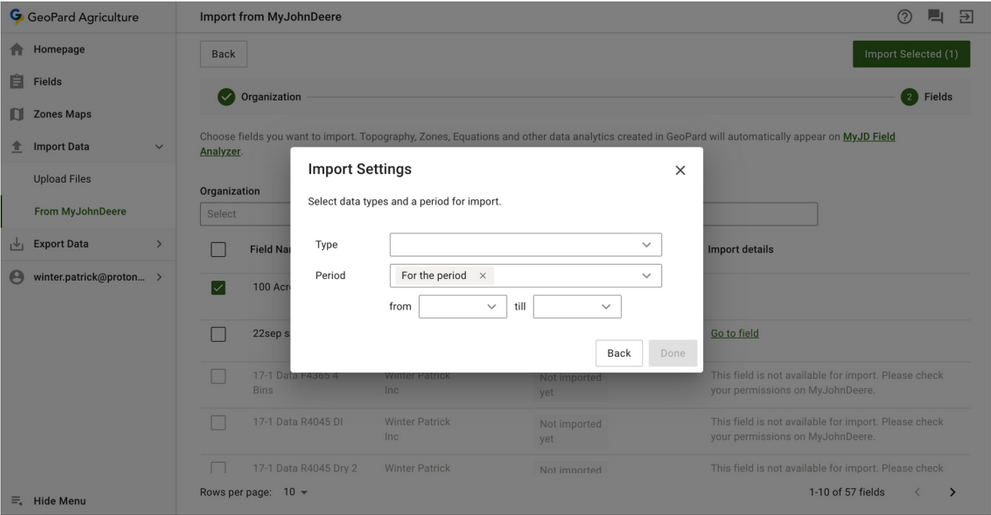
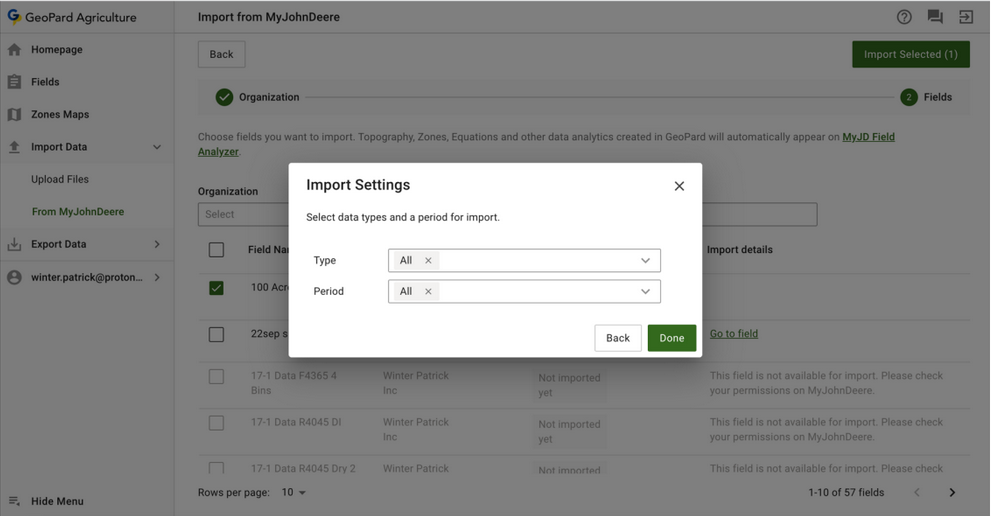
3.6 Välj importtyp och klicka på **Nästa**.
3.7 Användaren väljer **period** för tillgångarna i listrutan.
3.8 **Period** I listrutan Period kan du välja ett intervall av perioder.
3.9 När användaren har valt **typ** och **period**klickar hen på knappen **Klar** för att starta importen.
3.10 Importen tar en stund beroende på mängden data. Användaren ser en laddningssymbol på den aktuella fliken eller en **förloppsindikator** på en annan flik.
3.11 När importen är klar visas ett meddelande med resultatet.
3.12 När data har migrerats kan användaren gå till modulen **Fält** för att visa data, eller klicka på länken **Gå till fältet** .
3.13 Användaren kan se migrerade data i modulen **Fält** .
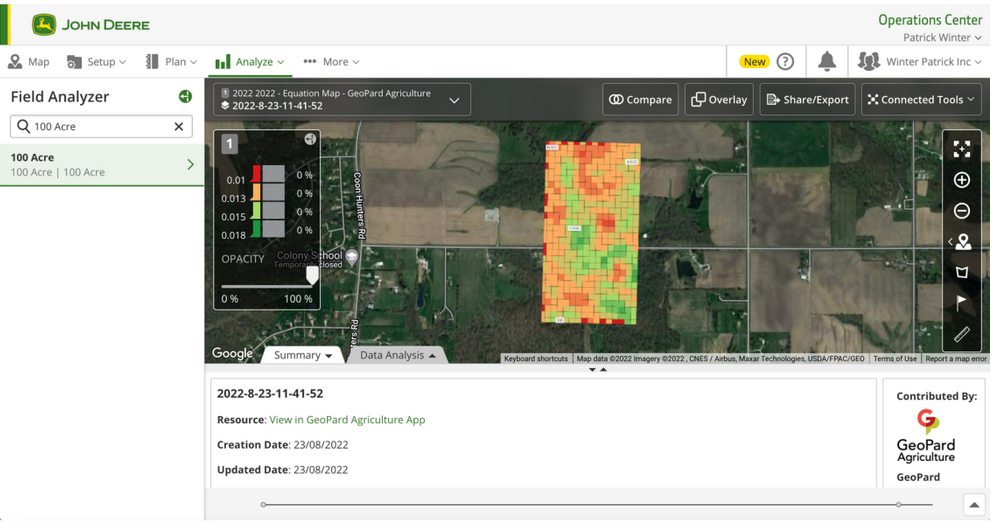
3.14 Leta efter synkroniserade data från GeoPard-fältet i John Deere-fältet. Endast det importerade GeoPard-fältet är kopplat till John Deere-fältet. Nya fälttillgångar i GeoPard (zonkartor, topografikartor och ekvationskartor) skickas automatiskt till John Deere Operations Center när de har skapats. Öppna Field Analyzer i John Deere Operations Center ([https://field-analyzer.deere.com](https://field-analyzer.deere.com/)) för att visa dem.
---
# Agent Instructions
This documentation is published with GitBook. GitBook is the documentation platform designed so that both humans and AI agents can read, navigate, and reason over technical content effectively. Learn more at gitbook.com.
## Querying This Documentation
If you need additional information that is not directly available in this page, you can query the documentation by asking a question.
Perform an HTTP GET request on the following URL with the `ask` and `goal` query parameters:
```
GET https://docs.geopard.tech/geopard-tutorials/swe/produktvandring-webbapp/john-deere-operations-center-integration/4.-import-into-geopard-from-john-deere-operations-center.md?ask=&goal=
```
`ask` is the immediate question: it should be specific, self-contained, and written in natural language.
`goal` is what the user is ultimately trying to achieve, the reason they need the answer. Sharing it helps GitBook give you a better, more relevant answer. A goal is most helpful when it describes the outcome the user wants rather than restating the question. For example, with `ask=how do I create an API token`, a goal like `automate deployments from our CI pipeline` lets GitBook tailor the answer to that use case.
The response will contain a direct answer to the question and relevant excerpts and sources from the documentation.
Use this mechanism when the answer is not explicitly present in the current page, you need clarification or additional context, or you want to retrieve related documentation sections.