> For the complete documentation index, see [llms.txt](https://docs.geopard.tech/geopard-tutorials/llms.txt). Markdown versions of documentation pages are available by appending `.md` to page URLs; this page is available as [Markdown](https://docs.geopard.tech/geopard-tutorials/ro/ponturi-rapide-gis/qgis-yield-data-manipulations.md).
# QGIS: Manipularea datelor de producție
Pregătește și curăță datele de producție în QGIS înainte de a le importa sau analiza în GeoPard.
PREZENTARE GENERALĂ
Ghid cu instrucțiuni pas cu pas pentru rezolvarea următoarelor probleme legate de datele de la monitorul de producție:
1. Lipsește fișierul de proiecție (.prj) din shapefile
2. Aplicarea regulilor de conversie pentru fiecare atribut din shapefile (pe baza exemplului de conversie din kg/ha în bu/ac)
Software-ul utilizat este QGIS ([LINK](https://qgis.org/en/site/forusers/download.html)).
Descărcarea și instalarea sunt obligatorii.
### FIȘIERUL DE PROIECȚIE LIPSEȘTE
1. Deschideți shapefile-ul cu datele de producție. Trageți fișierul în fereastra QGIS.
2. Shapefile-ul devine disponibil pentru modificări ulterioare în panoul Straturi.
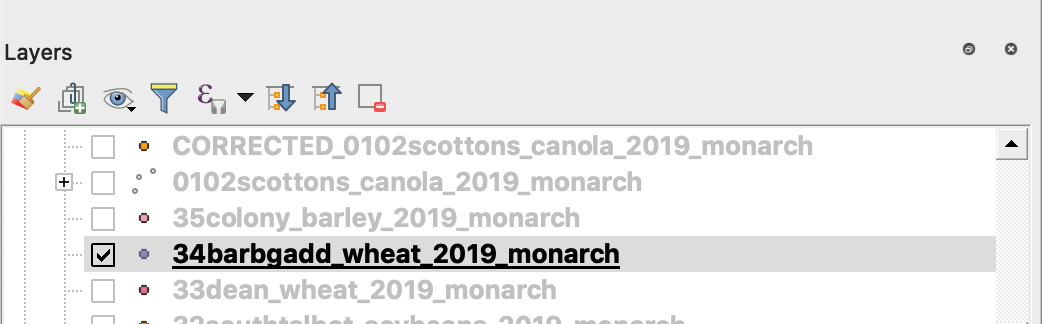
3. Începeți procesul de salvare
4. 1. Faceți clic dreapta pe shapefile
2. Alegeți Export -> Save Feature As ...
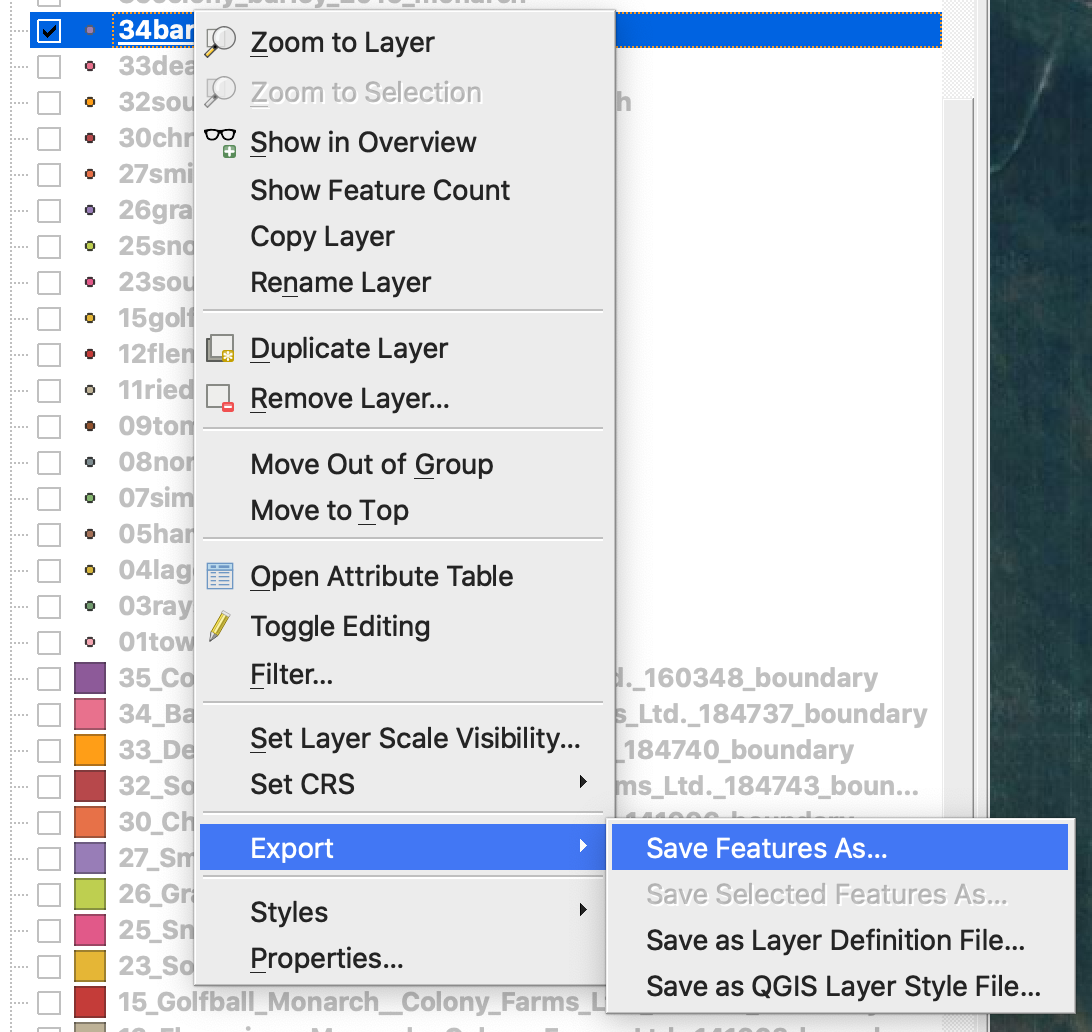
4. Alegeți
5. 1. Format -> ESRI Shapefile,
2. Filename -> faceți clic pe … și selectați directorul și numele de fișier dorite,
3. CRS -> EPSG:4326
4. Encoding -> UTF8
5. Add saved file to map (opțional, dacă doriți să îl vedeți direct în QGIS)
6. Geometry type -> Point
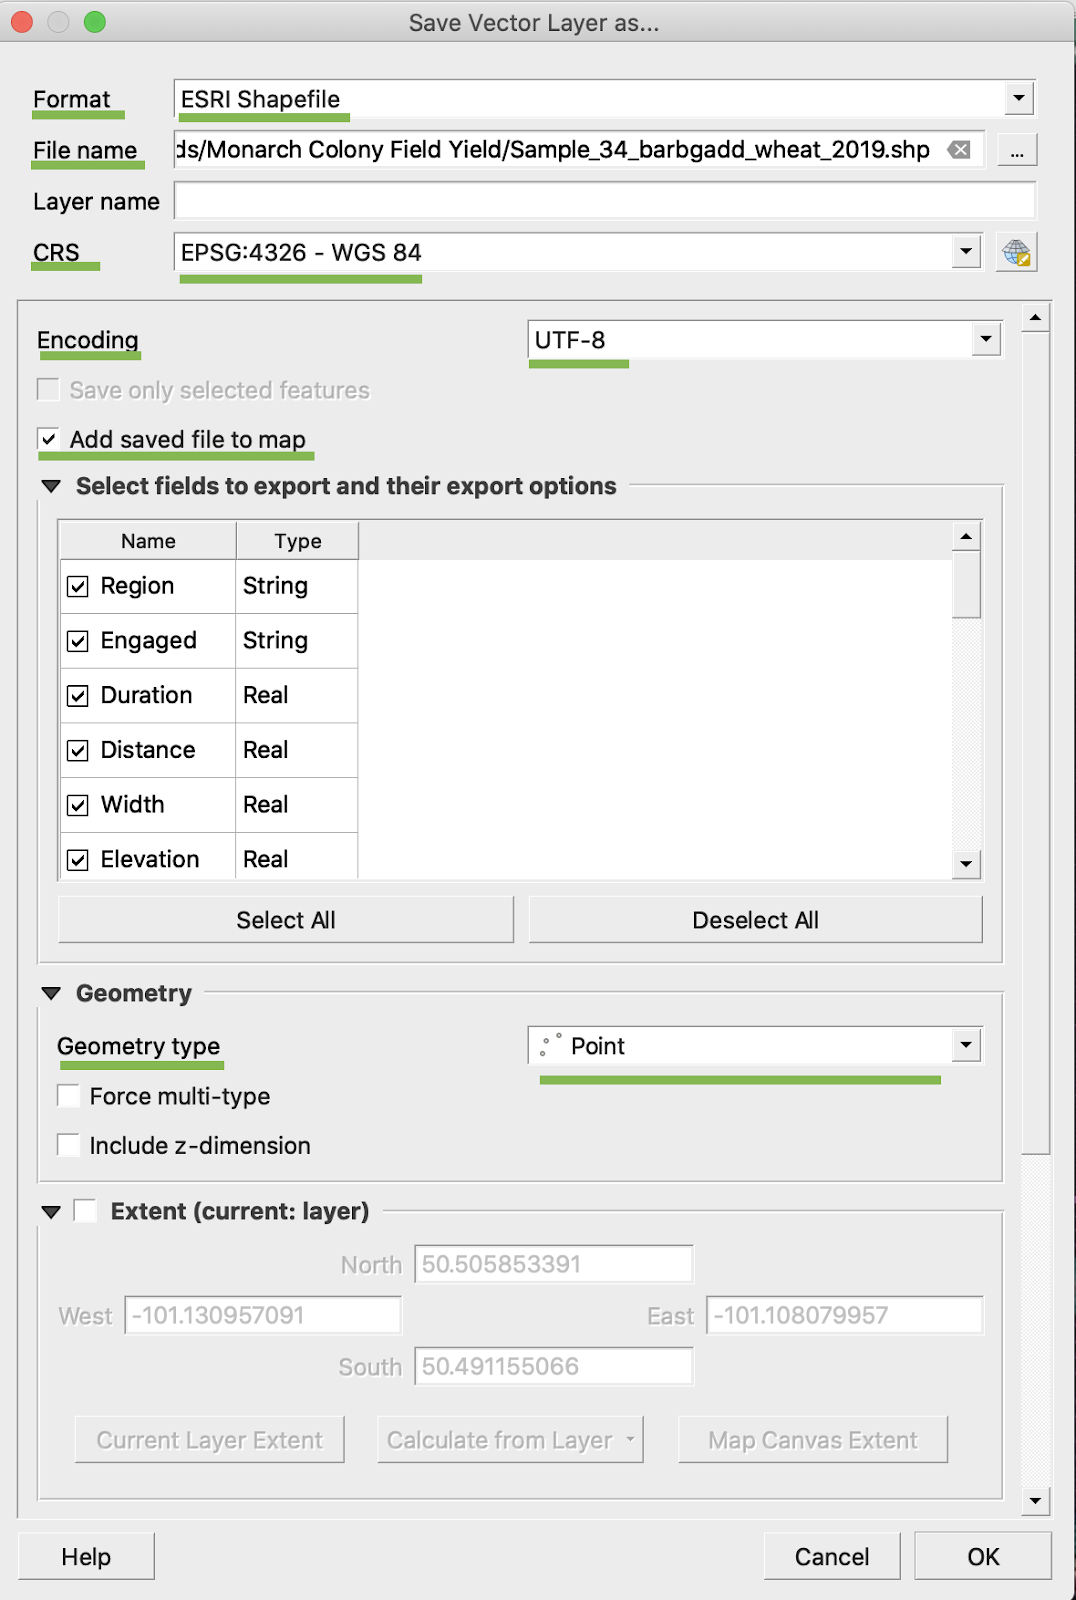
5. Faceți clic pe Ok
6. Se creează un shapefile suplimentar cu aceleași date de producție. A fost adăugat fișierul de proiecție (.prj).
\
### CONVERSIA ÎN BU/AC
1. Faceți clic dreapta pe shapefile și alegeți Open Attribute Table
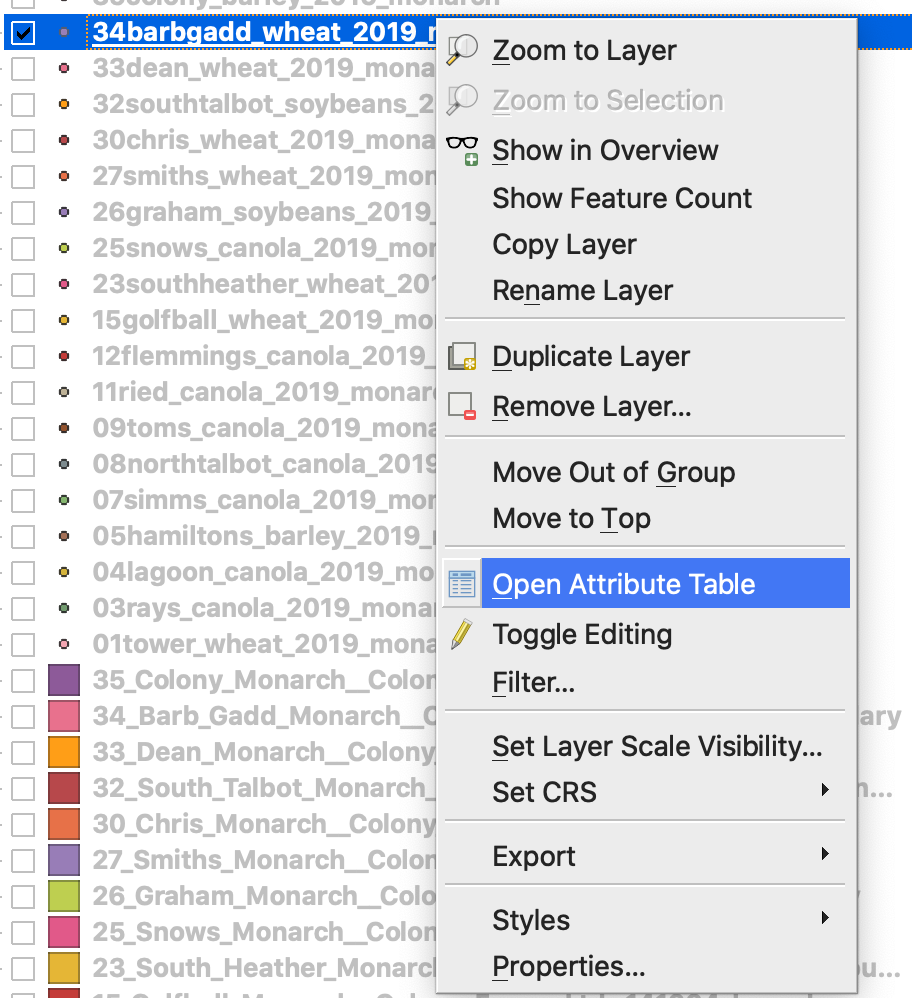
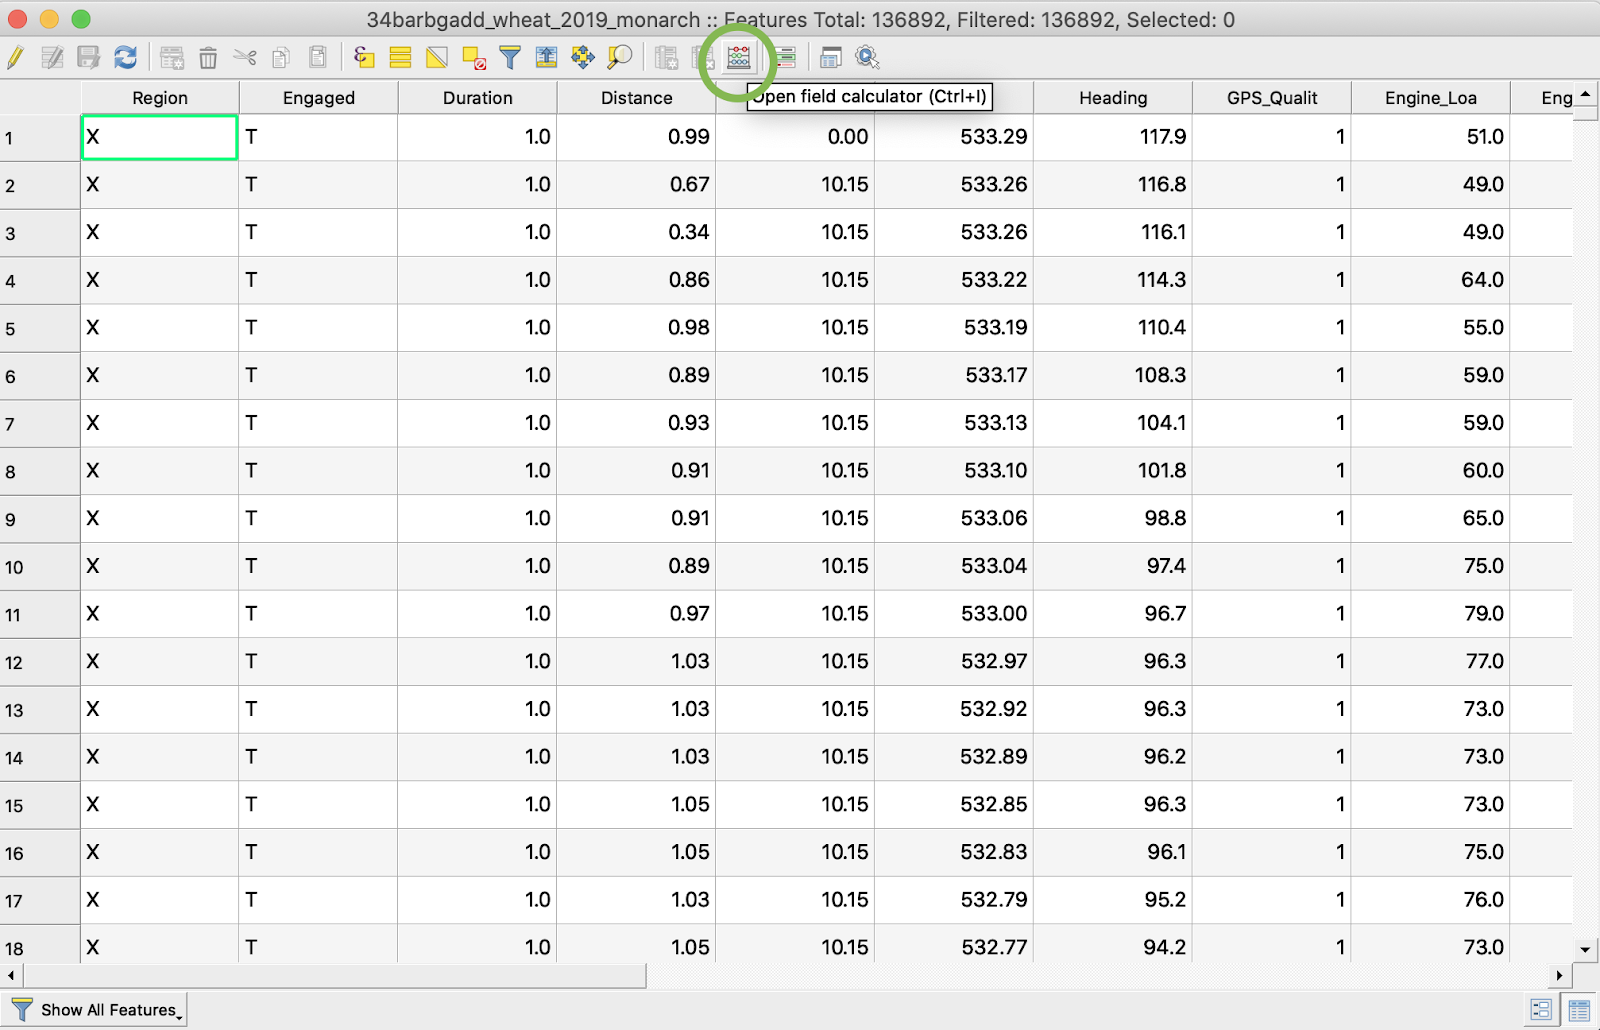
2. Faceți clic pe Open field calculator
3. Creați un câmp nou
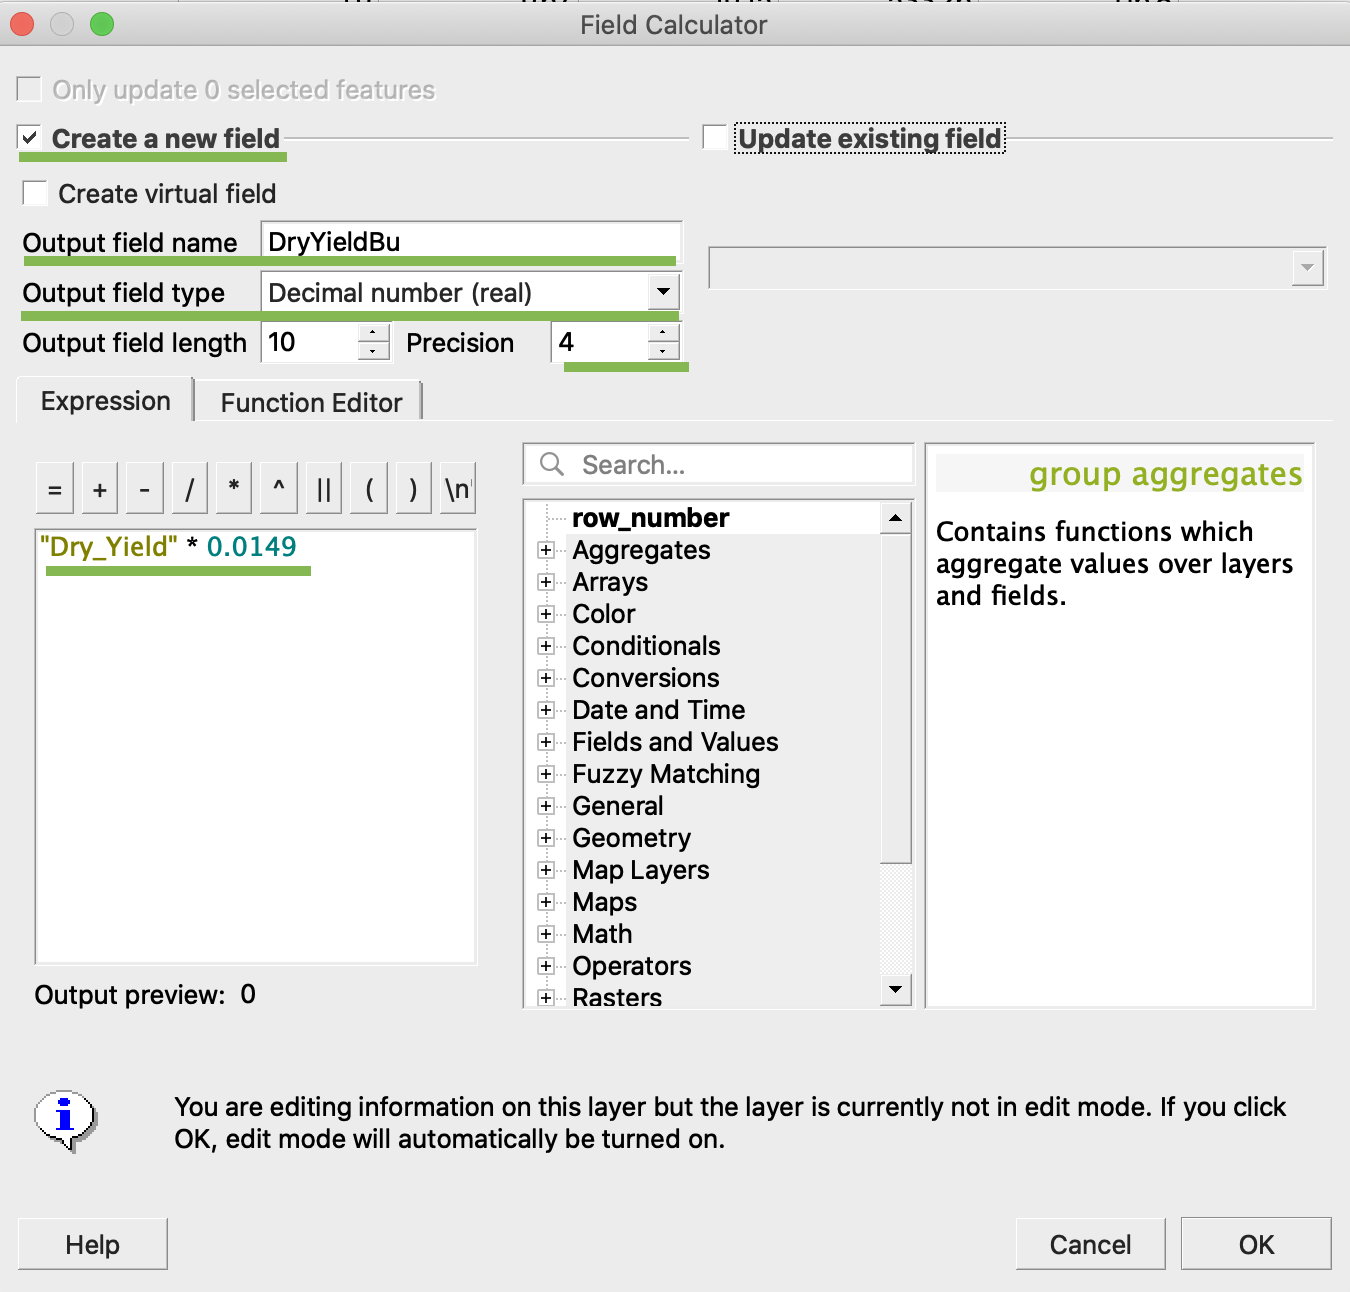
4. 1. Bifați Create a new field
2. Introduceți Output field name -> DryYieldBu
3. Alegeți Output field type -> Decimal number (real)
4. Modificați Precision -> 4
5. Introduceți regula de conversie din kg/ha în bu/ac -> "Dry\_Yield" \* 0.0149
4. Faceți clic pe Ok
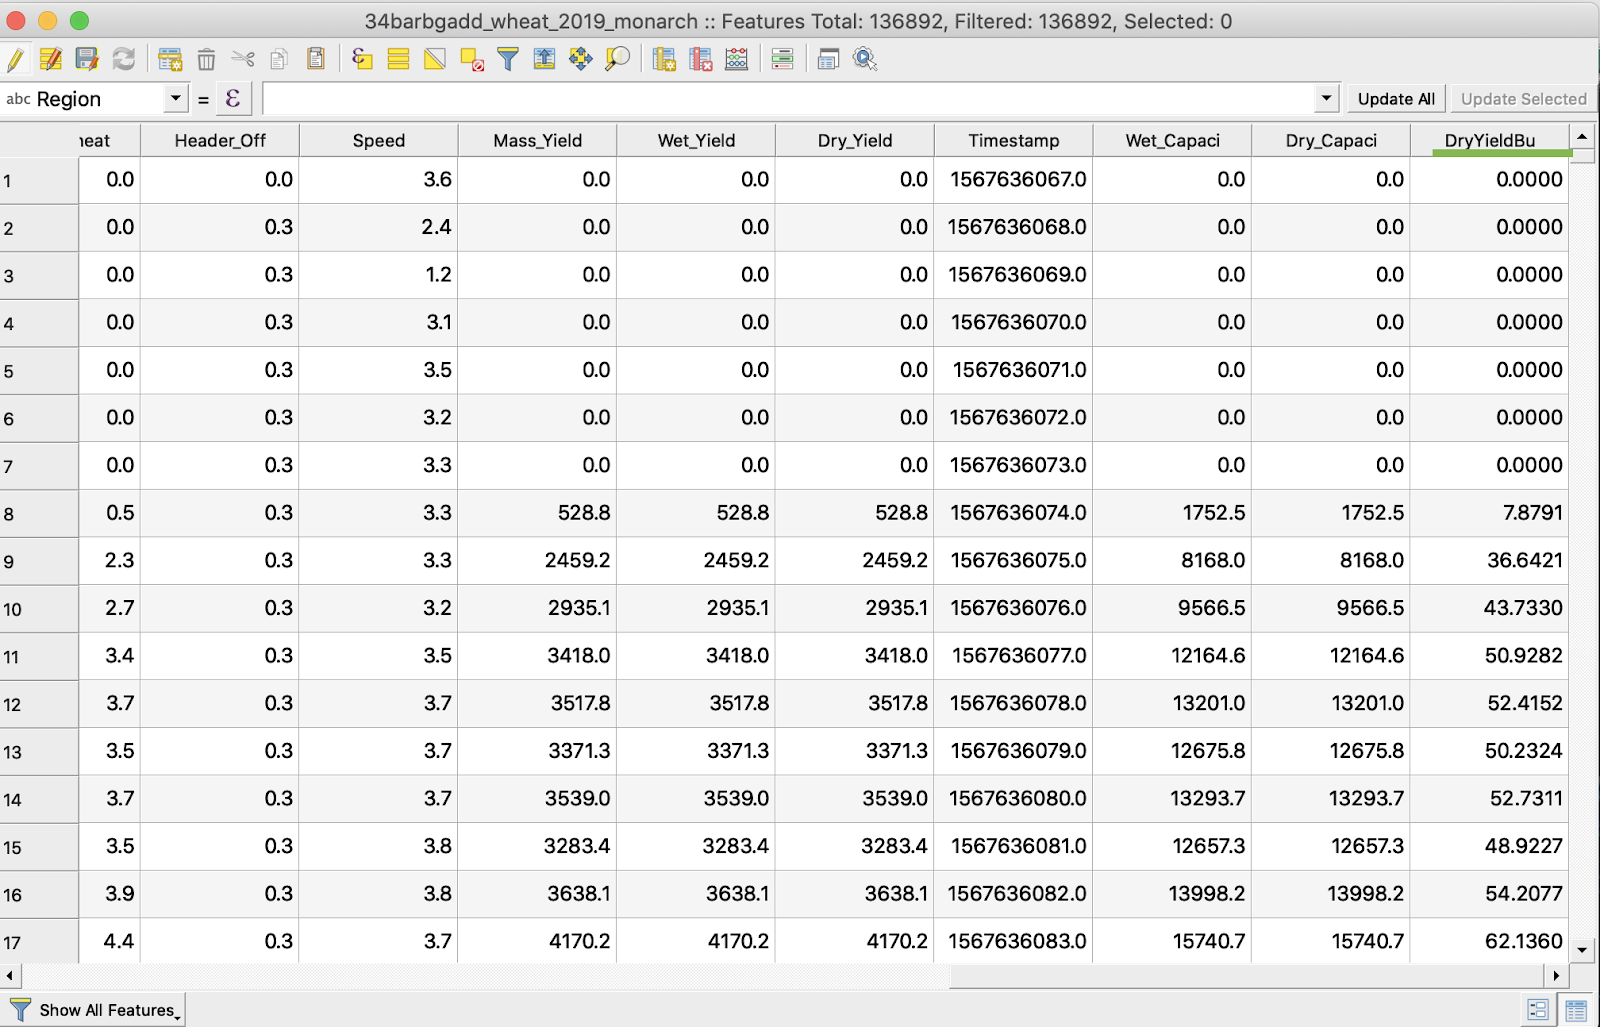
5. În tabel a apărut atributul suplimentar DryYieldBu
6. Salvați modificările
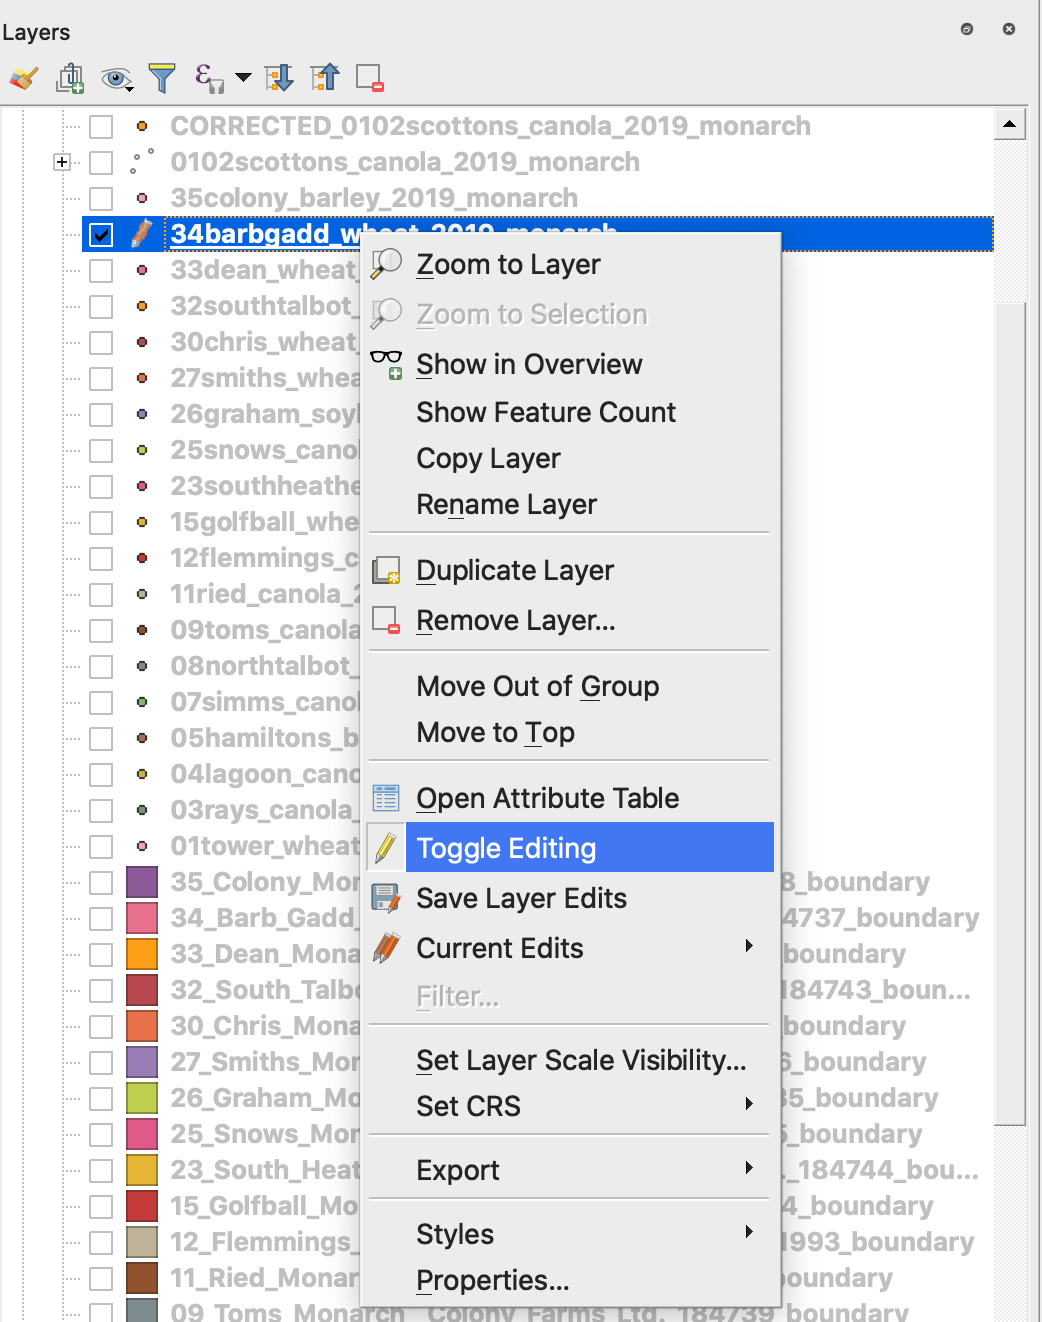
7. 1. Faceți clic dreapta pe shapefile-ul dorit
2. Alegeți Toggle Editing
\
\
\
7. Confirmați salvarea modificărilor
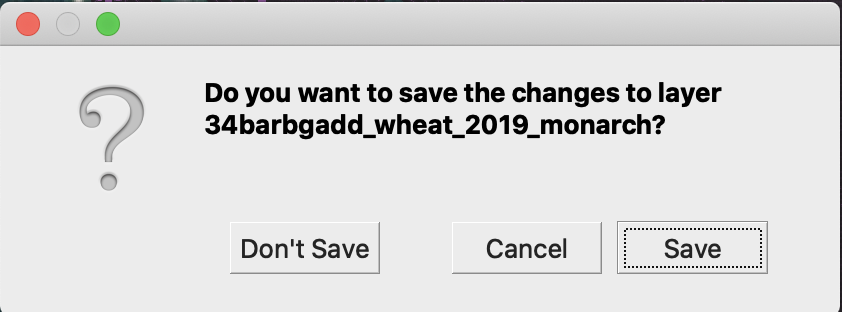
Shapefile-ul dorit nu mai este marcat cu pictograma creion. Datele din shapefile au fost actualizate.
---
# Agent Instructions
This documentation is published with GitBook. GitBook is the documentation platform designed so that both humans and AI agents can read, navigate, and reason over technical content effectively. Learn more at gitbook.com.
## Querying This Documentation
If you need additional information that is not directly available in this page, you can query the documentation by asking a question.
Perform an HTTP GET request on the following URL with the `ask` and `goal` query parameters:
```
GET https://docs.geopard.tech/geopard-tutorials/ro/ponturi-rapide-gis/qgis-yield-data-manipulations.md?ask=&goal=
```
`ask` is the immediate question: it should be specific, self-contained, and written in natural language.
`goal` is what the user is ultimately trying to achieve, the reason they need the answer. Sharing it helps GitBook give you a better, more relevant answer. A goal is most helpful when it describes the outcome the user wants rather than restating the question. For example, with `ask=how do I create an API token`, a goal like `automate deployments from our CI pipeline` lets GitBook tailor the answer to that use case.
The response will contain a direct answer to the question and relevant excerpts and sources from the documentation.
Use this mechanism when the answer is not explicitly present in the current page, you need clarification or additional context, or you want to retrieve related documentation sections.