> For the complete documentation index, see [llms.txt](https://docs.geopard.tech/geopard-tutorials/llms.txt). Markdown versions of documentation pages are available by appending `.md` to page URLs; this page is available as [Markdown](https://docs.geopard.tech/geopard-tutorials/ro/ponturi-rapide-gis/qgis-convert-csv-to-shp.md).
# QGIS: convertiți un CSV cu puncte în shapefile
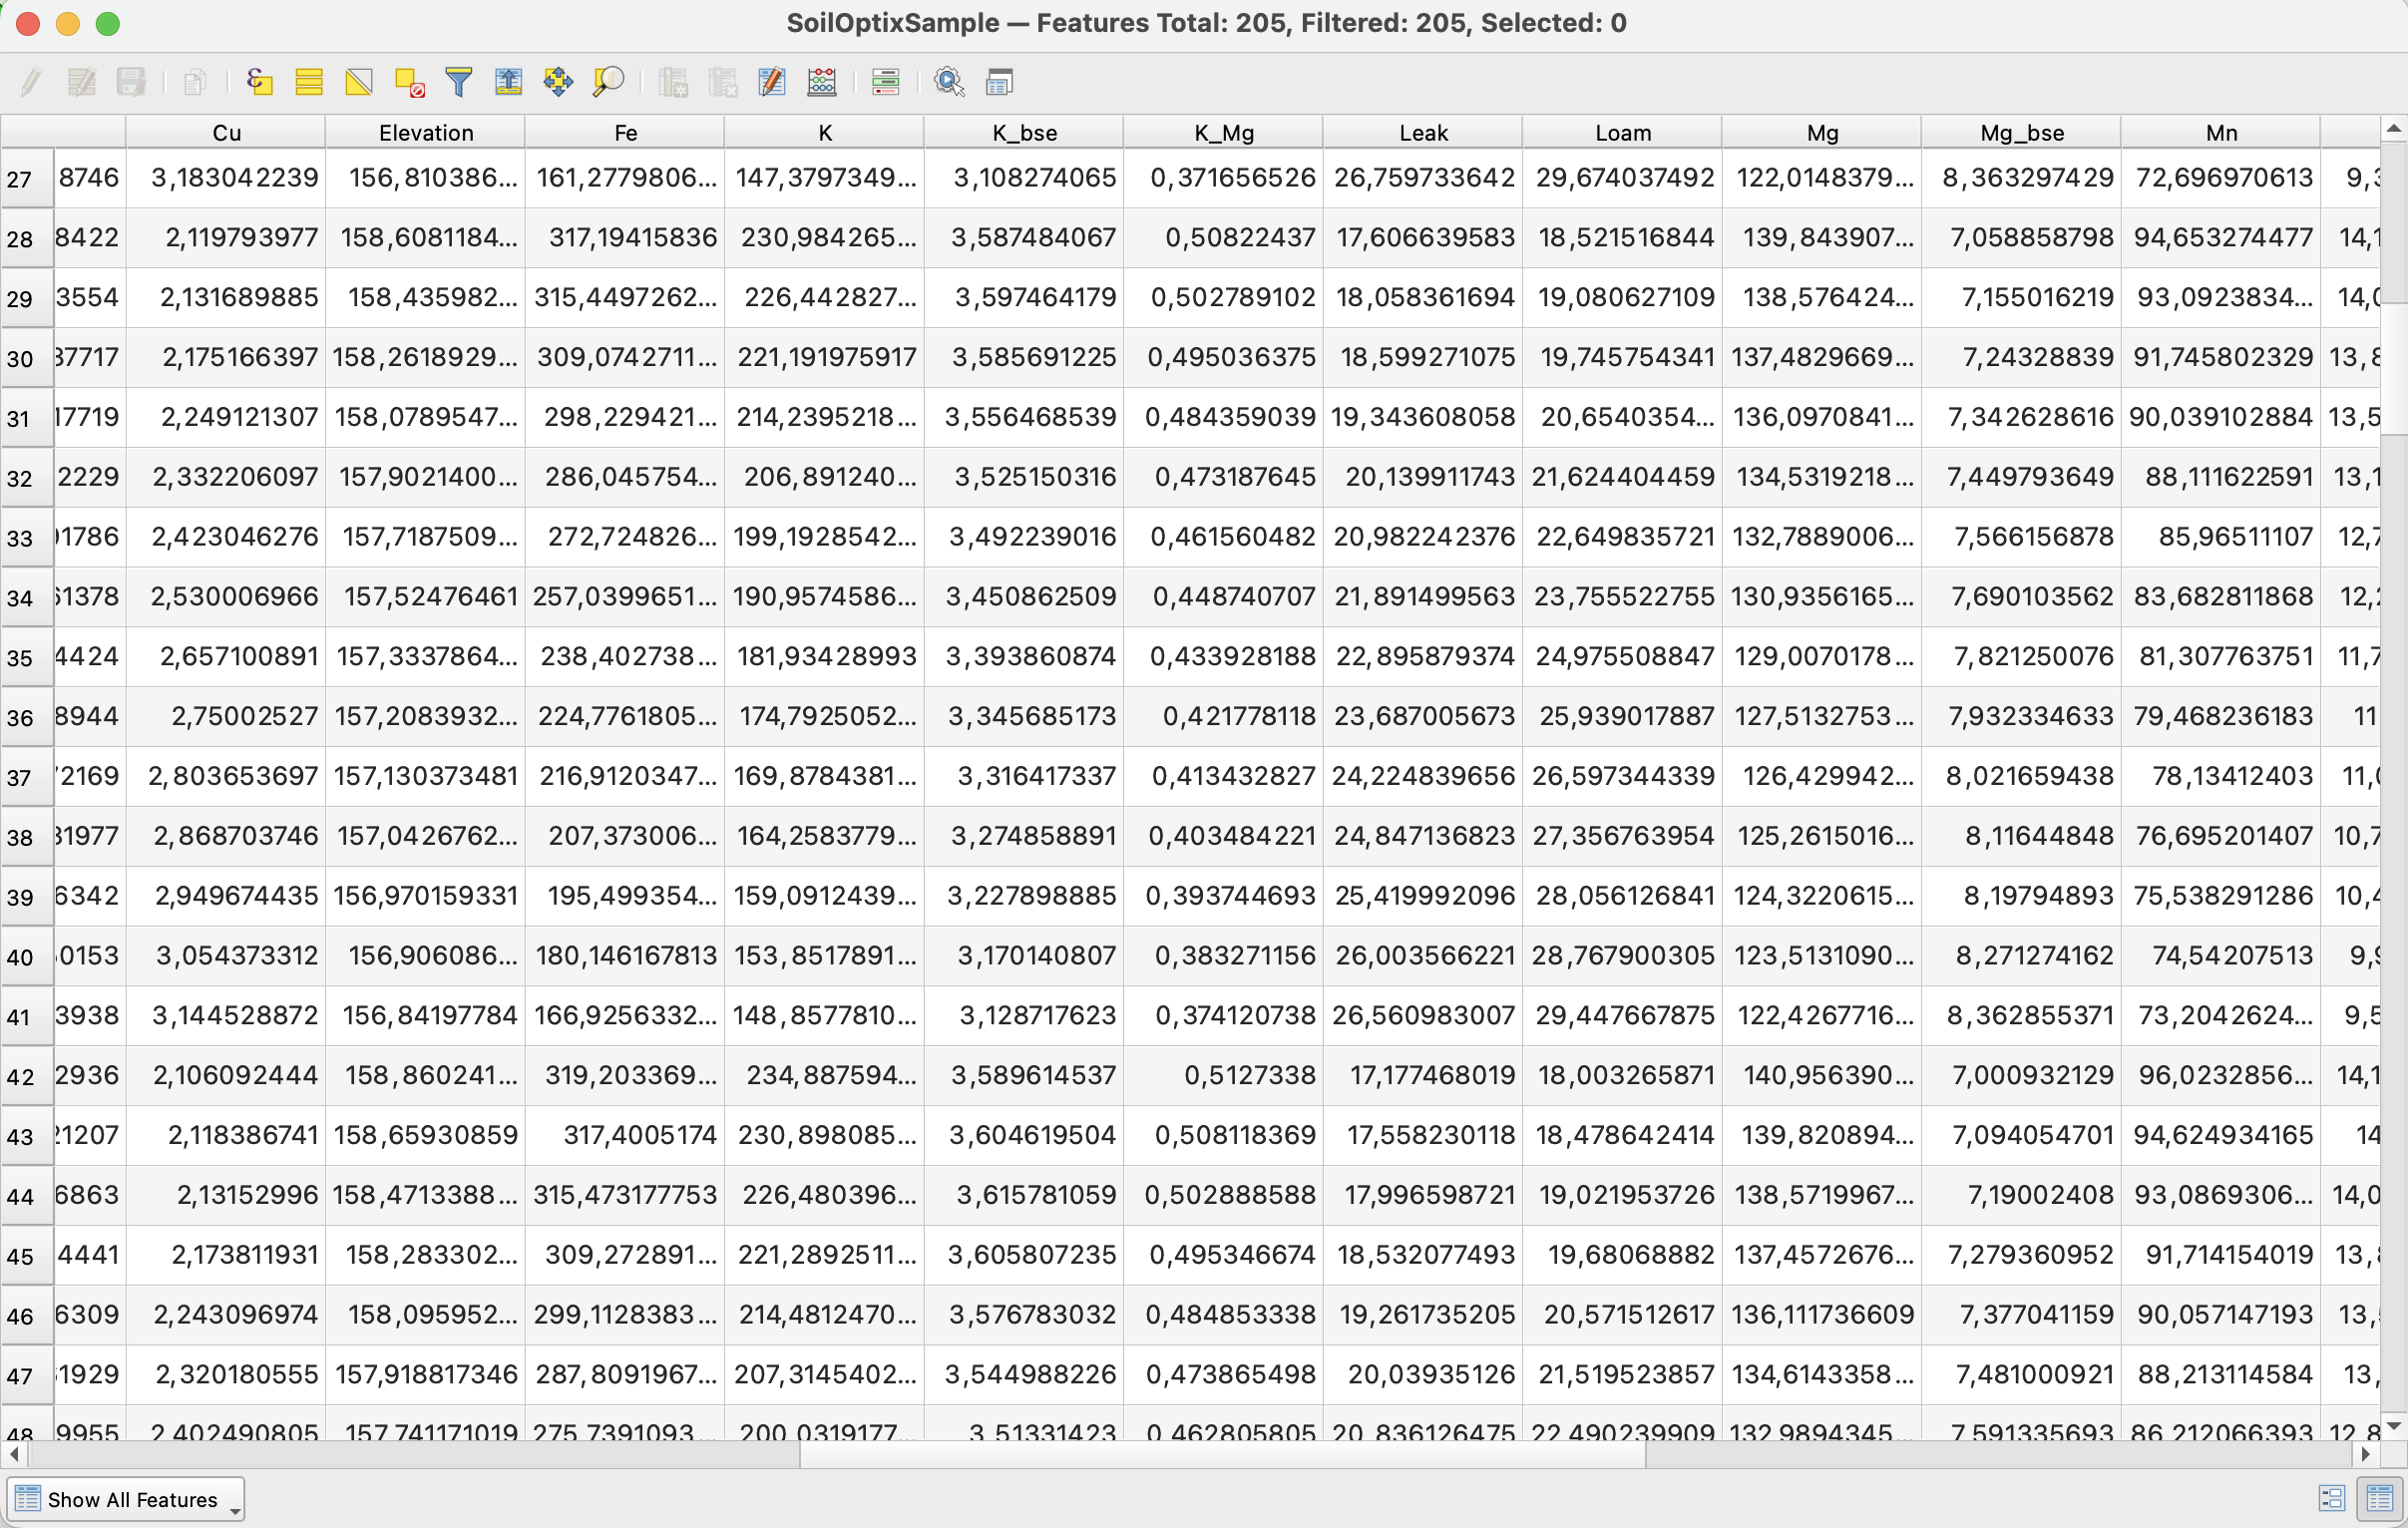
Încărcați în QGIS un CSV cu latitudine și longitudine ca strat de puncte (Add Delimited Text Layer), setați EPSG:4326 și salvați-l ca shapefile pentru import.
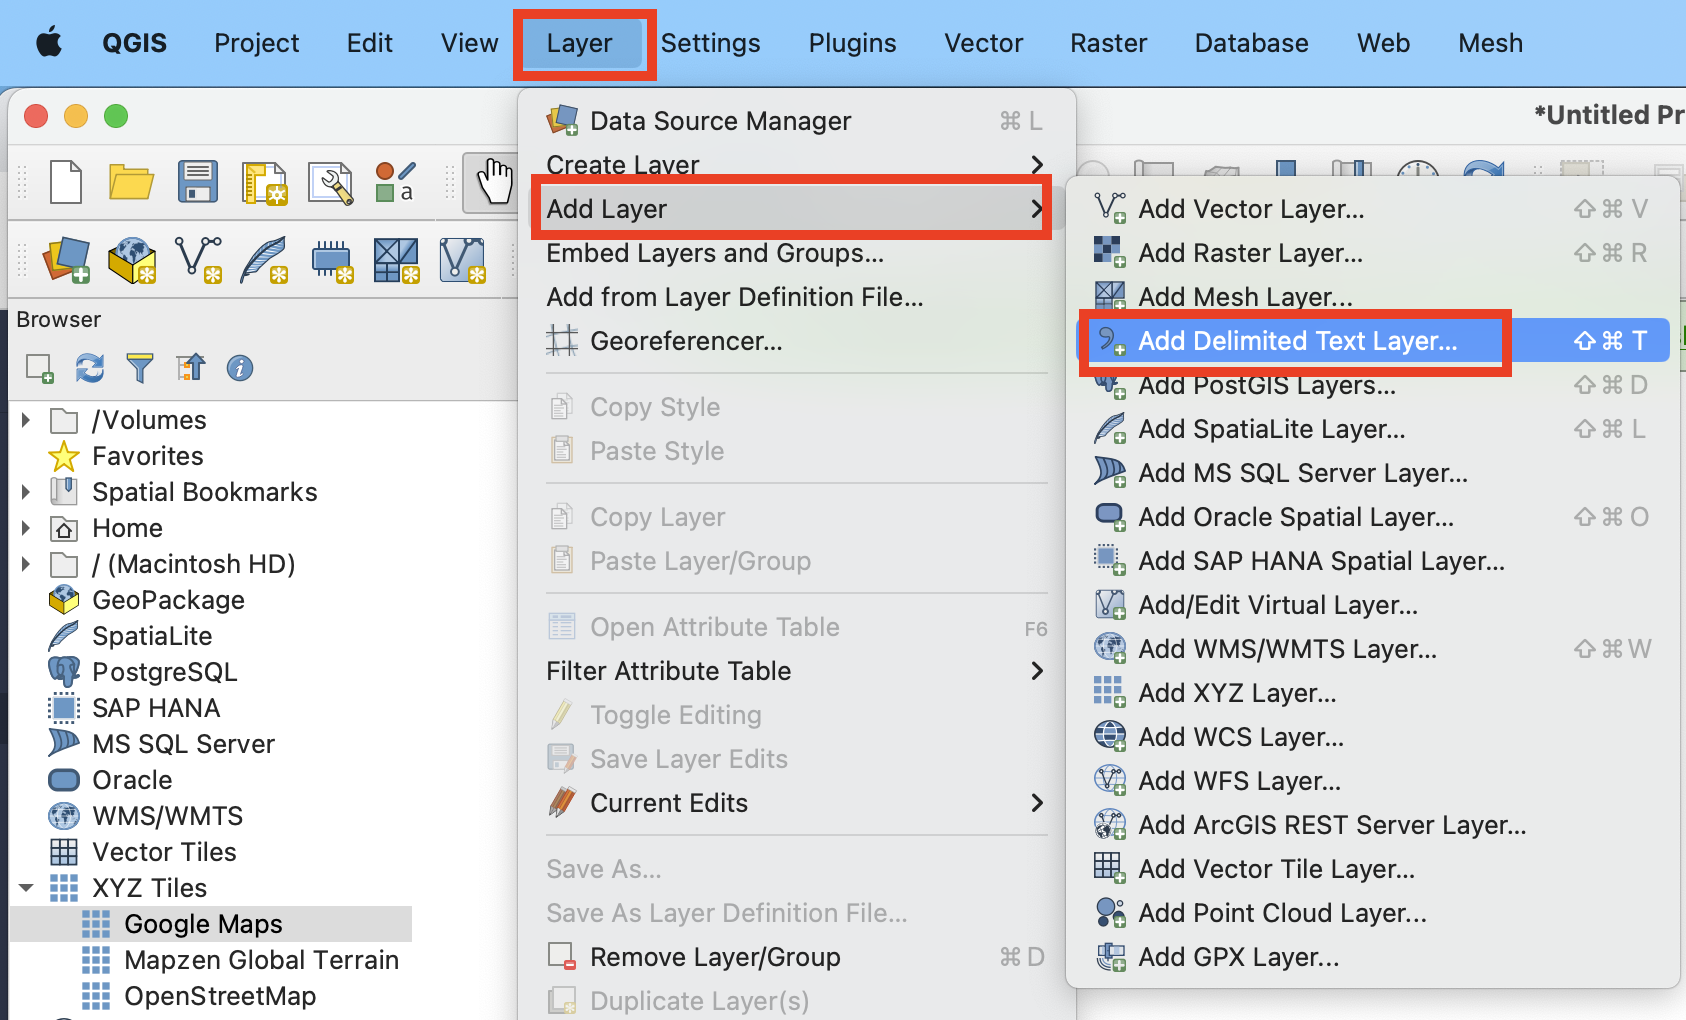
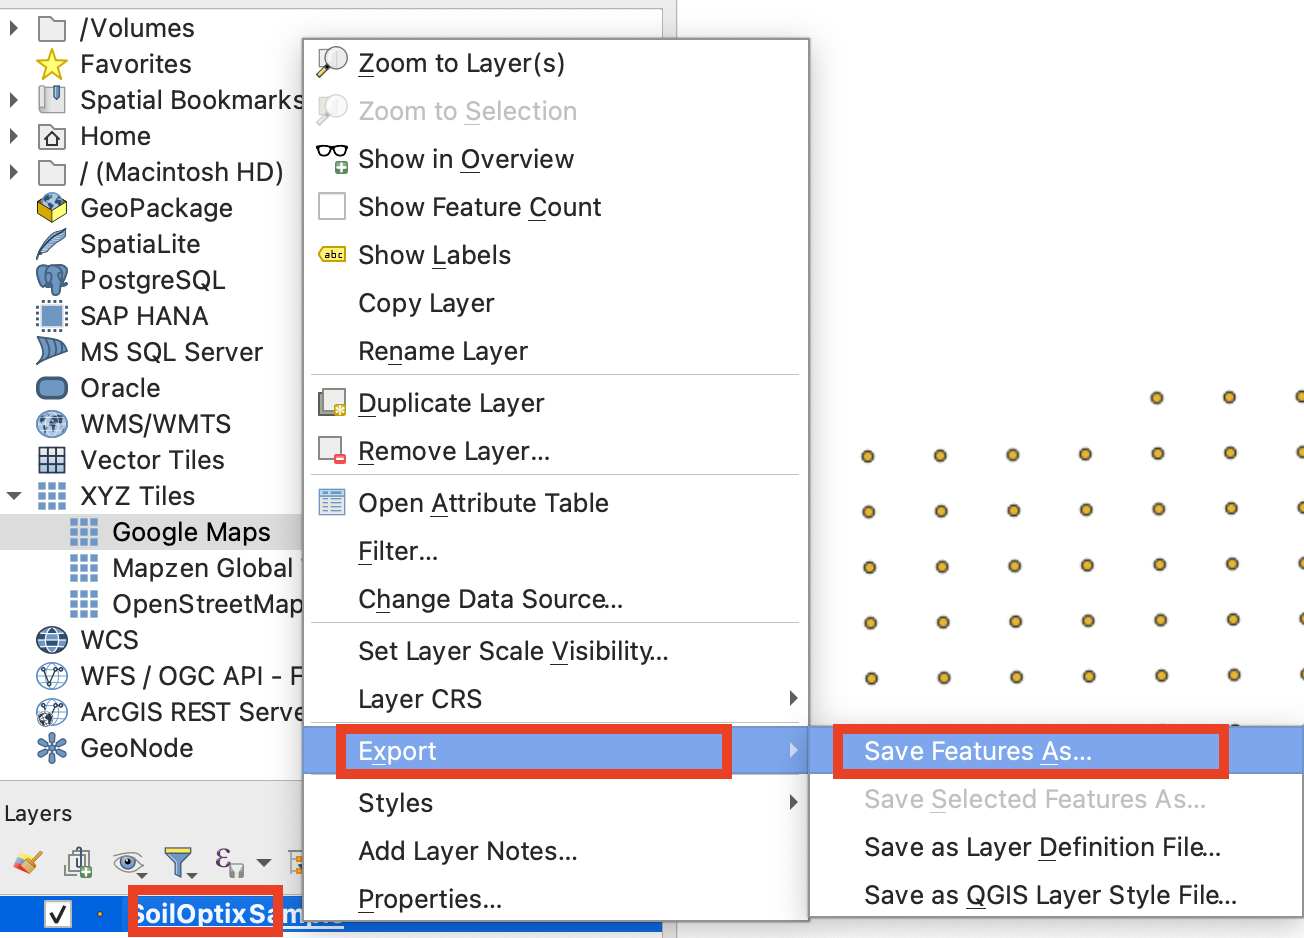
În QGIS, selectați Layer (Strat) > Add Layer (Adăugare strat) > Add Delimited Text Layer (Adăugare strat text delimitat), alegeți fișierul CSV, setați X la coloana cu longitudinea și Y la coloana cu latitudinea, apoi setați CRS la EPSG:4326 (WGS 84). Apoi faceți clic dreapta pe strat și selectați Export (Exportare) > Save Features As (Salvare obiecte spațiale ca) > ESRI Shapefile. Coloanele cu numere stocate ca text au nevoie de [un pas în plus](https://docs.geopard.tech/geopard-tutorials/ro/ponturi-rapide-gis/qgis-change-string-to-number-values-in-the-shapefile.md).
{% hint style="success" %}
Omiteți conversia: GeoPard importă direct fișierele CSV și Excel cu analize de sol. [Începeți gratuit](https://app.geopard.tech/auth/sign-up?utm_source=docs\&utm_medium=cta\&utm_campaign=qgis-convert-csv-to-shp)
{% endhint %}
Acest tutorial vă ajută să convertiți un fișier CSV în SHP (shapefile). Mai jos găsiți pașii pentru a face acest lucru folosind [QGIS](https://www.qgis.org/en/site/) — un software pentru desktop.
**IMPORTANT**: Datele în format CSV trebuie să conțină coloanele `longitude` și `latitude` pentru a permite georeferențierea corectă a datelor.
**PASUL 1**: Începeți procesul de import selectând „Strat” >> „Adăugare strat” >> „Adăugare strat text delimitat”.
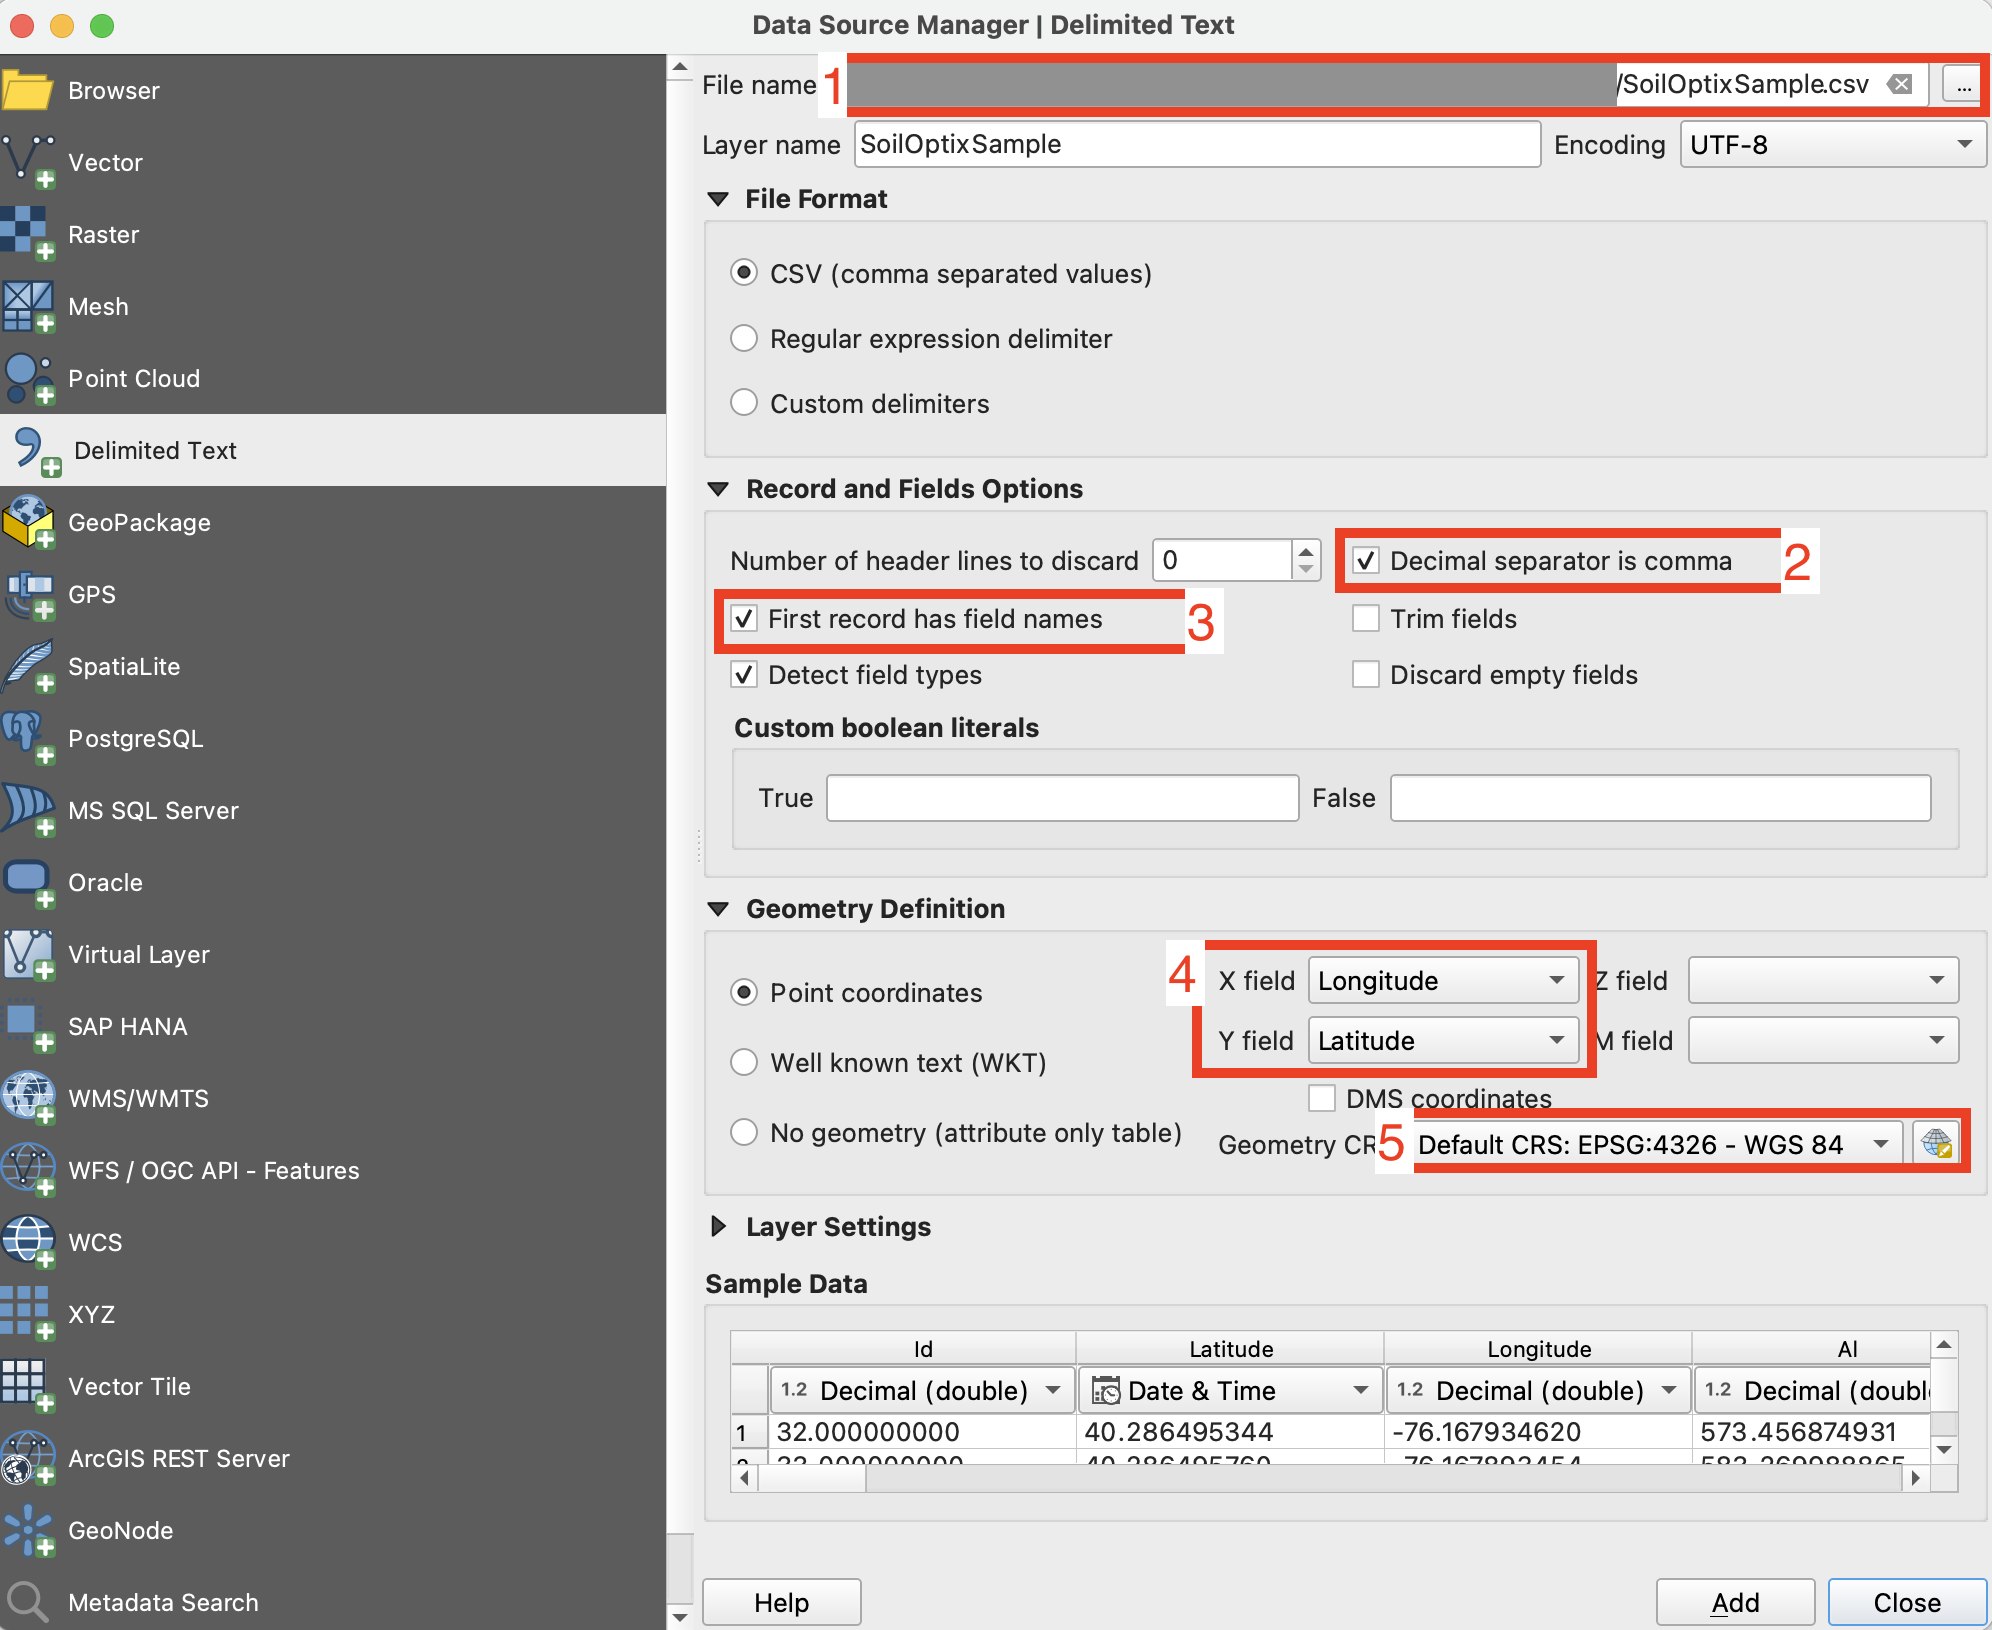
**PASUL 2**: Configurați parametrii de import și faceți clic pe butonul „Adăugare”.
1. Specificați calea către fișierul CSV
2. Verificați separatorul de coloane; acesta trebuie să fie o virgulă.
3. Verificați primul rând. De obicei, acesta conține numele atributelor și trebuie exclus din parsare.
4. Selectați coloanele setului de date care conțin longitudinea (câmpul X) și latitudinea (câmpul Y).
5. Setați sistemul de coordonate. De obicei, se utilizează EPSG:4326.
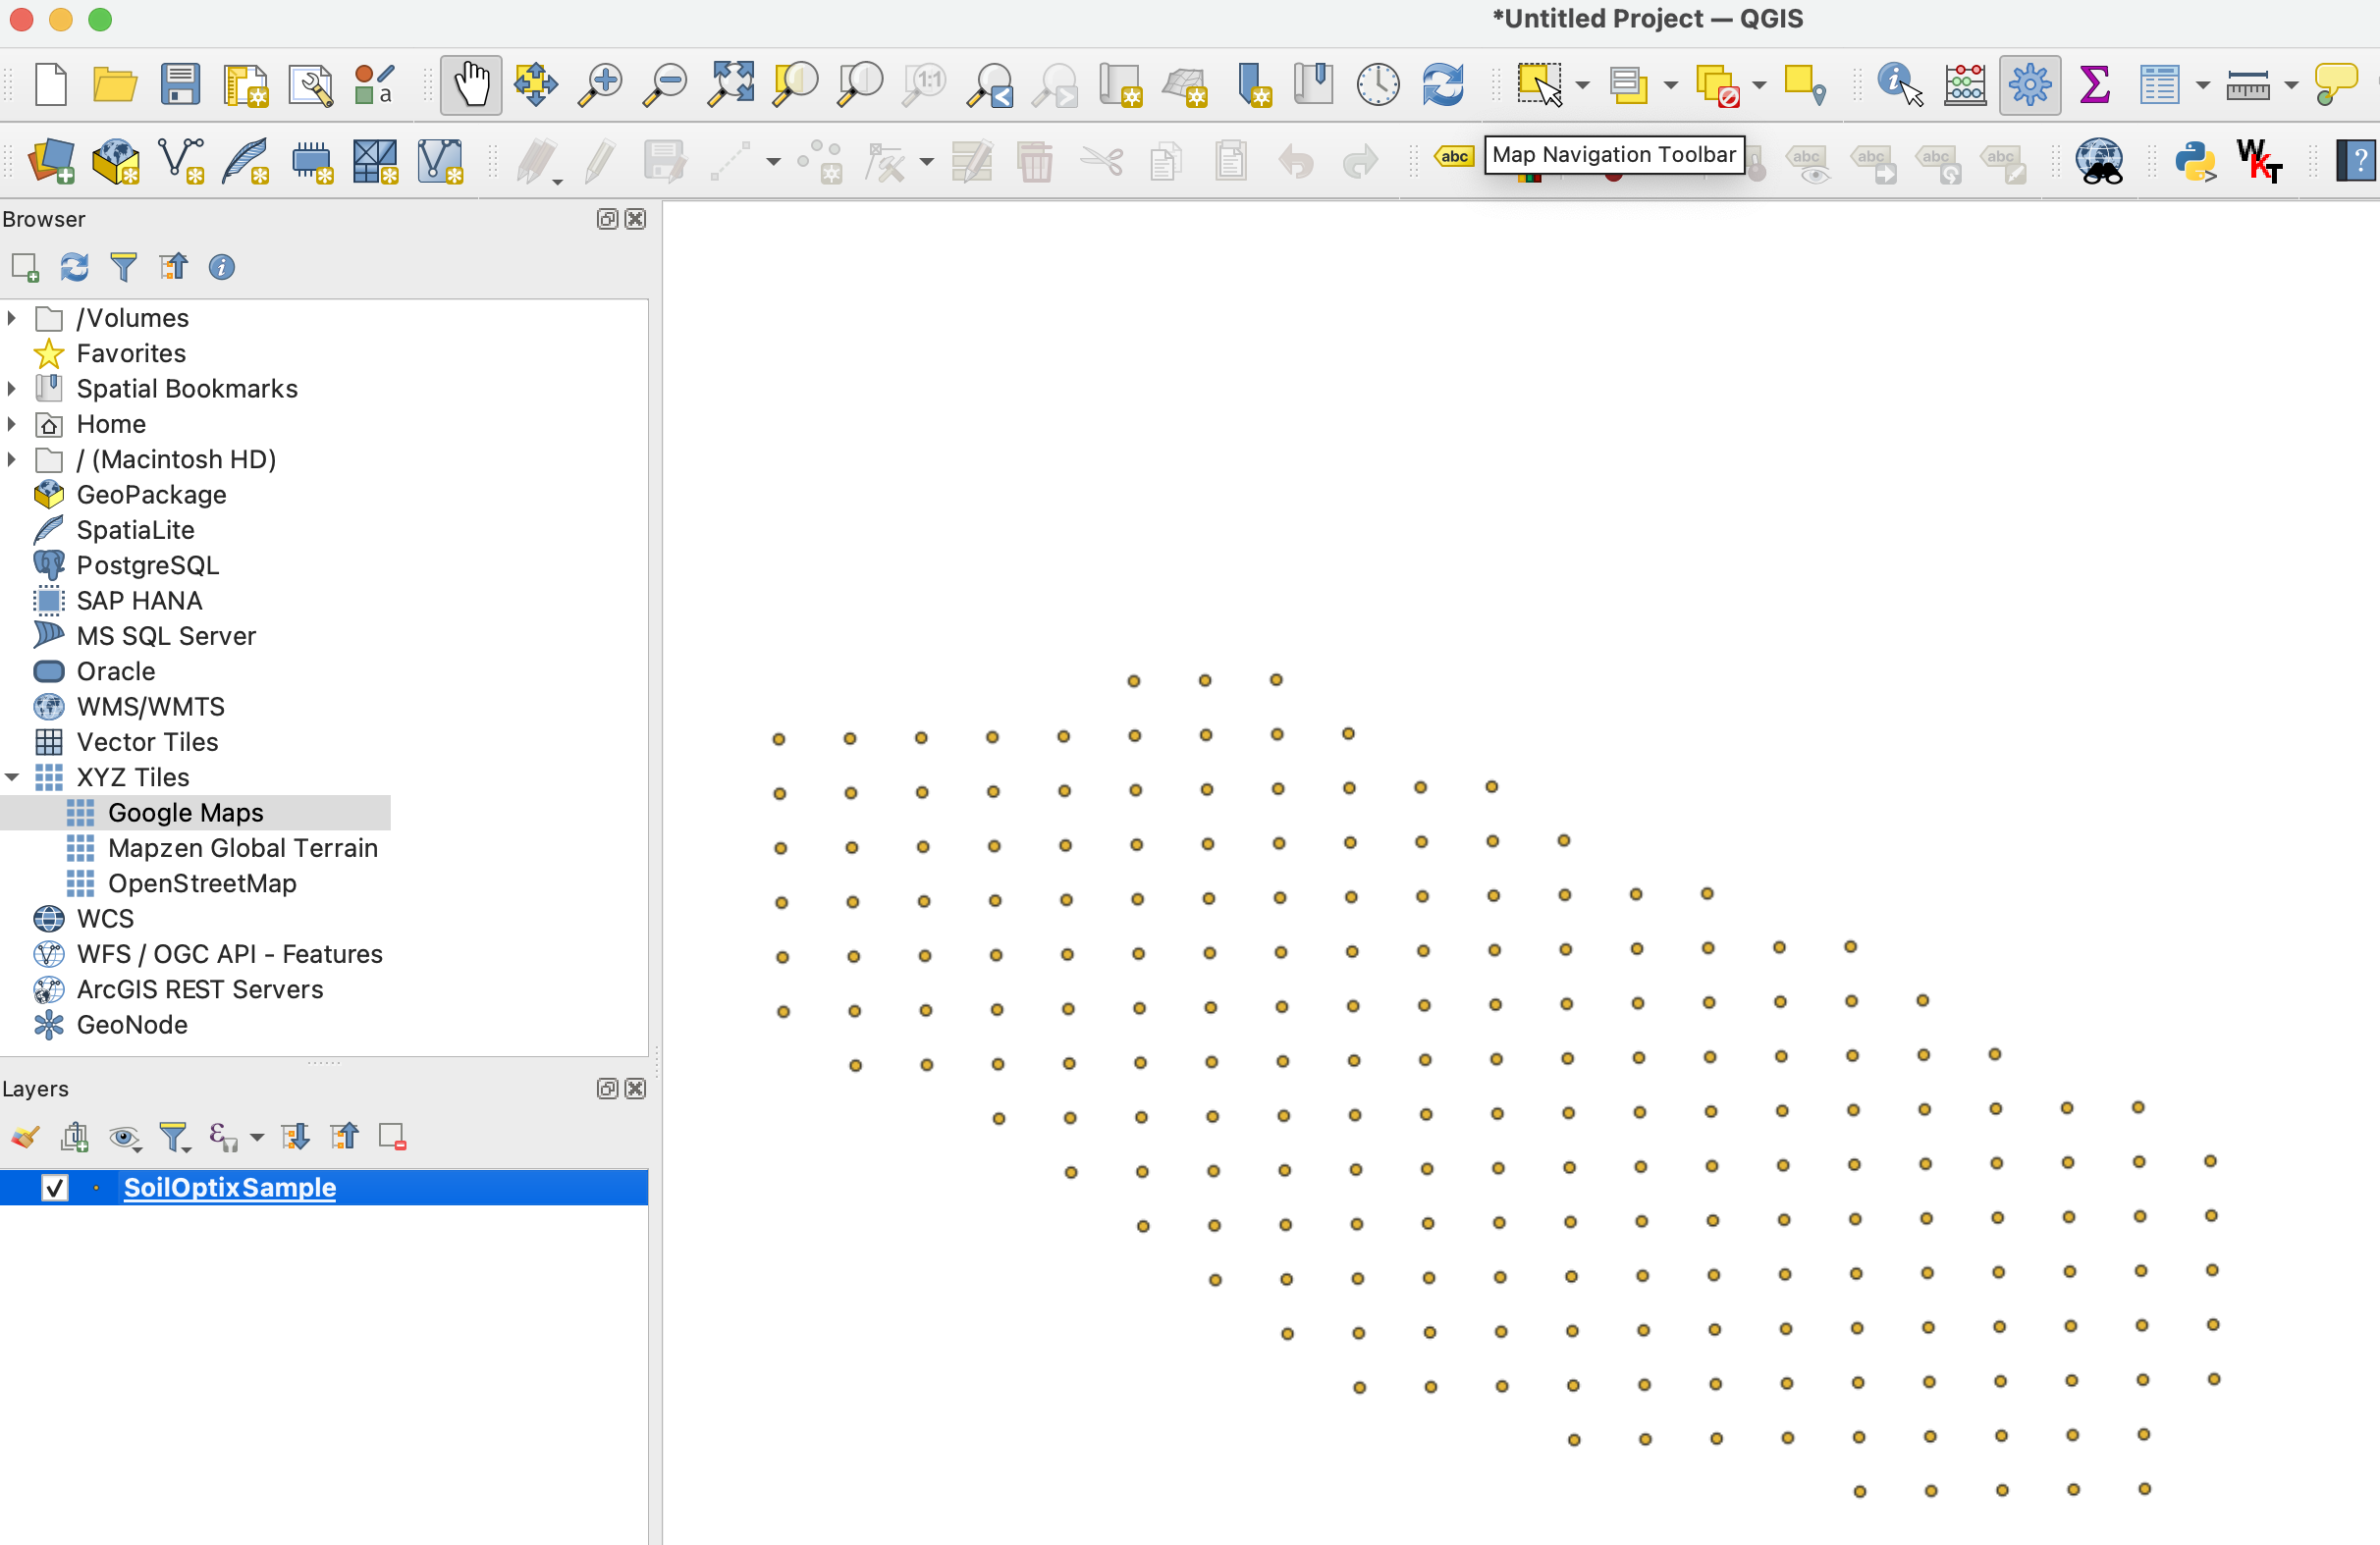
Rezultatul așteptat după **PASUL 2** arată astfel
**PASUL 3**: Porniți procesul de export făcând clic cu butonul drept al mouse-ului pe strat, apoi selectând „Exportare” >> „Salvare obiecte spațiale ca...”
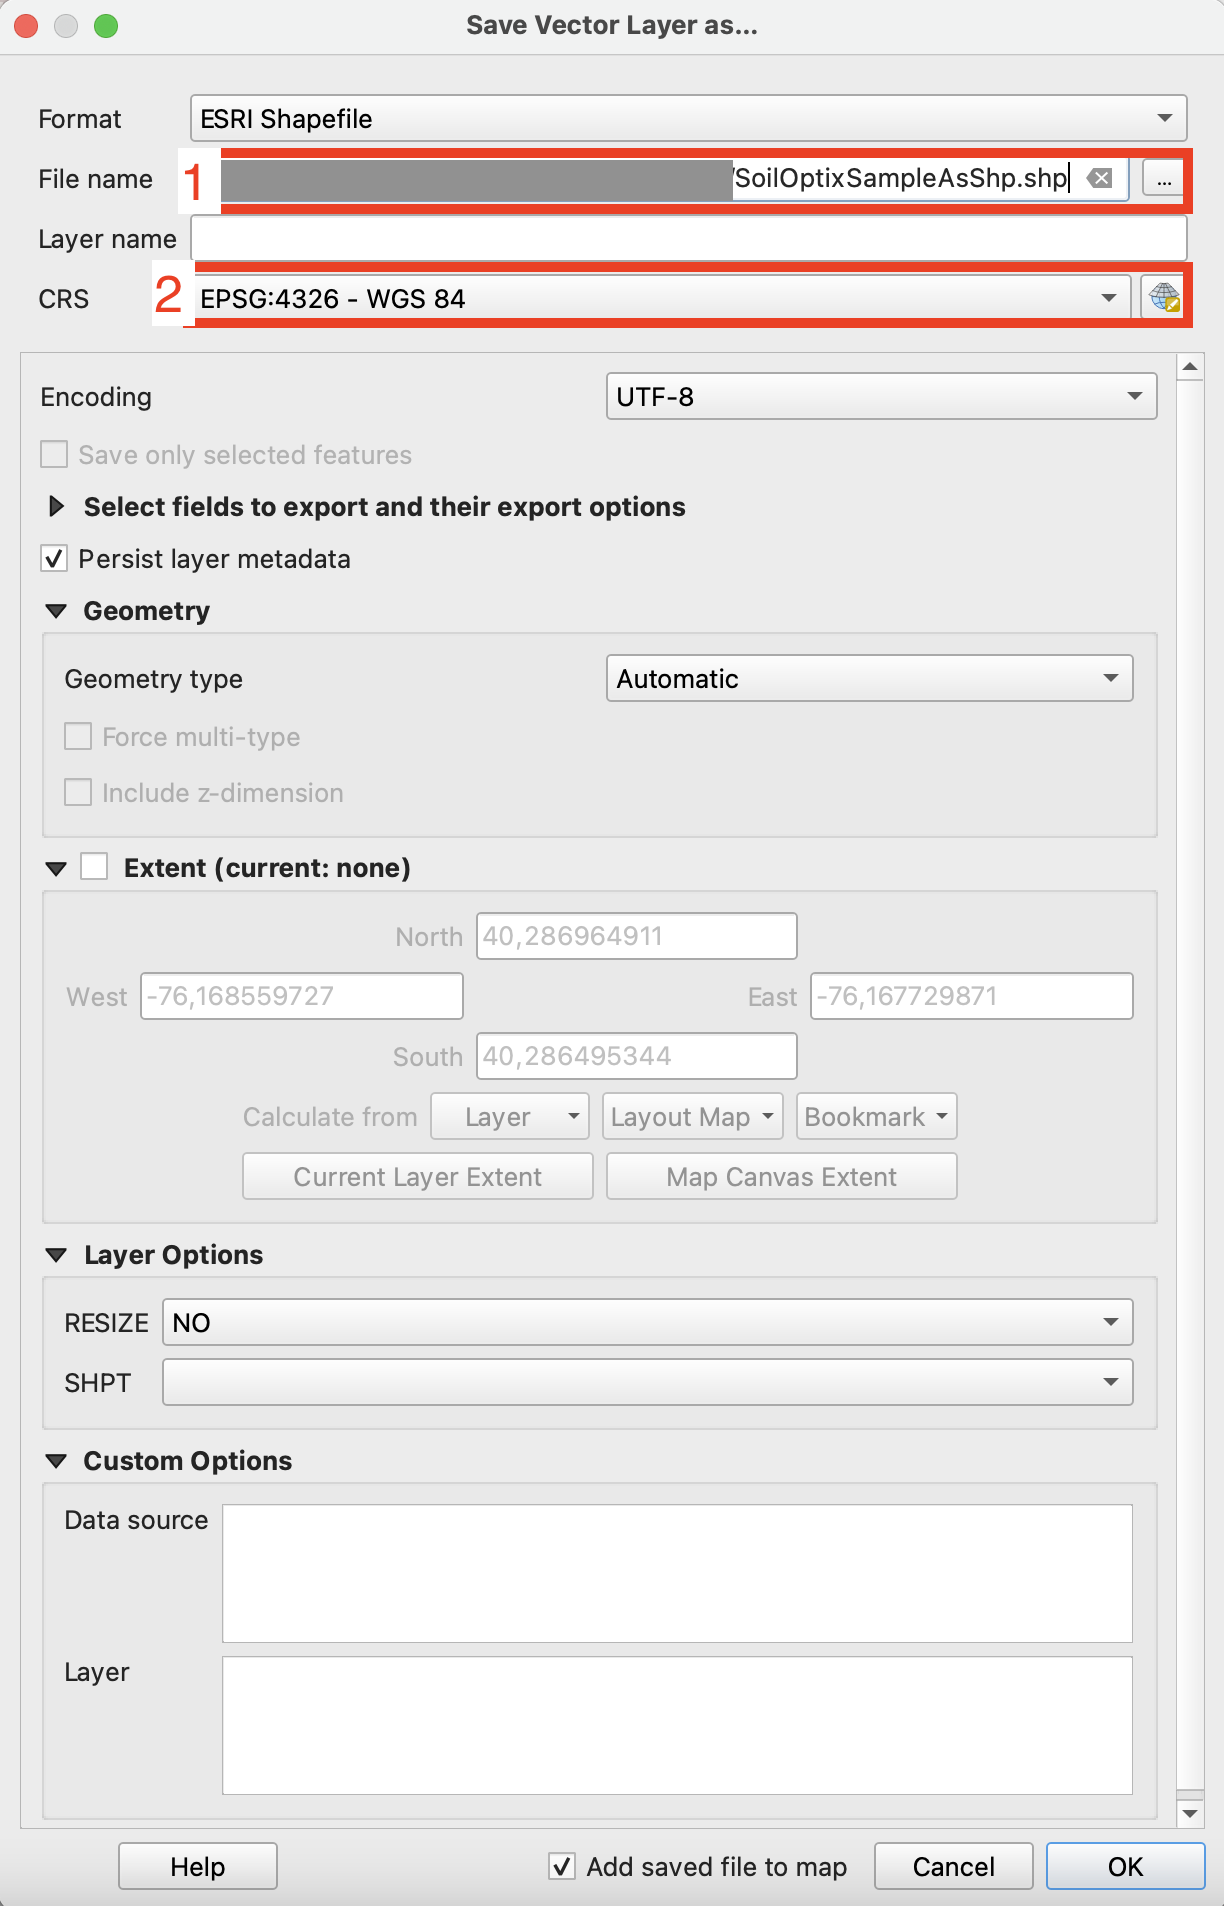
**PASUL 4**: Configurați opțiunile de export corespunzătoare și faceți clic pe „Ok”.
1. Setați calea fișierului shapefile exportat.
2. Setați sistemul de coordonate (CRS) la EPSG:4326, acceptat de GeoPard.
{% hint style="success" %}
Omiteți conversia: GeoPard importă direct fișierele CSV și Excel cu analize de sol. [Începeți gratuit](https://app.geopard.tech/auth/sign-up?utm_source=docs\&utm_medium=cta\&utm_campaign=qgis-convert-csv-to-shp)
{% endhint %}
---
# Agent Instructions
This documentation is published with GitBook. GitBook is the documentation platform designed so that both humans and AI agents can read, navigate, and reason over technical content effectively. Learn more at gitbook.com.
## Querying This Documentation
If you need additional information that is not directly available in this page, you can query the documentation by asking a question.
Perform an HTTP GET request on the following URL with the `ask` and `goal` query parameters:
```
GET https://docs.geopard.tech/geopard-tutorials/ro/ponturi-rapide-gis/qgis-convert-csv-to-shp.md?ask=&goal=
```
`ask` is the immediate question: it should be specific, self-contained, and written in natural language.
`goal` is what the user is ultimately trying to achieve, the reason they need the answer. Sharing it helps GitBook give you a better, more relevant answer. A goal is most helpful when it describes the outcome the user wants rather than restating the question. For example, with `ask=how do I create an API token`, a goal like `automate deployments from our CI pipeline` lets GitBook tailor the answer to that use case.
The response will contain a direct answer to the question and relevant excerpts and sources from the documentation.
Use this mechanism when the answer is not explicitly present in the current page, you need clarification or additional context, or you want to retrieve related documentation sections.