> For the complete documentation index, see [llms.txt](https://docs.geopard.tech/geopard-tutorials/llms.txt). Markdown versions of documentation pages are available by appending `.md` to page URLs; this page is available as [Markdown](https://docs.geopard.tech/geopard-tutorials/nl/snelle-gis-tips/qgis-split-multi-field-shapefiles.md).

# QGIS: één shapefile opsplitsen in afzonderlijke bestanden per perceel

Gebruik Vectorlaag splitsen in QGIS om een shapefile met perceelgrenzen of opbrengstgegevens van een heel bedrijf op te splitsen in één bestand per perceel, genoemd naar het perceelattribuut.

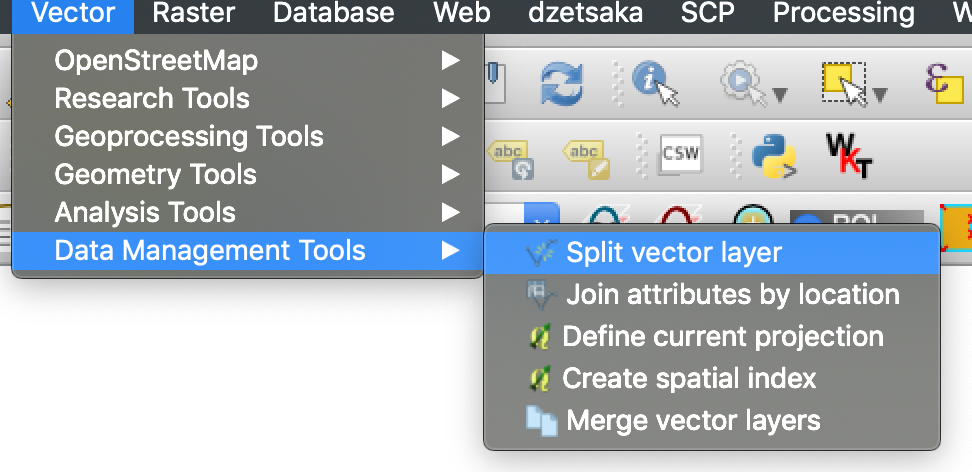
Ga in QGIS naar Vector, Gegevensbeheerhulpmiddelen, Vectorlaag splitsen, kies het veldnaam-attribuut als unieke ID en QGIS schrijft één bestand per veld naar de uitvoermap. Controleer vooraf of elk veld een unieke naam heeft; anders komen twee velden met dezelfde naam in één bestand terecht.

{% hint style="success" %}
Upload de gesplitste perceelsgrenzen en bekijk alle percelen op één kaart: [Gratis starten](https://app.geopard.tech/auth/sign-up?utm_source=docs\&utm_medium=cta\&utm_campaign=qgis-split-multi-field-shapefiles)
{% endhint %}

Als een shapefile meerdere perceelpolygonen bevat, splitst u deze vóór het importeren. GeoPard importeert één perceelsgrens per shapefile. Met deze QGIS-werkwijze bereidt u sneller schone bestanden voor en voorkomt u importproblemen.

### Voordat u begint

* Zorg dat de laag een unieke veldnaam of ID heeft.
* Maak vooraf een lege uitvoermap aan.
* Verwijder `/`, `\`en vergelijkbare speciale tekens uit veldnamen.

### Een shapefile met meerdere percelen splitsen in QGIS

#### 1. Open de shapefile in QGIS

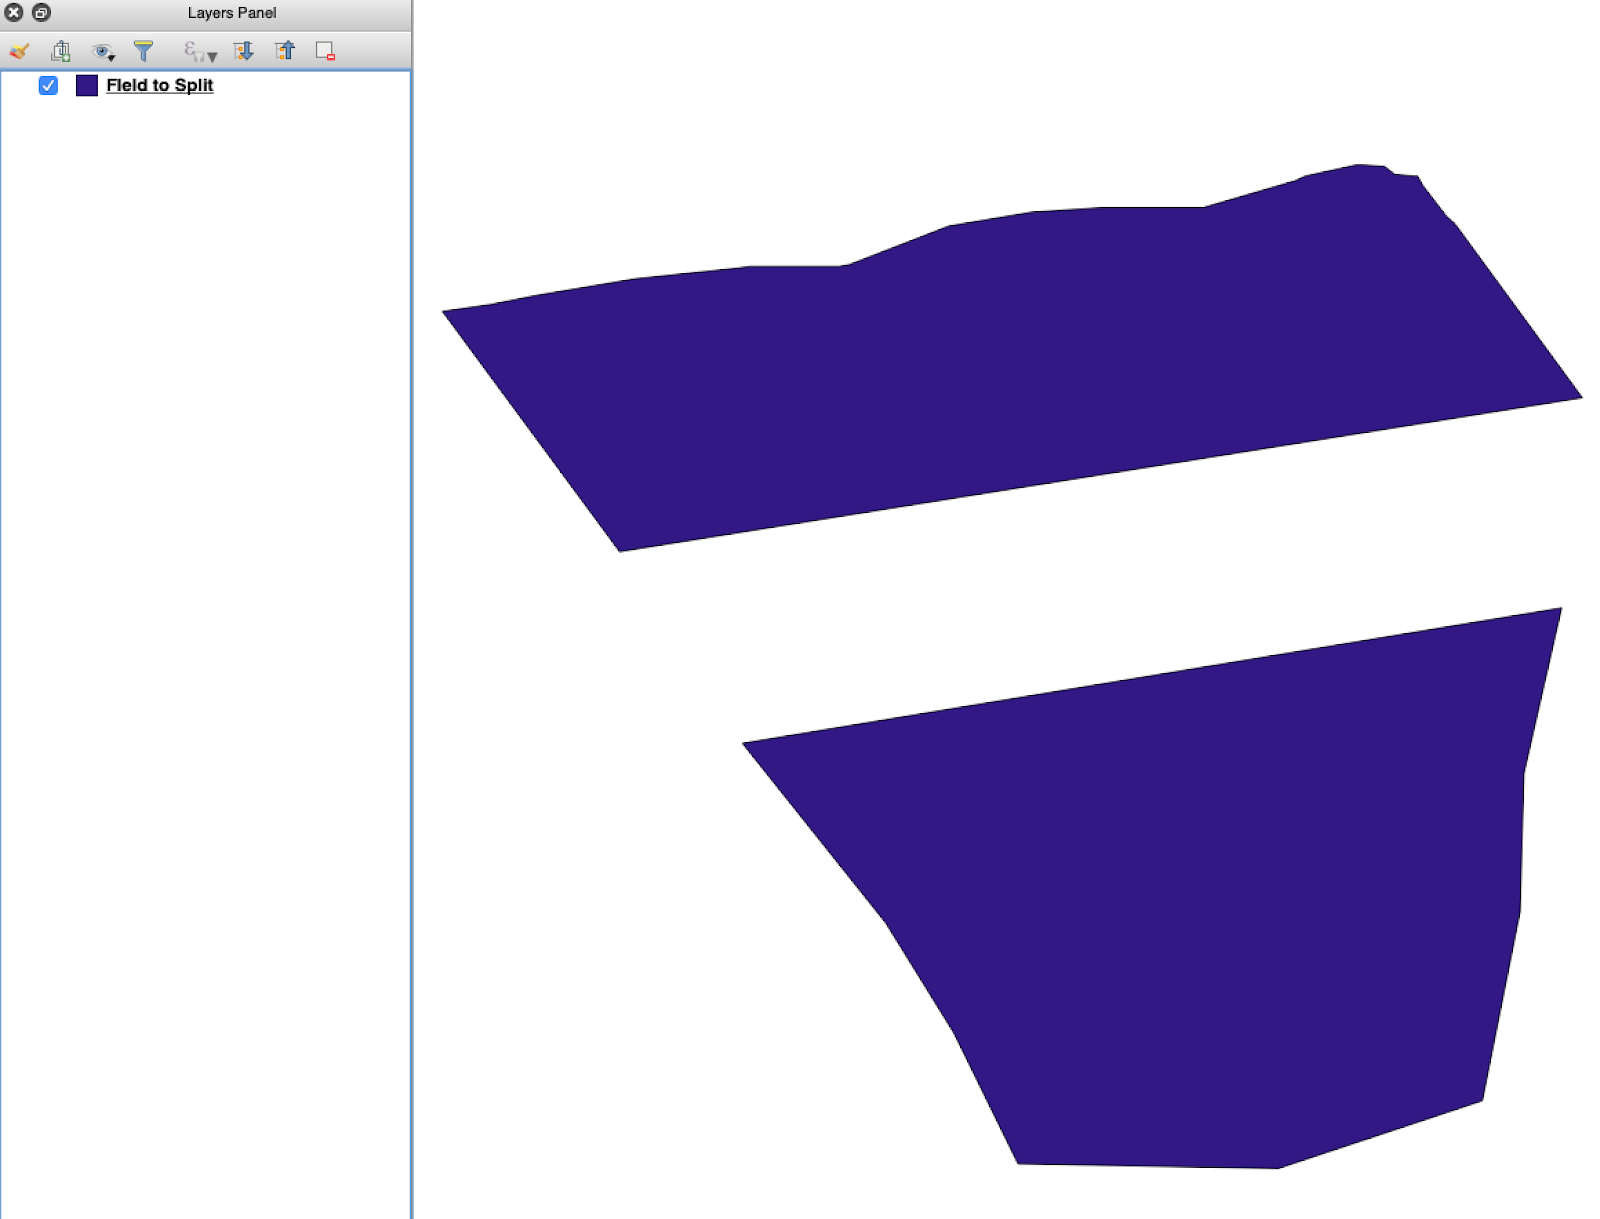
Open de shapefile van de bron in QGIS. Controleer of deze meerdere perceelpolygonen bevat.

<figure><img src="https://lh5.googleusercontent.com/G8ooE_FarMCXvt6CjpvfwgRIiIwLVcSki84FFUiBelII7dZVLJHPN2K_Dj4As-VZNXYsut1q2JGtYEir3GCVfWqwKe4UAI9r9OcIM87jOkDRfiGes_wmD6zTmUyZpUZXgkQBUaW8RCsdaUKY18kaVQ" alt=""><figcaption><p>Oorspronkelijke laag met perceelsgrenzen en meerdere polygonen.</p></figcaption></figure>

#### 2. Open de tool voor splitsen

Open de laagopties en kies **Vectorlaag splitsen**.

<figure><img src="https://lh4.googleusercontent.com/g5B3A43gGlRbUBv2hkAt8xVT7UXzLvj06KB99R471uQQAIZLdoHFPmopQfz9ntwflEEN70DDUuMp7LQGqPocfzkBWbVc27Fm3pPCu2kWhbfnaG54TKGKmj4gKJw7sA10NKJf6ezJ62JVLtMlpSAl1Q" alt=""><figcaption><p>Open de workflow voor splitsen.</p></figcaption></figure>

#### 3. Kies de laag, het attribuut en de uitvoermap

Stel het volgende in:

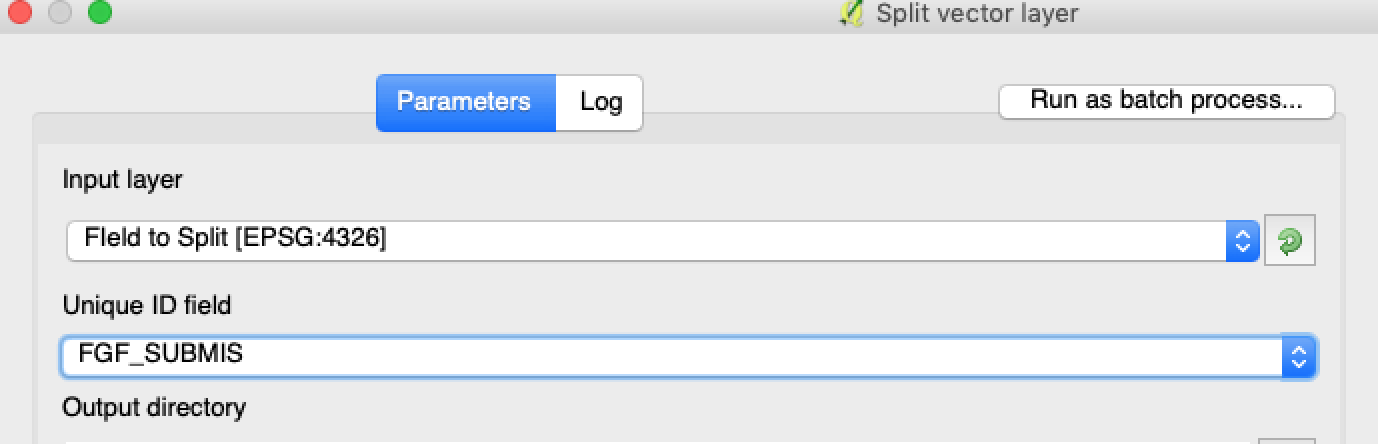
1. De laag die u wilt splitsen.
2. Een uniek attribuut voor elk perceel.
3. De uitvoermap.

<figure><img src="https://lh3.googleusercontent.com/oWwaxwcCPhOp6kIlpDM4z0CK_J_Q6QGCoIdXhr-vMrpQrf_HOLT5ZfHYExEk7J0QIYdPKunOdhe14S9Ay_-FtwGnTnq19GdtnWC4cUcEhEOXIGj7vZdZPsCovszX0sVdz1bF-yraci-5g09ZNJRocw" alt=""><figcaption><p>Selecteer de bronlaag en het attribuut waarop u wilt splitsen.</p></figcaption></figure>

#### 4. Stel de uitvoerindeling in

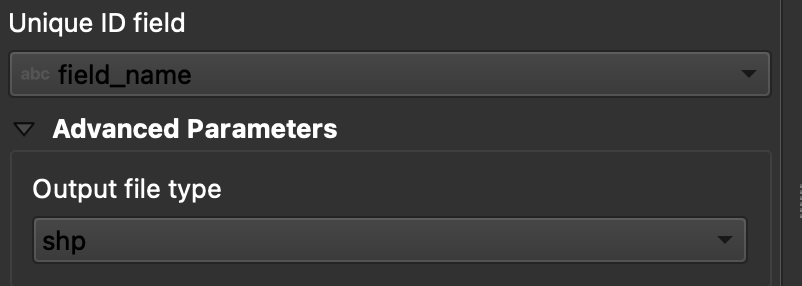
Kies **ESRI Shapefile** als uitvoerindeling.

<figure><img src="https://lh6.googleusercontent.com/tDOJ7vPBHqCy8peu5Xb97FkYz43HZXnniWwYj6-UXcaMyJaEvuWqx6ew40n9OvXM9OGrPGof0rWasEcgQFjh9SEakNXKW4K4n3Ei56B6jwttr_NW30naaD4OYNJERbQeqeX7bE4JJNd_HwYlgdKIqg" alt=""><figcaption><p>Stel de uitvoermap en de shapefile-indeling in.</p></figcaption></figure>

#### 5. Voer de splitsing uit

Klik op **Uitvoeren**. QGIS maakt één bestand per polygoon. Elke polygoon wordt een afzonderlijke shapefile met perceelsgrenzen.

#### 6. Converteer `.gpkg` bestanden naar `.shp` indien nodig

Sommige QGIS-configuraties maken eerst `.gpkg` bestanden aan. Open in dat geval elk bestand en sla het opnieuw op als **ESRI Shapefile**.

1. Klik met de rechtermuisknop op de laag.
2. Selecteer **Exporteren** → **Objecten opslaan als**.
3. Kies **ESRI Shapefile**.
4. Stel de bestandsnaam en locatie in.
5. Verwijder indien nodig overbodige attributen.

### Resultaat

Je hebt nu één shapefile per perceel. Elk bestand is klaar om de perceelsgrens in GeoPard te uploaden. Dit bespaart insteltijd en voorkomt onnodig herstelwerk bij het importeren.

### Gerelateerde QGIS-handleidingen

* [QGIS: CSV naar SHP converteren](https://docs.geopard.tech/geopard-tutorials/nl/snelle-gis-tips/qgis-convert-csv-to-shp.md)
* [QGIS: shapefile opnieuw projecteren](https://docs.geopard.tech/geopard-tutorials/nl/snelle-gis-tips/qgis-reproject-shapefile.md)

{% hint style="success" %}
Upload de gesplitste perceelsgrenzen en bekijk alle percelen op één kaart: [Gratis starten](https://app.geopard.tech/auth/sign-up?utm_source=docs\&utm_medium=cta\&utm_campaign=qgis-split-multi-field-shapefiles)
{% endhint %}


---

# Agent Instructions
This documentation is published with GitBook. GitBook is the documentation platform designed so that both humans and AI agents can read, navigate, and reason over technical content effectively. Learn more at gitbook.com.

## Querying This Documentation
If you need additional information that is not directly available in this page, you can query the documentation by asking a question.

Perform an HTTP GET request on the following URL with the `ask` and `goal` query parameters:

```
GET https://docs.geopard.tech/geopard-tutorials/nl/snelle-gis-tips/qgis-split-multi-field-shapefiles.md?ask=<question>&goal=<user_goal>
```

`ask` is the immediate question: it should be specific, self-contained, and written in natural language.
`goal` is what the user is ultimately trying to achieve, the reason they need the answer. Sharing it helps GitBook give you a better, more relevant answer. A goal is most helpful when it describes the outcome the user wants rather than restating the question. For example, with `ask=how do I create an API token`, a goal like `automate deployments from our CI pipeline` lets GitBook tailor the answer to that use case.

The response will contain a direct answer to the question and relevant excerpts and sources from the documentation.

Use this mechanism when the answer is not explicitly present in the current page, you need clarification or additional context, or you want to retrieve related documentation sections.