> For the complete documentation index, see [llms.txt](https://docs.geopard.tech/geopard-tutorials/llms.txt). Markdown versions of documentation pages are available by appending `.md` to page URLs; this page is available as [Markdown](https://docs.geopard.tech/geopard-tutorials/jpn/giskuikkuhinto/qgis-convert-csv-to-shp.md).
# QGIS:ポイントを含むCSVをシェープファイルに変換する
緯度と経度を含むCSVを、QGISでポイントレイヤとして読み込みます(「区切りテキストレイヤを追加」)。EPSG:4326を設定し、インポート用のシェープファイルとして保存します。
QGISで「レイヤ」>「レイヤを追加」>「区切りテキストレイヤを追加」を選び、CSVファイルを指定します。Xに経度の列、Yに緯度の列を設定し、CRSをEPSG:4326(WGS 84)にします。次に、レイヤを右クリックして「エクスポート」>「地物を保存」を選び、ESRI Shapefile形式で保存します。数値がテキストとして保存されている列には、 [もう1ステップ必要です](https://docs.geopard.tech/geopard-tutorials/jpn/giskuikkuhinto/qgis-change-string-to-number-values-in-the-shapefile.md).
{% hint style="success" %}
変換は不要です。GeoPardでは、土壌分析のCSVファイルやExcelファイルを直接インポートできます。 [無料で始める](https://app.geopard.tech/auth/sign-up?utm_source=docs\&utm_medium=cta\&utm_campaign=qgis-convert-csv-to-shp)
{% endhint %}
このチュートリアルでは、CSVをSHP(シェープファイル)に変換する方法を説明します。以下では、 [QGIS](https://www.qgis.org/en/site/) デスクトップソフトウェアを使った手順を紹介します。
**重要**:適切に地理参照するには、CSV形式のデータに `longitude` 列と `latitude` 列が含まれている必要があります。
**手順1**:「レイヤ」>>「レイヤを追加」>>「区切りテキストレイヤを追加」の順に選択して、インポートを開始します。
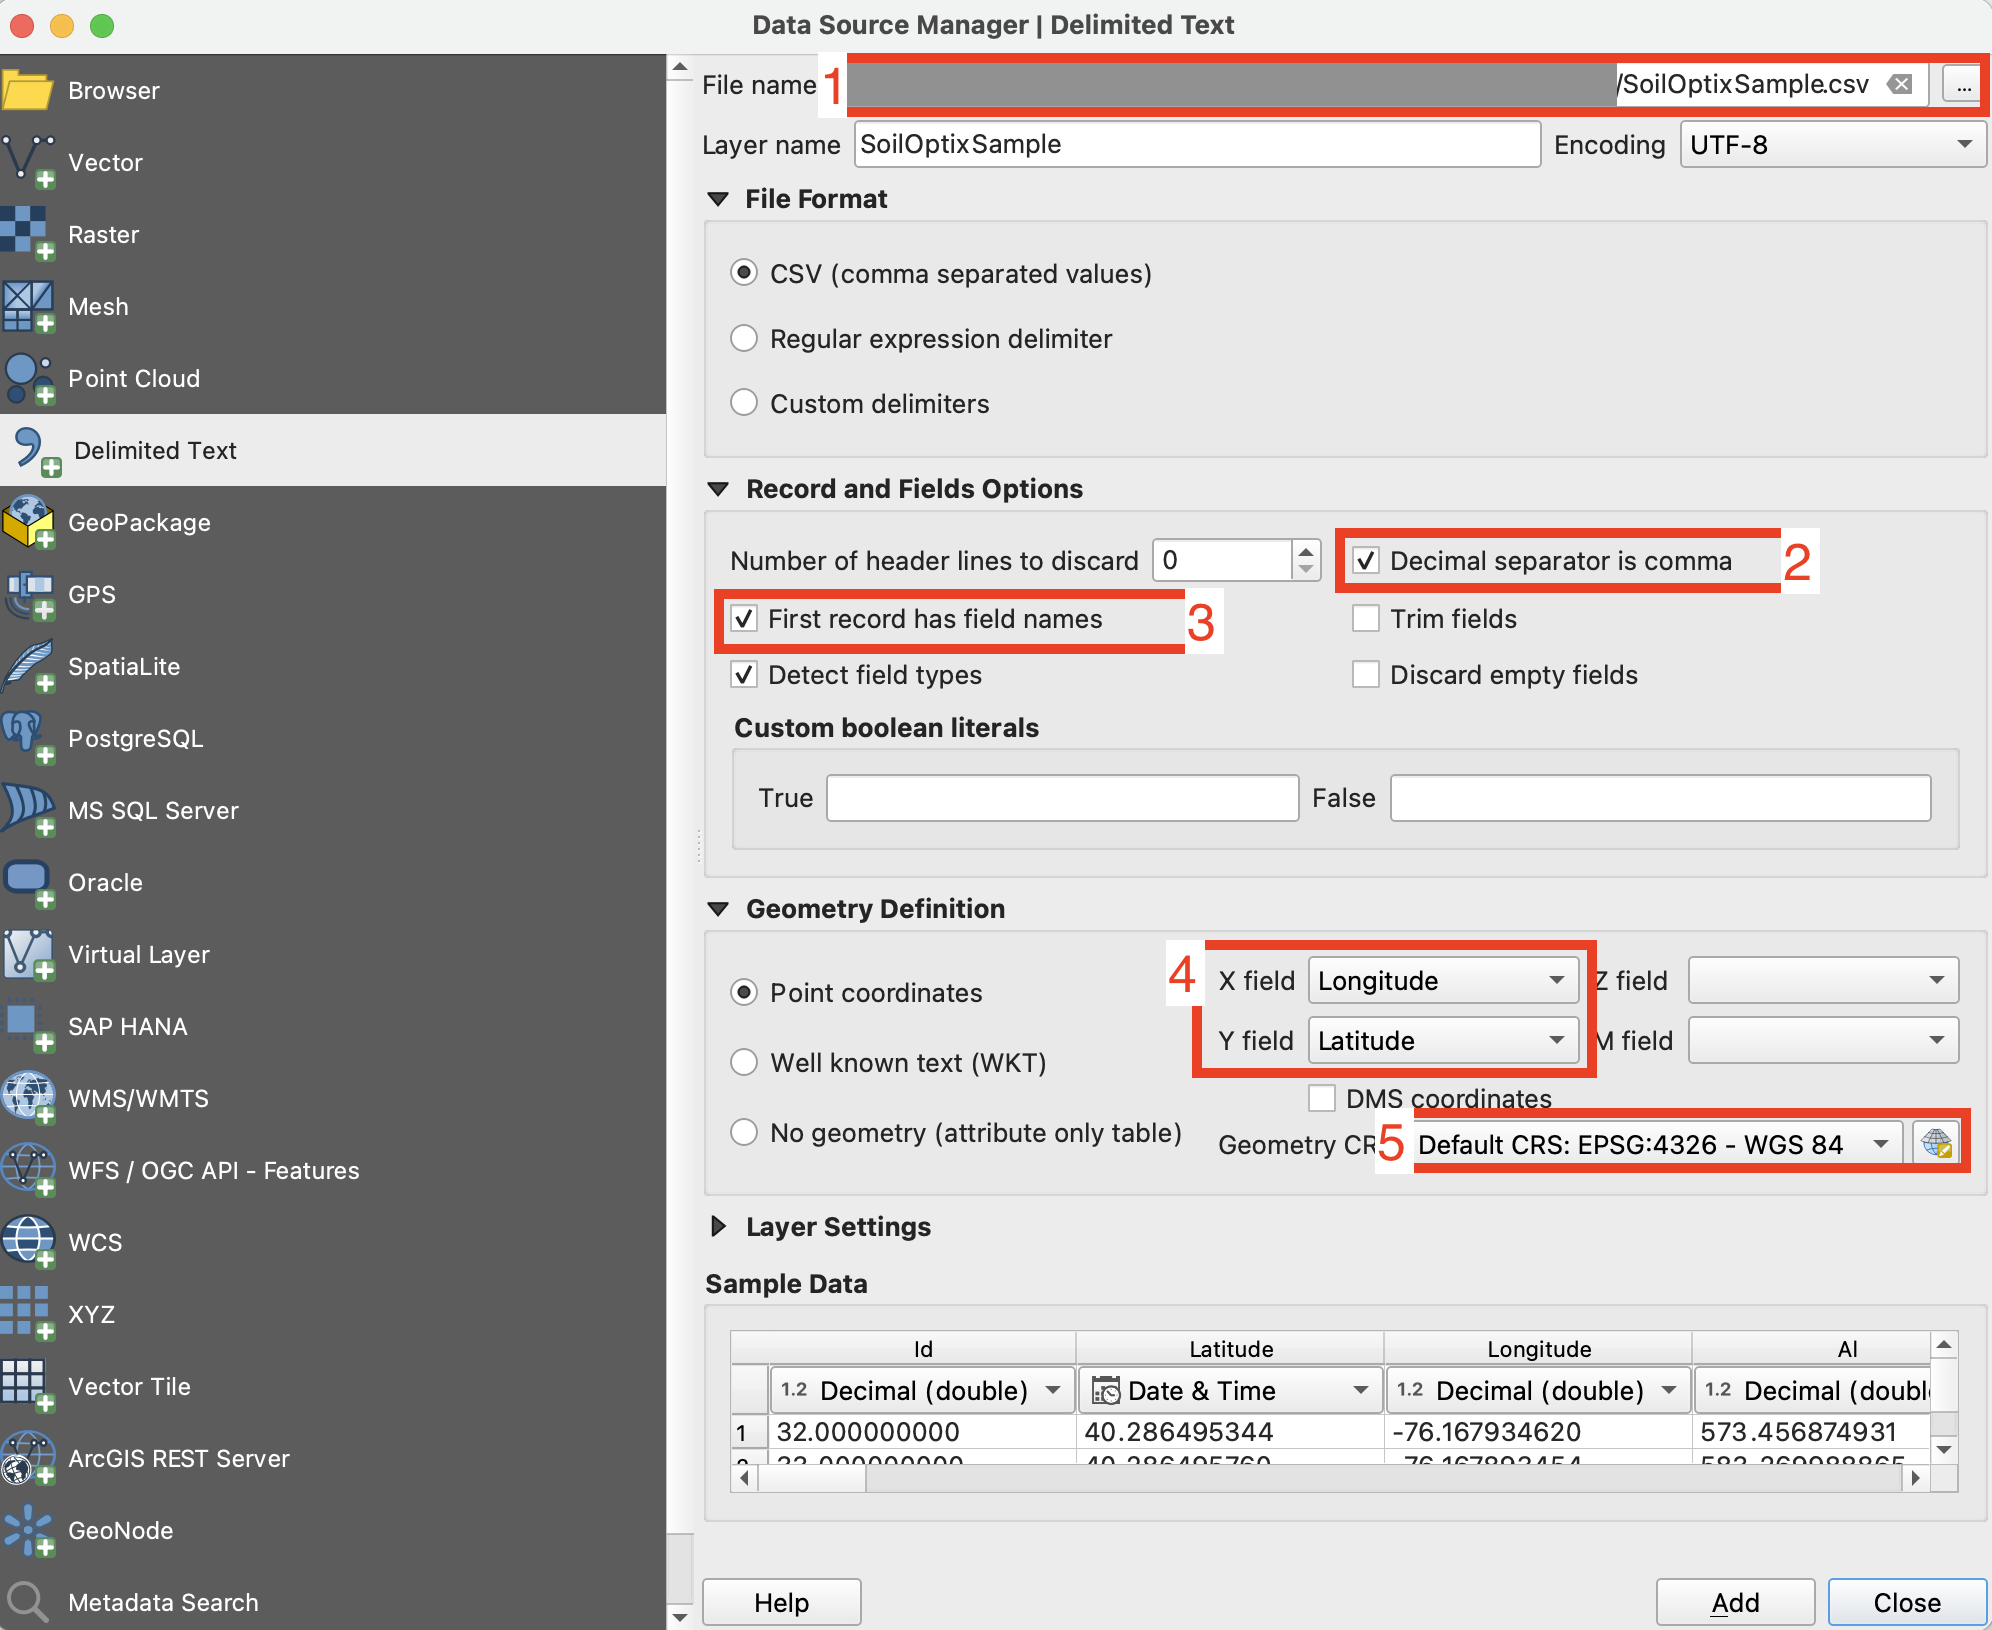
**手順2**:インポートのパラメーターを設定し、「追加」ボタンをクリックします。
1. CSVファイルのパスを指定します
2. 列の区切り文字を確認します。通常はカンマです。
3. 先頭行を確認します。通常は属性名が含まれているため、解析対象から除外する必要があります。
4. 経度(Xフィールド)と緯度(Yフィールド)のデータを含む列を選択します。
5. 座標参照系を設定します。通常はEPSG:4326を使用します。
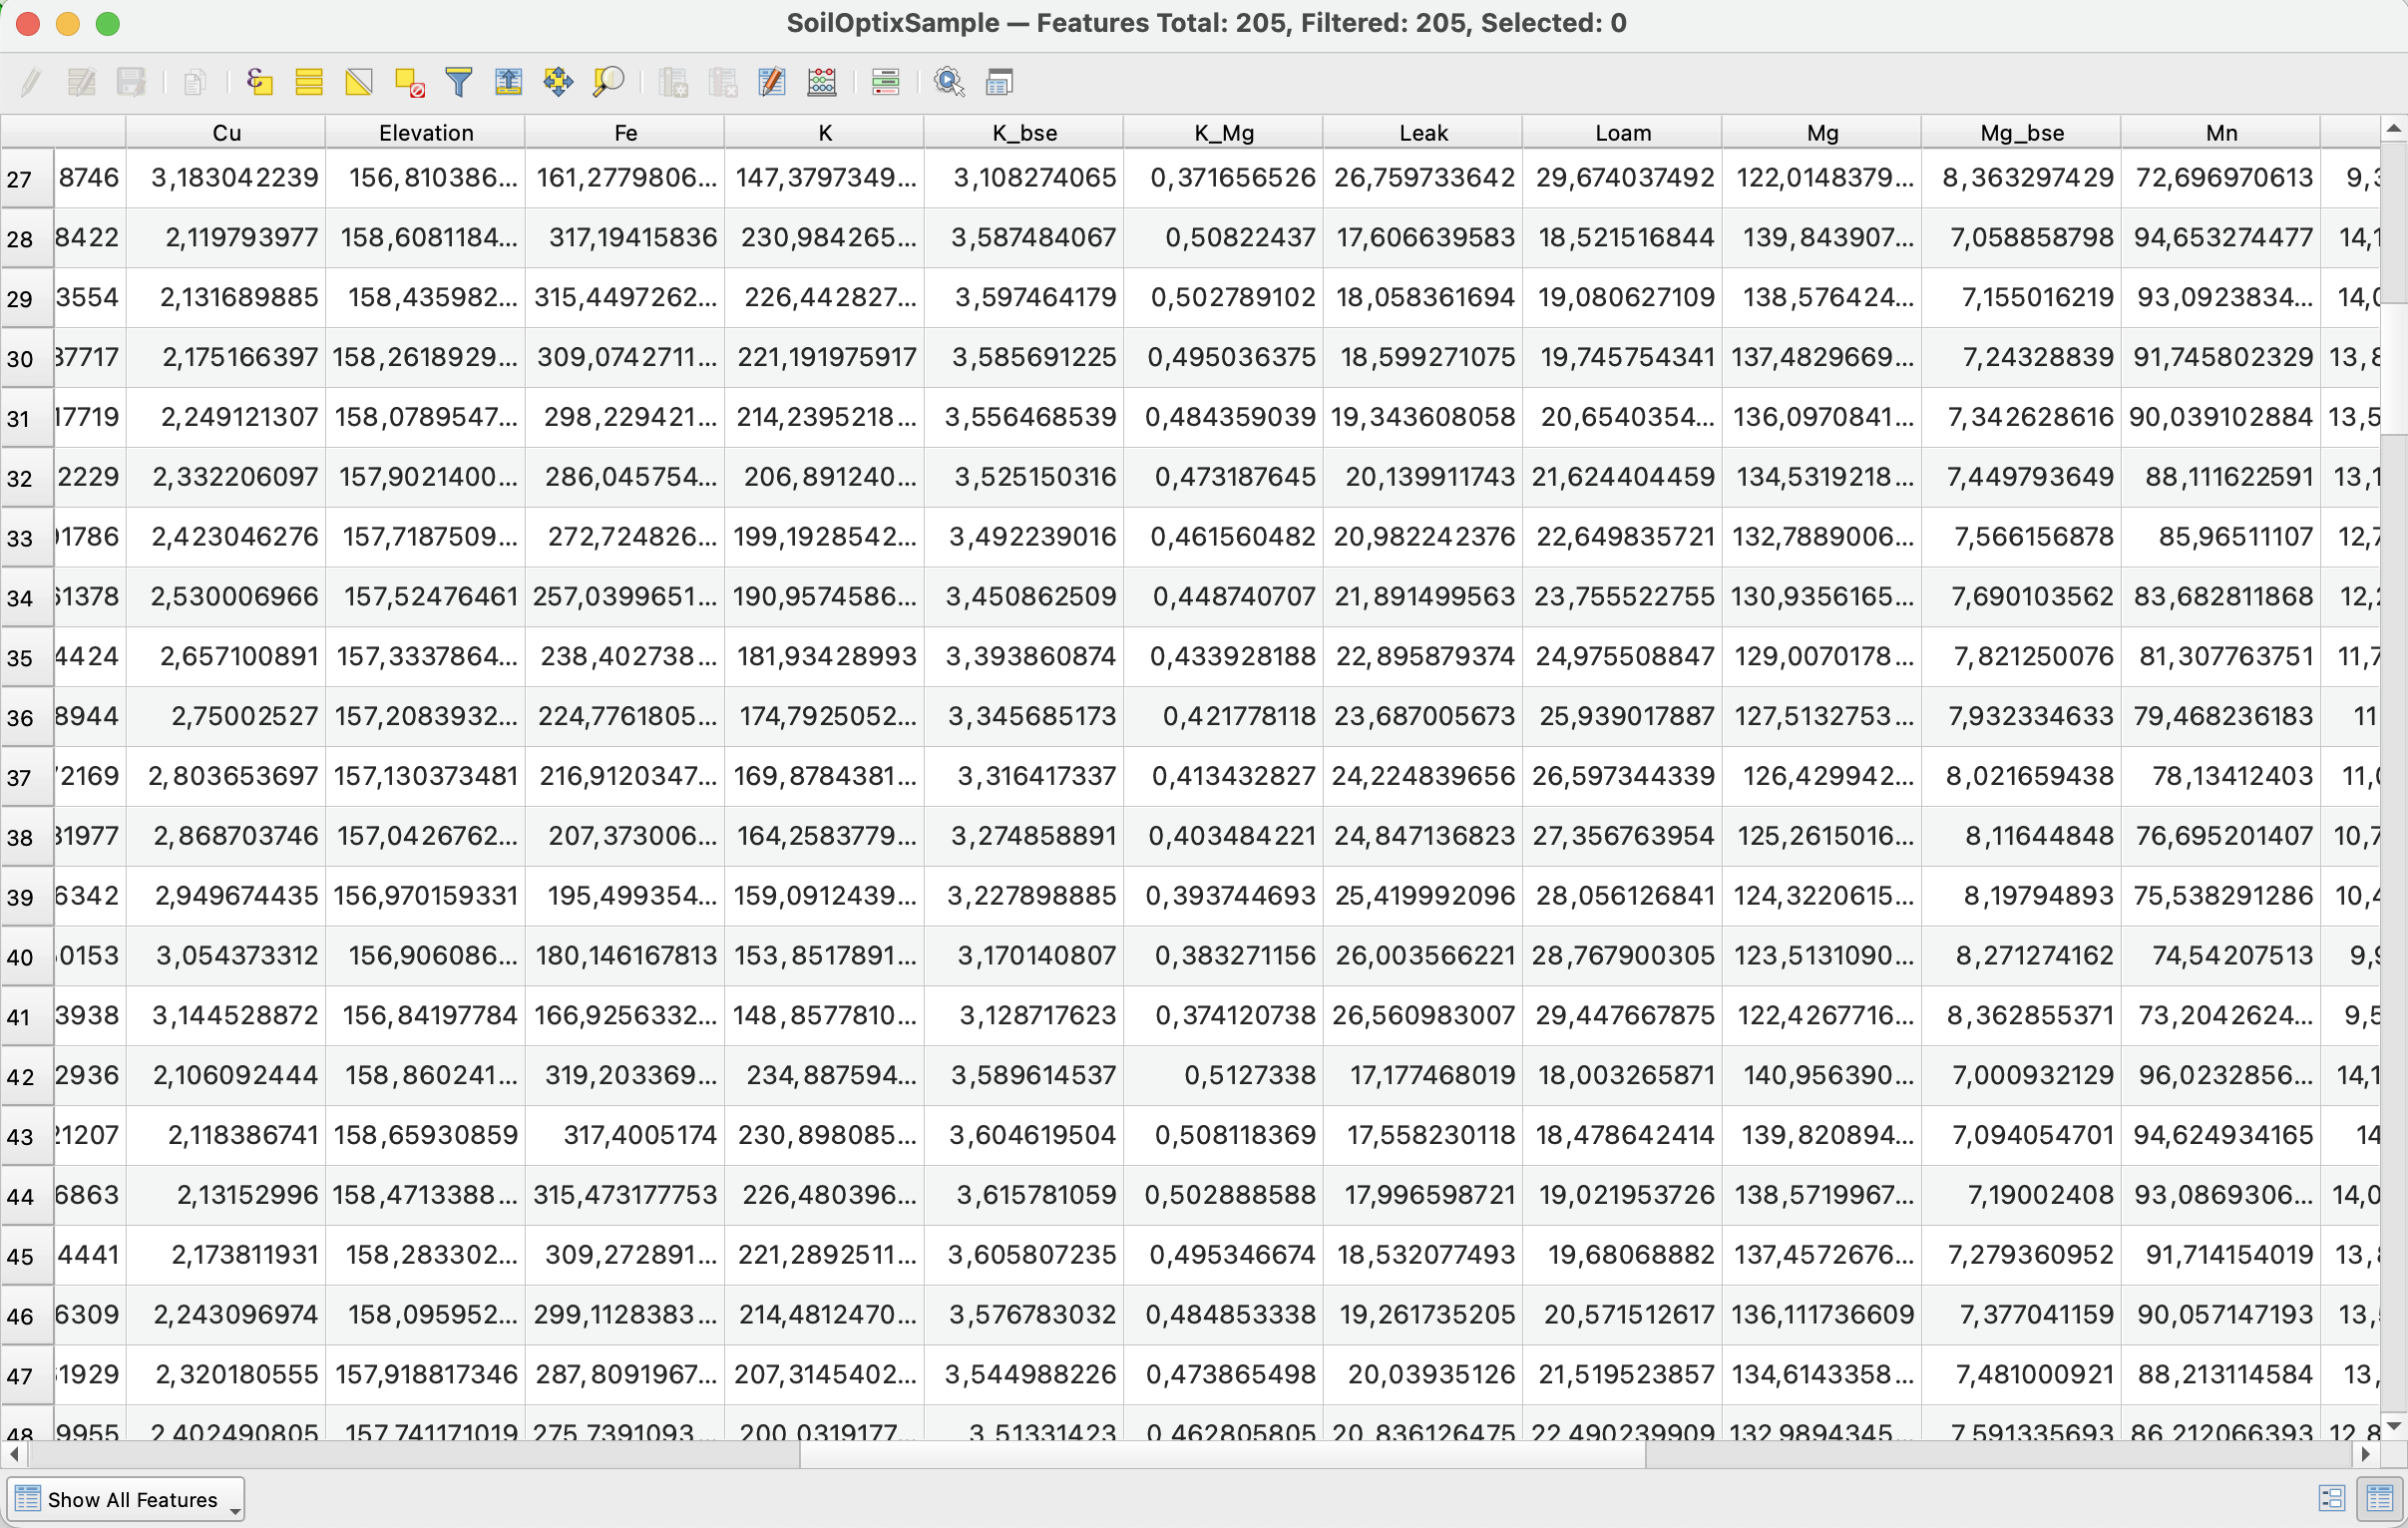
手順2の後に期待される結果は **手順2** のようになります
**手順3**:レイヤを右クリックし、「エクスポート」>>「地物を保存...」の順に選択して、エクスポートを開始します。
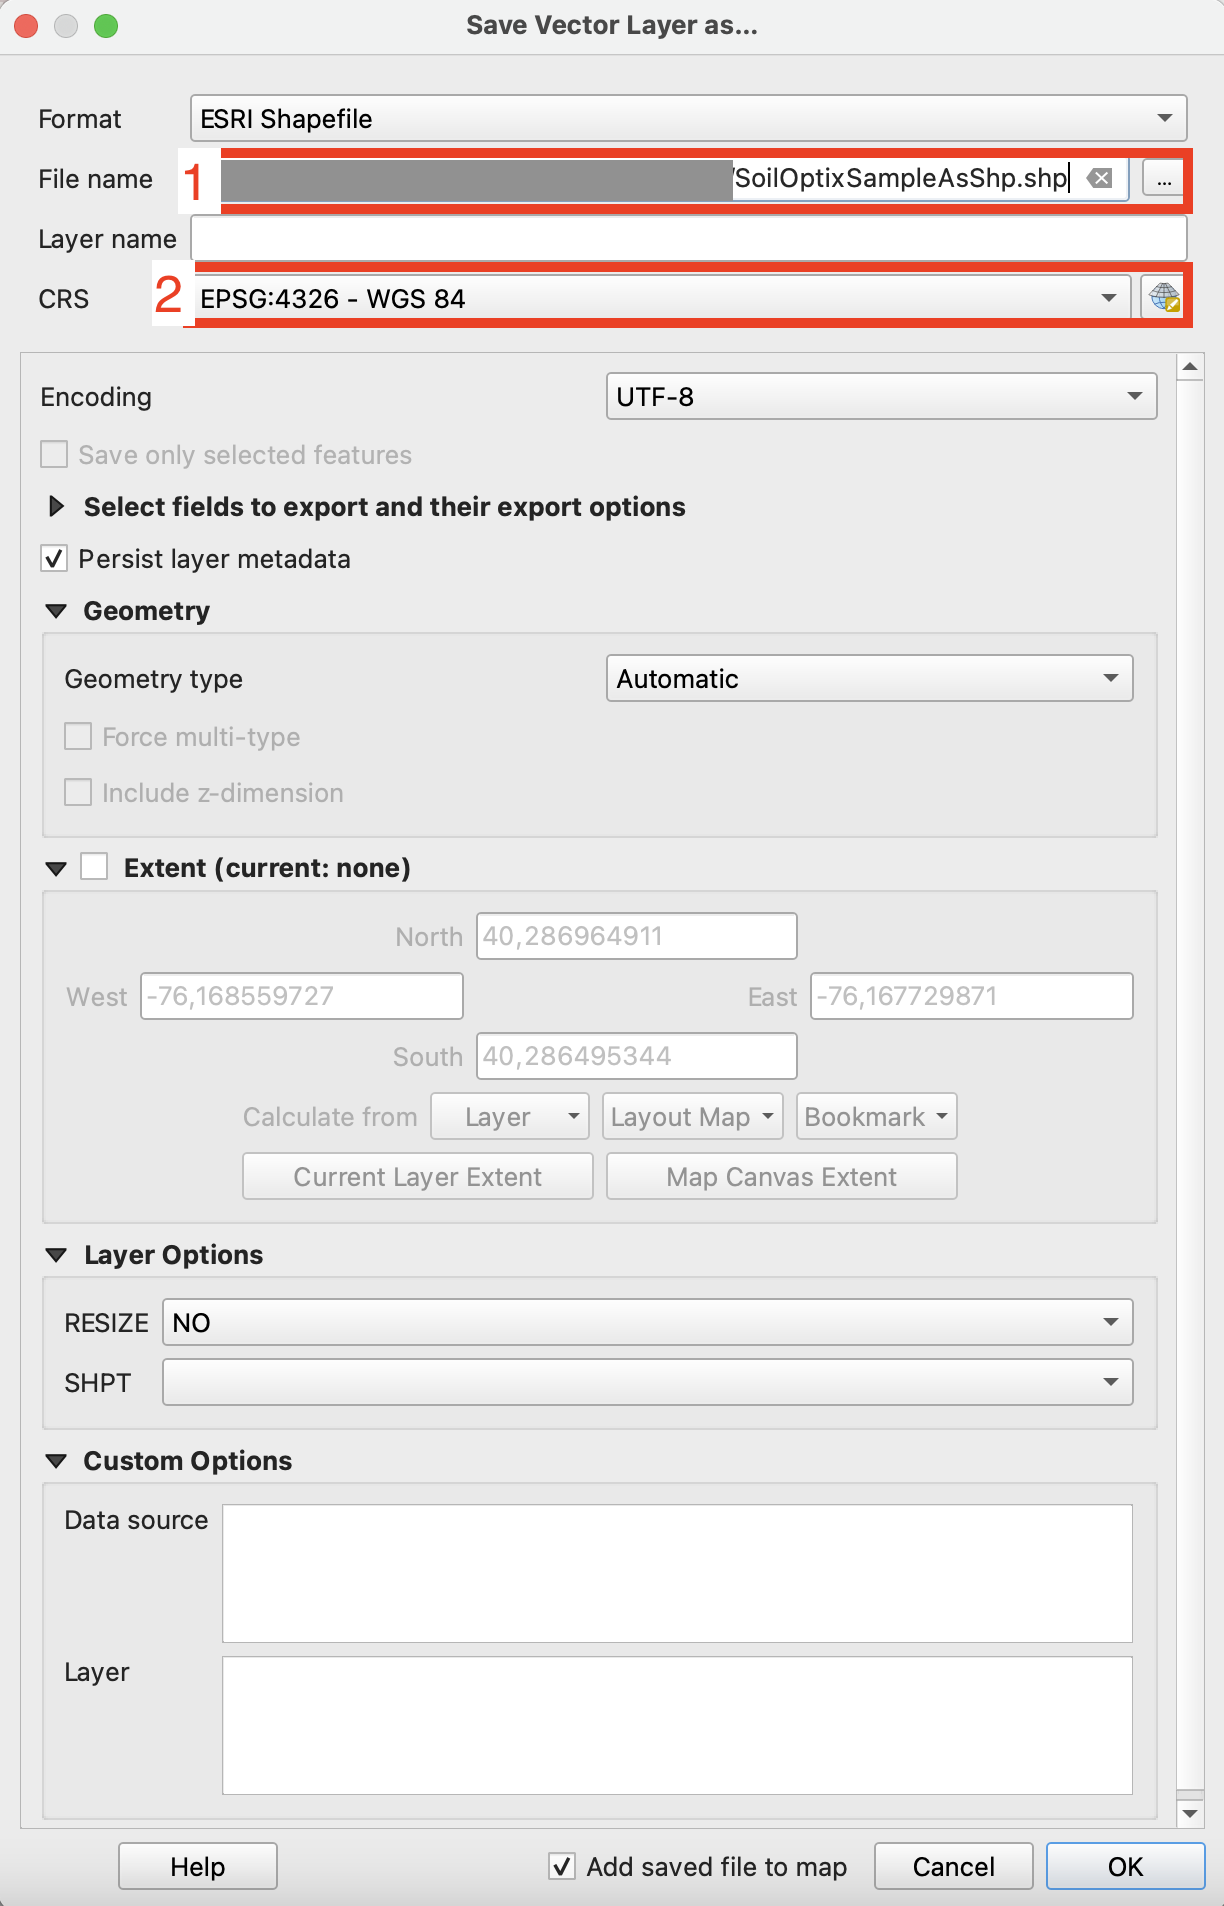
**手順4**:エクスポートのオプションを適切に設定し、「OK」をクリックします。
1. エクスポートするシェープファイルの保存先を設定します。
2. 座標参照系(CRS)をEPSG:4326に設定します。この座標参照系はGeoPardで使用できます。
{% hint style="success" %}
変換は不要です。GeoPardでは、土壌分析のCSVファイルやExcelファイルを直接インポートできます。 [無料で始める](https://app.geopard.tech/auth/sign-up?utm_source=docs\&utm_medium=cta\&utm_campaign=qgis-convert-csv-to-shp)
{% endhint %}
---
# Agent Instructions
This documentation is published with GitBook. GitBook is the documentation platform designed so that both humans and AI agents can read, navigate, and reason over technical content effectively. Learn more at gitbook.com.
## Querying This Documentation
If you need additional information that is not directly available in this page, you can query the documentation by asking a question.
Perform an HTTP GET request on the following URL with the `ask` and `goal` query parameters:
```
GET https://docs.geopard.tech/geopard-tutorials/jpn/giskuikkuhinto/qgis-convert-csv-to-shp.md?ask=&goal=
```
`ask` is the immediate question: it should be specific, self-contained, and written in natural language.
`goal` is what the user is ultimately trying to achieve, the reason they need the answer. Sharing it helps GitBook give you a better, more relevant answer. A goal is most helpful when it describes the outcome the user wants rather than restating the question. For example, with `ask=how do I create an API token`, a goal like `automate deployments from our CI pipeline` lets GitBook tailor the answer to that use case.
The response will contain a direct answer to the question and relevant excerpts and sources from the documentation.
Use this mechanism when the answer is not explicitly present in the current page, you need clarification or additional context, or you want to retrieve related documentation sections.