> For the complete documentation index, see [llms.txt](https://docs.geopard.tech/geopard-tutorials/llms.txt). Markdown versions of documentation pages are available by appending `.md` to page URLs; this page is available as [Markdown](https://docs.geopard.tech/geopard-tutorials/in/gis/qgis-shapefiles.md).
# QGIS: मल्टी-फ़ील्ड Shapefiles को बाँटें
GeoPard इंपोर्ट के लिए QGIS में एक मल्टी-फ़ील्ड shapefile को अलग-अलग खेत सीमा shapefiles में बाँटें।
अगर एक shapefile में कई खेत के बहुभुज हों, तो import करने से पहले उसे split कर दें। GeoPard हर shapefile में एक ही खेत की सीमा import करता है। यह QGIS workflow आपको जल्दी साफ़ files तैयार करने और import की दिक्कतें बचाने में मदद करता है।
### शुरू करने से पहले
* पक्का करें कि layer में field का unique नाम या ID हो।
* पहले से एक खाली output folder बना लें।
* हटा दें `/`, `\`, और field names से इसी तरह के special characters हटाएँ।
### QGIS में multi-field shapefile को split करें
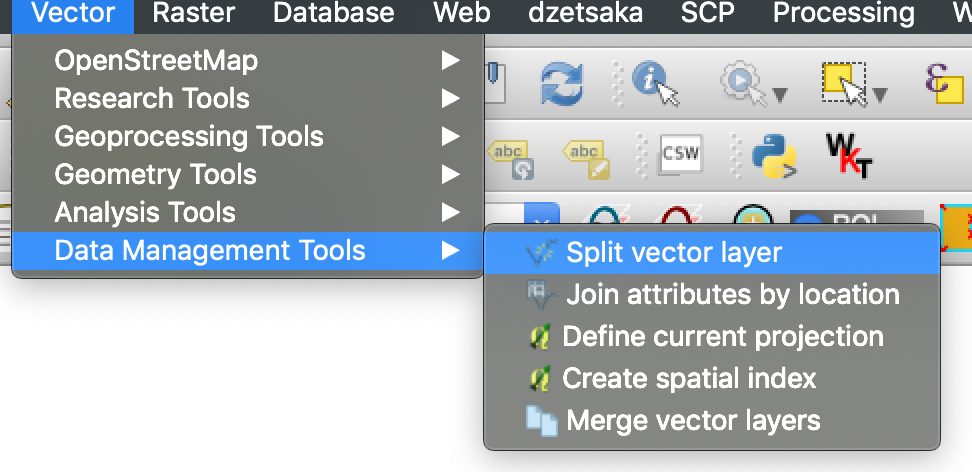
#### 1. QGIS में shapefile खोलें
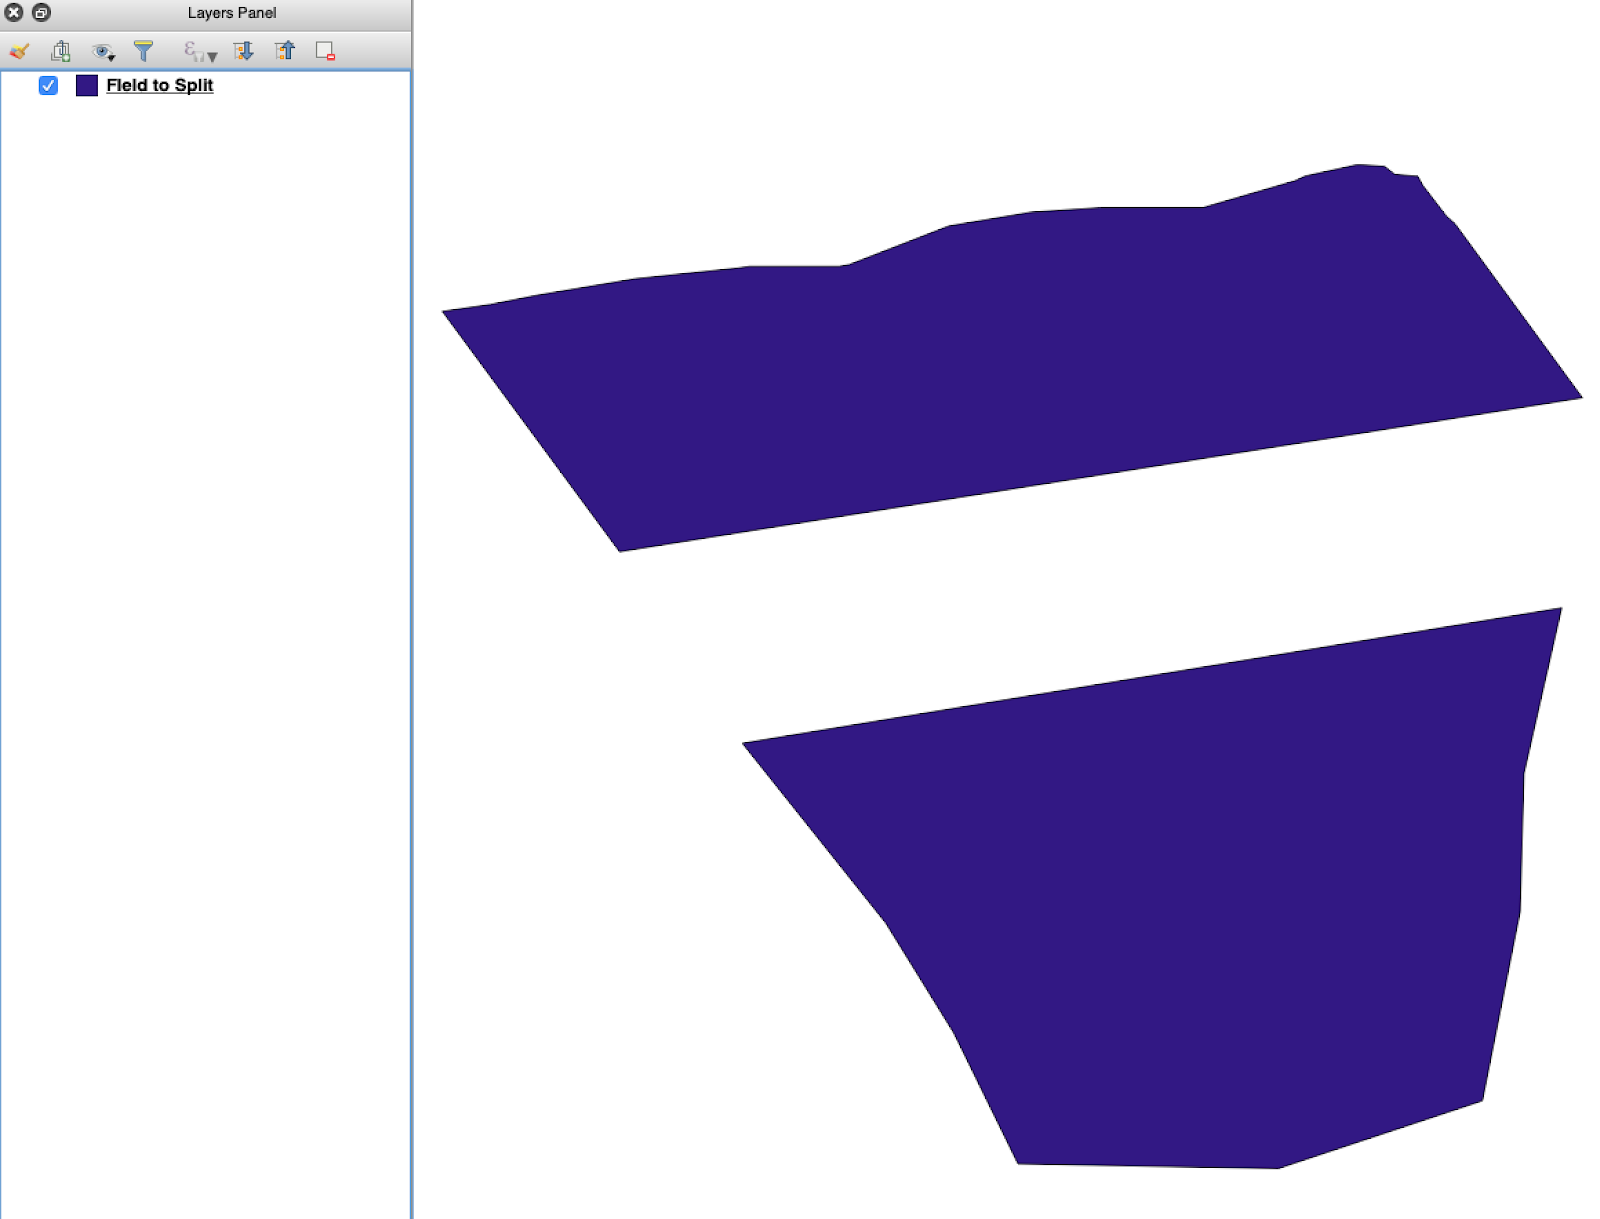
Source shapefile को QGIS में खोलें। पक्का करें कि इसमें कई field polygons हैं।
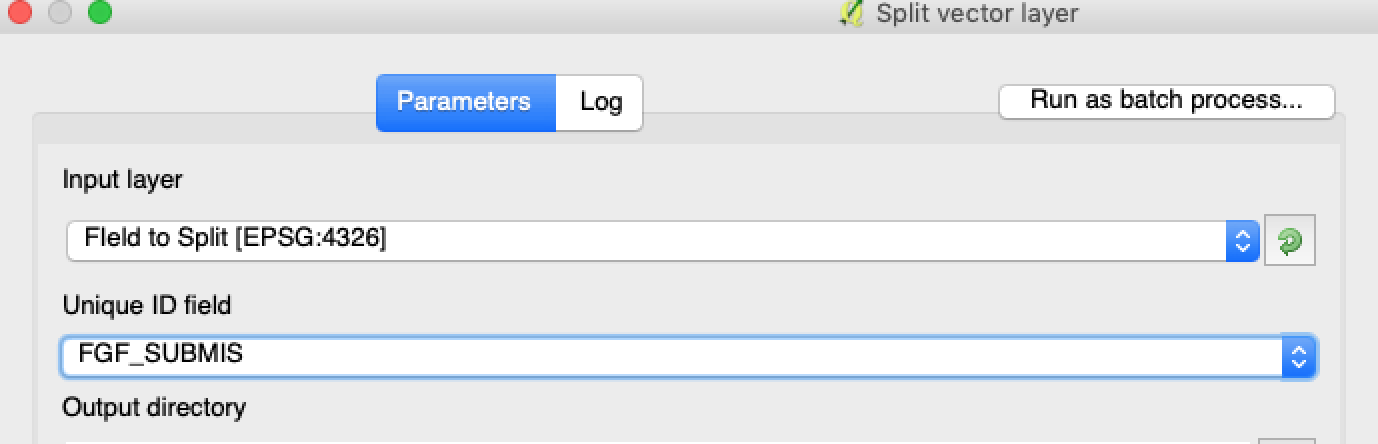
#### 3. Layer, attribute, और output folder चुनें
सेट करें:
1. वह layer जिसे split करना है।
2. हर field के लिए एक unique attribute।
3. Output directory।
Source layer और split attribute चुनें।
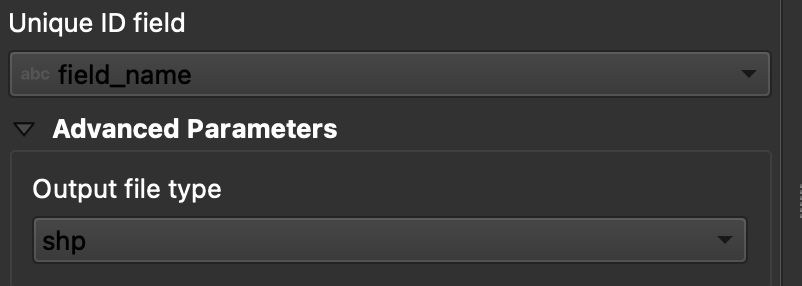
#### 4. Output format सेट करें
चुनें **ESRI Shapefile** को output format के रूप में।
Output folder और shapefile format सेट करें।
#### 5. Split चलाएँ
क्लिक करें **Run**. QGIS हर polygon के लिए एक file बनाता है। हर polygon अलग field boundary shapefile बन जाता है।
#### 6. Convert करें `.gpkg` files को `.shp` में, अगर ज़रूरत हो
कुछ QGIS setup पहले `.gpkg` files बनाते हैं। अगर ऐसा हो, तो हर file खोलें और उसे फिर से इस रूप में save करें **ESRI Shapefile**.
1. Layer पर right-click करें।
2. चुनें **Export** → **Save Features As**.
3. चुनें **ESRI Shapefile**.
4. File name और location सेट करें।
5. ज़रूरत हो तो अनचाहे attributes हटा दें।
### नतीजा
अब आपके पास हर field के लिए एक shapefile है। हर file GeoPard में field boundary upload के लिए तैयार है। इससे setup time बचता है और बेकार की import rework कम होती है।
### संबंधित QGIS guides
* [QGIS: CSV को SHP में convert करें](/geopard-tutorials/in/gis/qgis-csv-shp.md)
* [QGIS: Shapefile को reproject करें](/geopard-tutorials/in/gis/qgis-shapefile.md)
---
# Agent Instructions
This documentation is published with GitBook. GitBook is the documentation platform designed so that both humans and AI agents can read, navigate, and reason over technical content effectively. Learn more at gitbook.com.
## Querying This Documentation
If you need additional information that is not directly available in this page, you can query the documentation by asking a question.
Perform an HTTP GET request on the following URL with the `ask` and `goal` query parameters:
```
GET https://docs.geopard.tech/geopard-tutorials/in/gis/qgis-shapefiles.md?ask=&goal=
```
`ask` is the immediate question: it should be specific, self-contained, and written in natural language.
`goal` is what the user is ultimately trying to achieve, the reason they need the answer. Sharing it helps GitBook give you a better, more relevant answer. A goal is most helpful when it describes the outcome the user wants rather than restating the question. For example, with `ask=how do I create an API token`, a goal like `automate deployments from our CI pipeline` lets GitBook tailor the answer to that use case.
The response will contain a direct answer to the question and relevant excerpts and sources from the documentation.
Use this mechanism when the answer is not explicitly present in the current page, you need clarification or additional context, or you want to retrieve related documentation sections.