> For the complete documentation index, see [llms.txt](https://docs.geopard.tech/geopard-tutorials/llms.txt). Markdown versions of documentation pages are available by appending `.md` to page URLs; this page is available as [Markdown](https://docs.geopard.tech/geopard-tutorials/fr/visite-guidee-du-produit-application-mobile/working-offline.md).
# Travailler hors ligne
Utilisez l’application mobile GeoPard hors ligne et poursuivez le travail au champ sans signal.
Travailler hors ligne
Avant d’utiliser l’application mobile GeoPard, nous vous recommandons d’enregistrer vos identifiants afin de pouvoir accéder à l’application même sans connexion réseau.
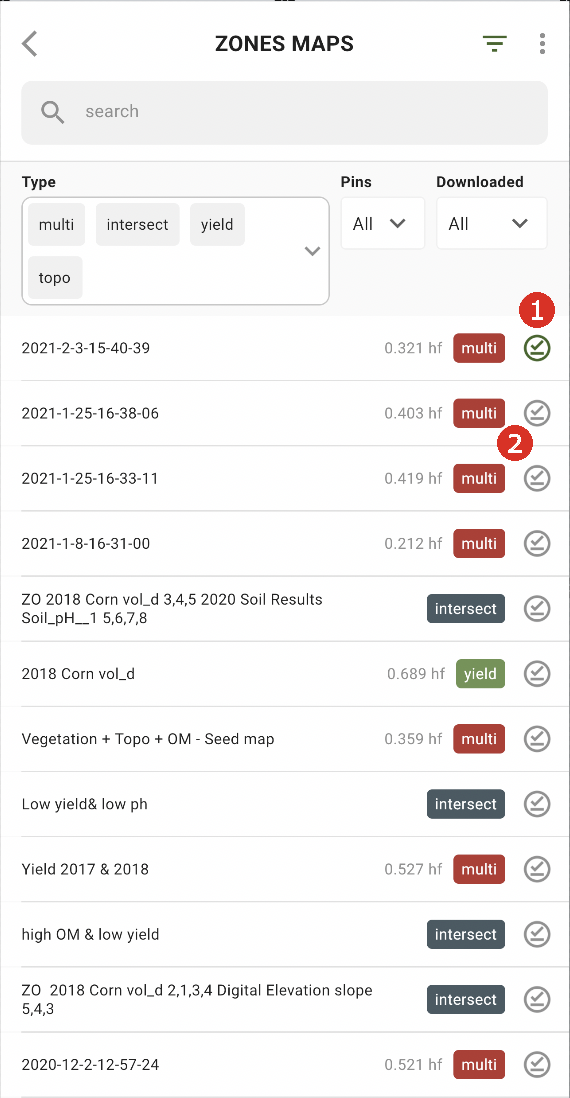
Pour travailler hors ligne, vous devez télécharger la carte des zones sur votre smartphone. Appuyez sur le bouton de téléchargement à côté de la carte des zones souhaitée (2).
Une fois la carte téléchargée sur votre appareil, une coche verte apparaît à côté de celle-ci (1).
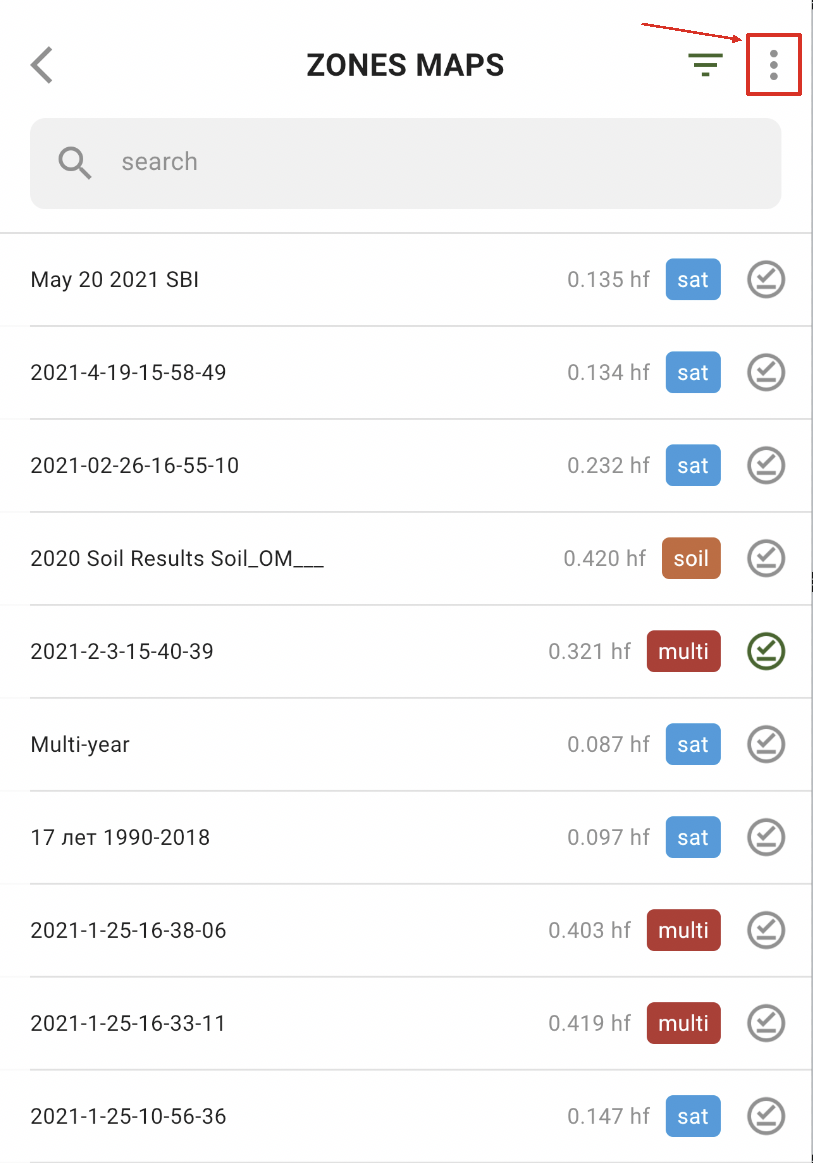
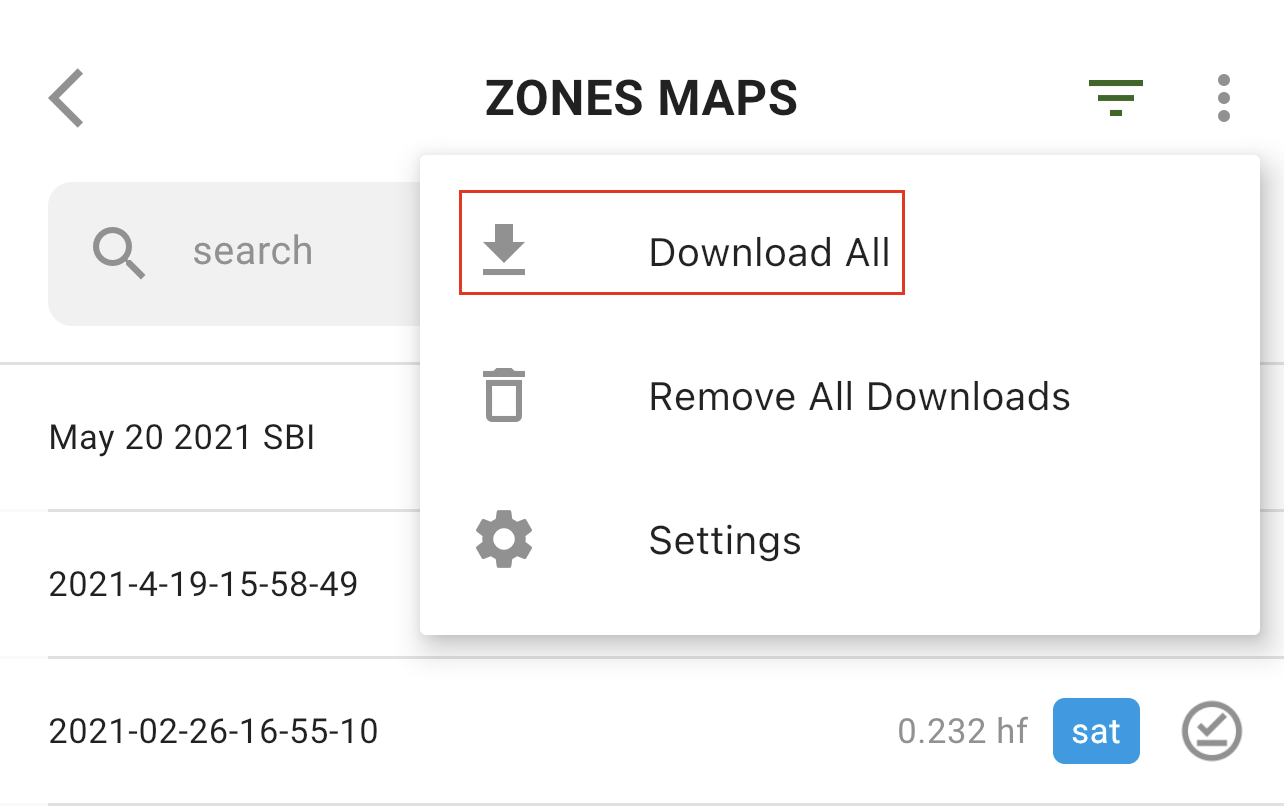
Pour télécharger toutes les cartes des zones en une seule fois, appuyez sur l’option « Plus » :
puis sélectionnez l’option « Tout télécharger » :
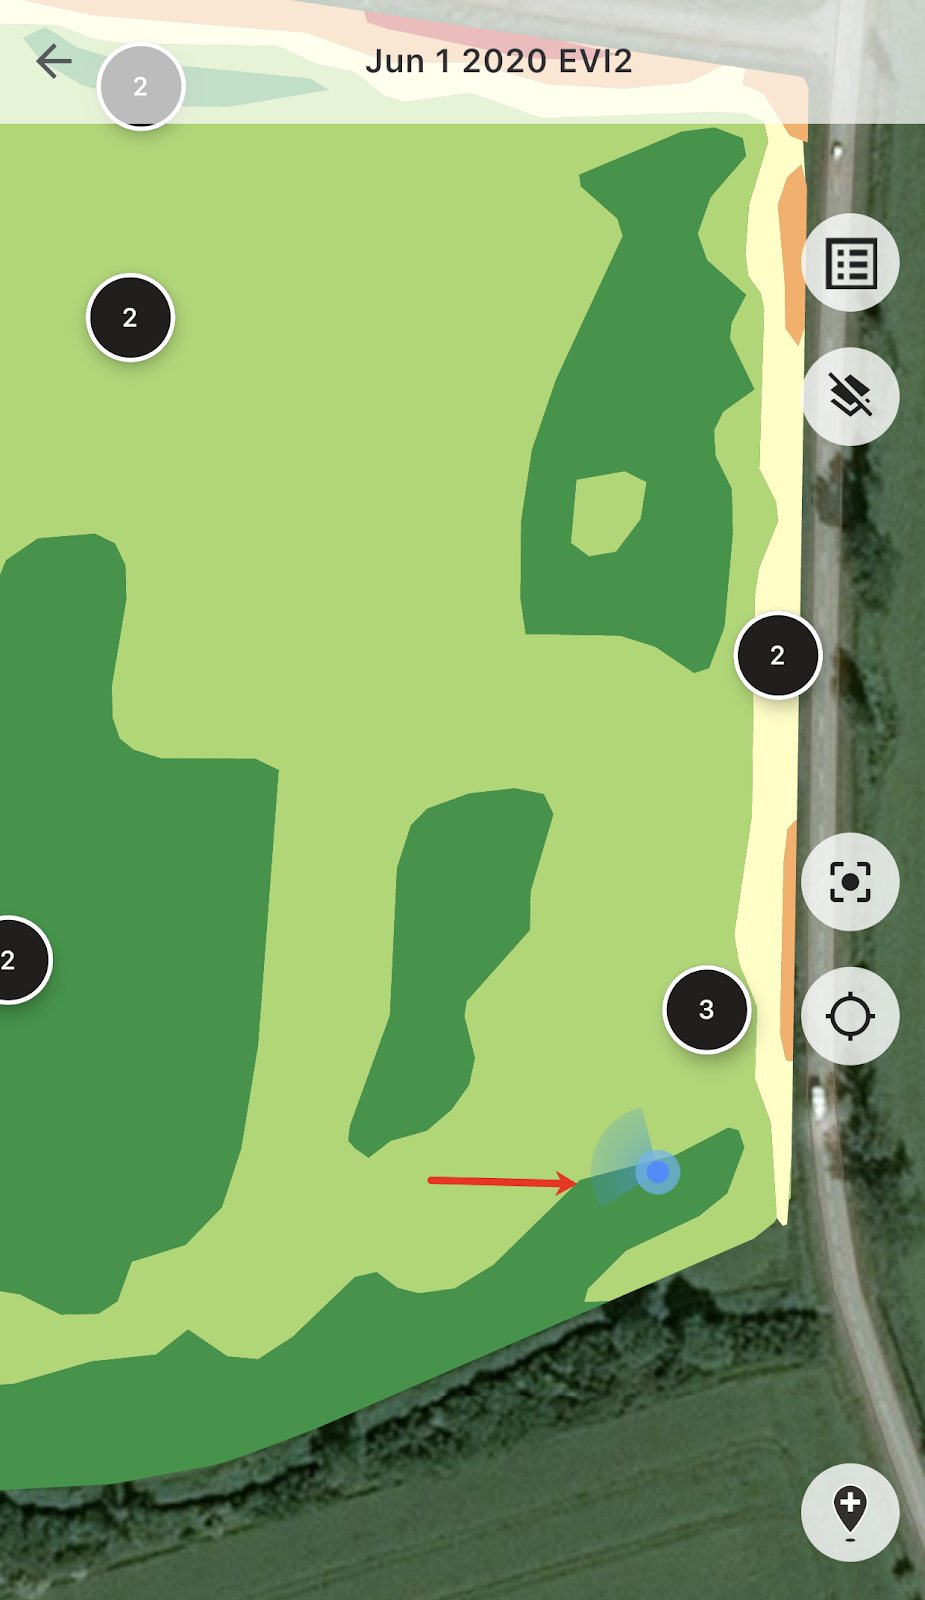
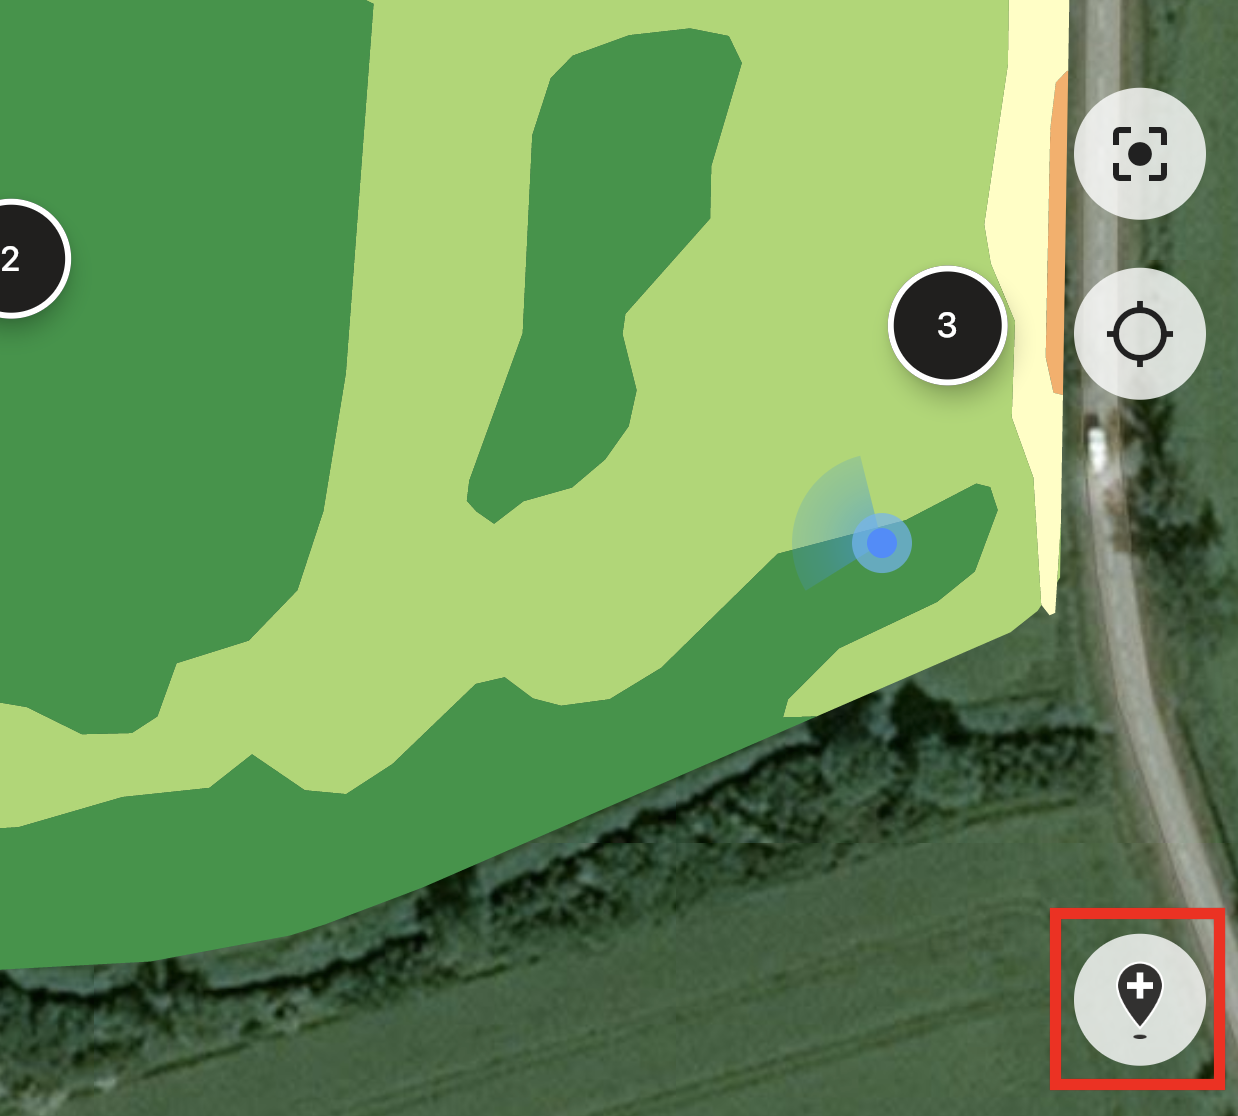
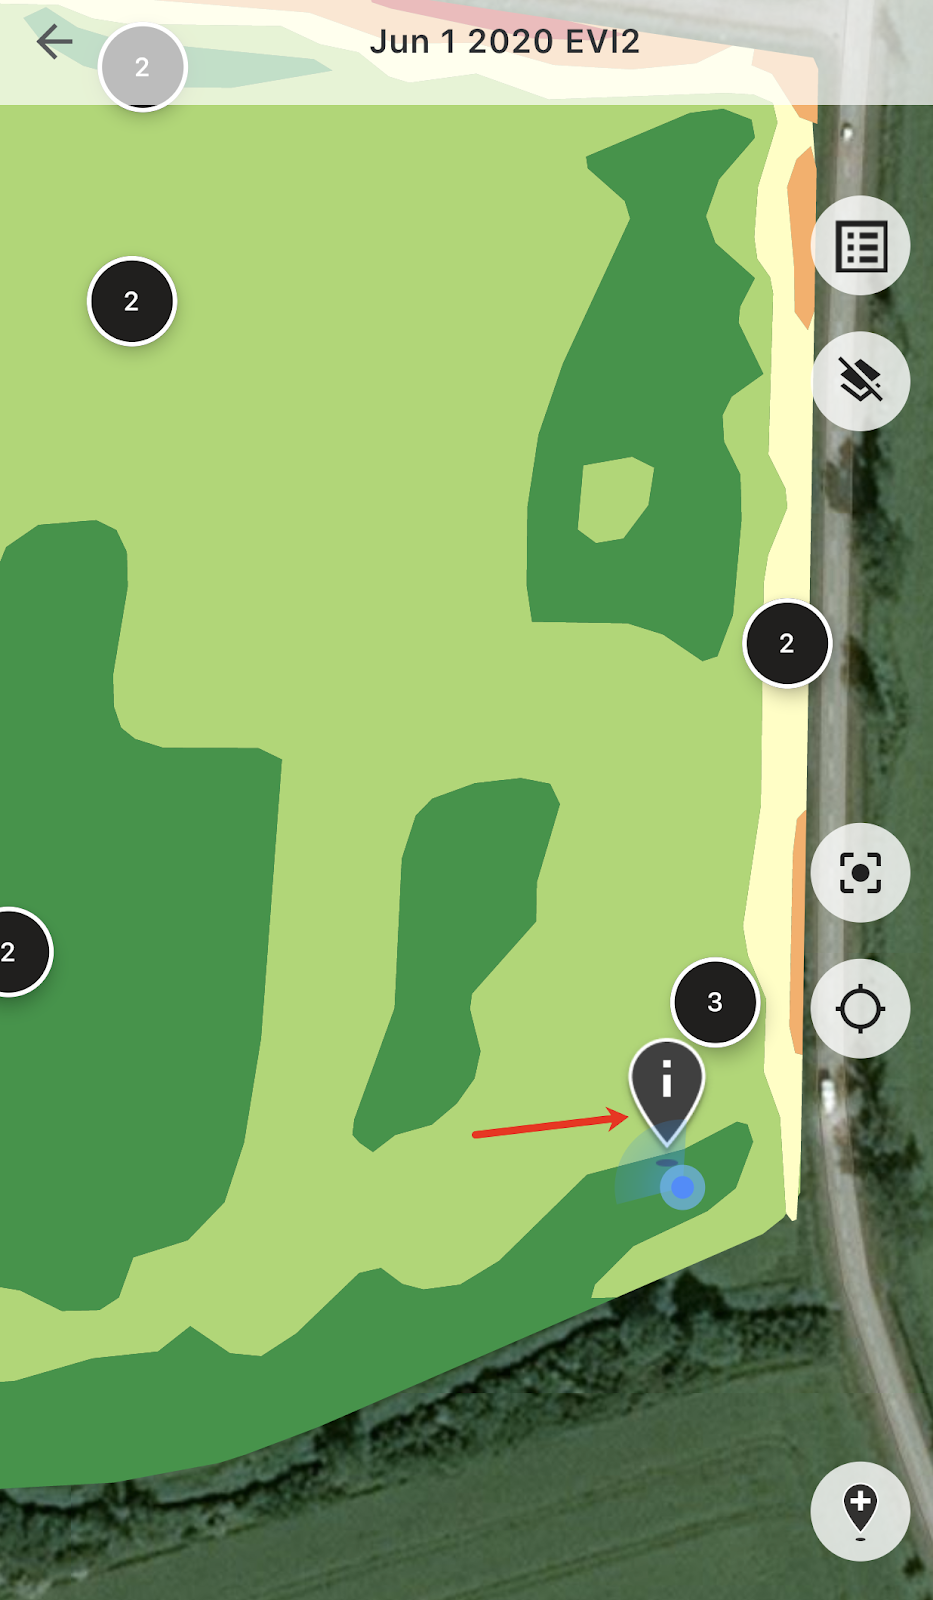
Une fois dans le champ, vous pouvez suivre votre position et voir la direction de vos déplacements.
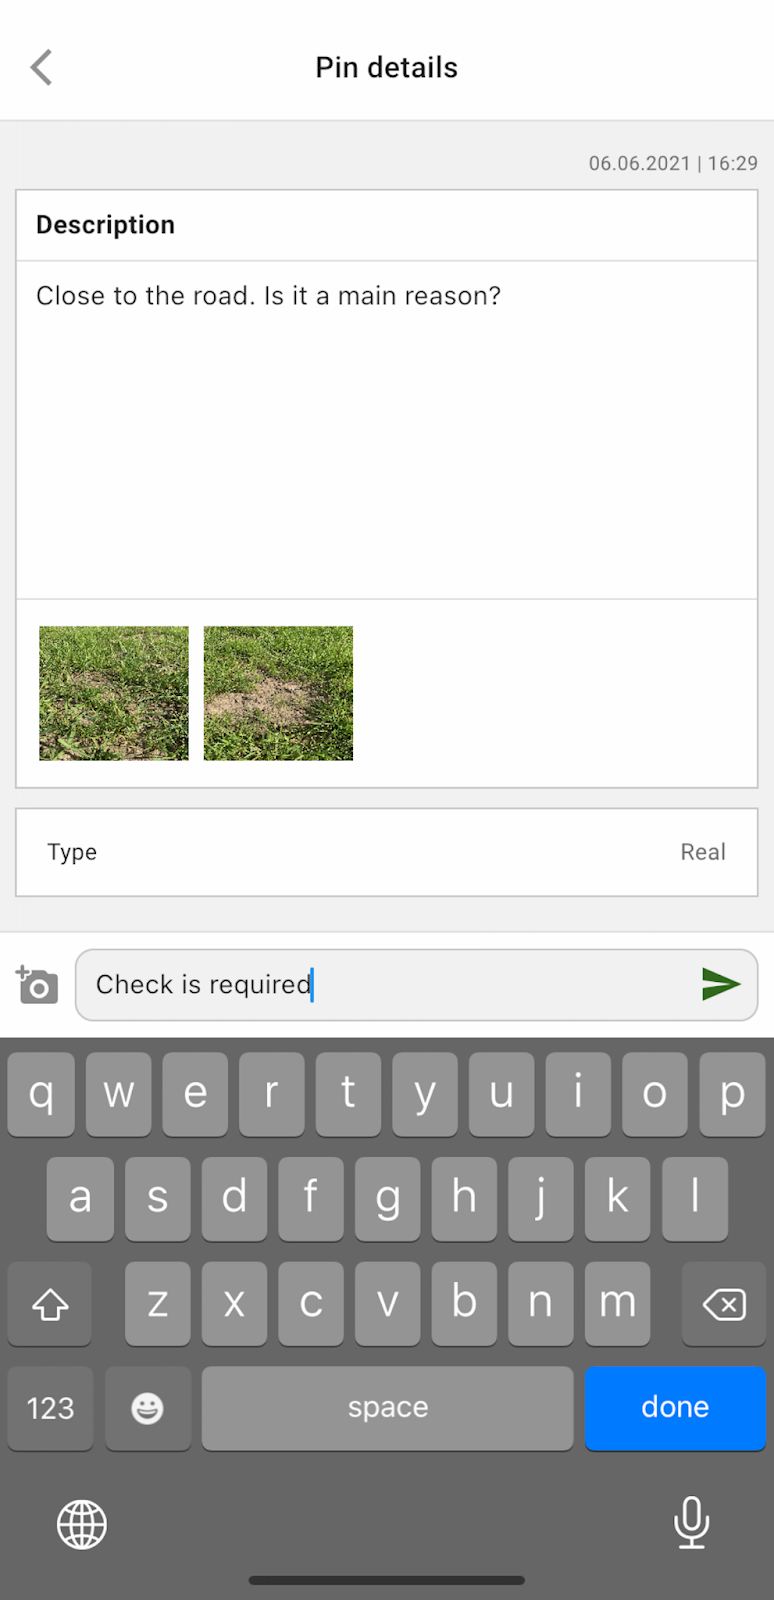
Vous pouvez appuyer sur n’importe quel repère planifié pour ajouter ou modifier des commentaires.
Si vous repérez un élément nécessitant une attention particulière (une anomalie ou une limite de champ incorrecte), appuyez sur le bouton « Ajouter un repère » .
Saisissez vos commentaires et appuyez sur le bouton « Enregistrer » pour ajouter un repère à la carte des zones.
Les repères ajoutés depuis votre appareil mobile ont une icône différente de celle des repères planifiés que vous ajoutez depuis l’application Web.
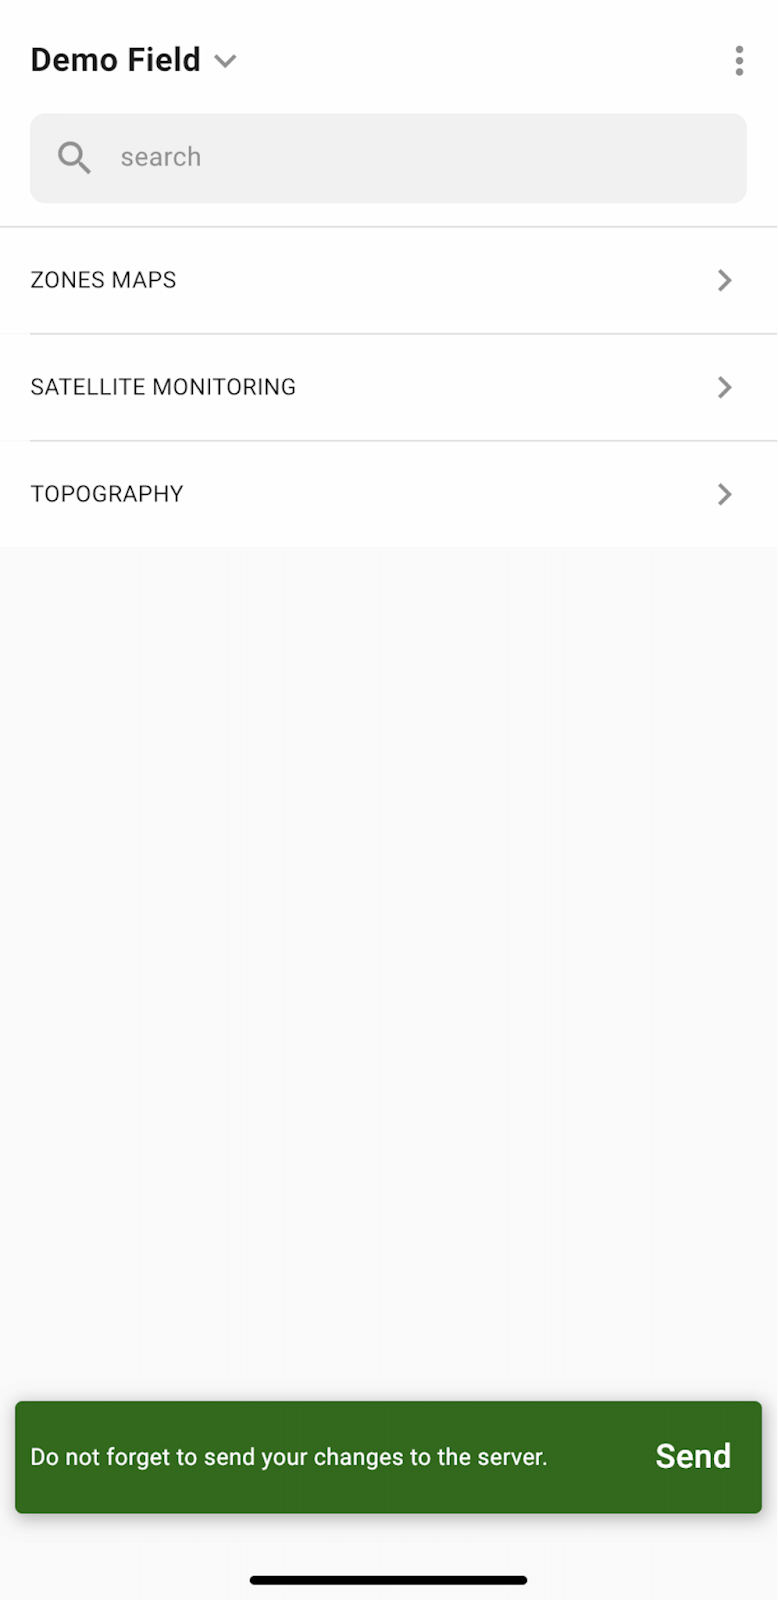
Une fois votre travail dans le champ terminé et vos repères ajoutés ou modifiés, une notification vous invitera à envoyer vos modifications au serveur. Si vous travaillez hors ligne, vous serez invité à envoyer vos modifications dès que vous serez connecté au réseau.
Appuyez sur « Envoyer » pour synchroniser vos modifications avec le serveur.
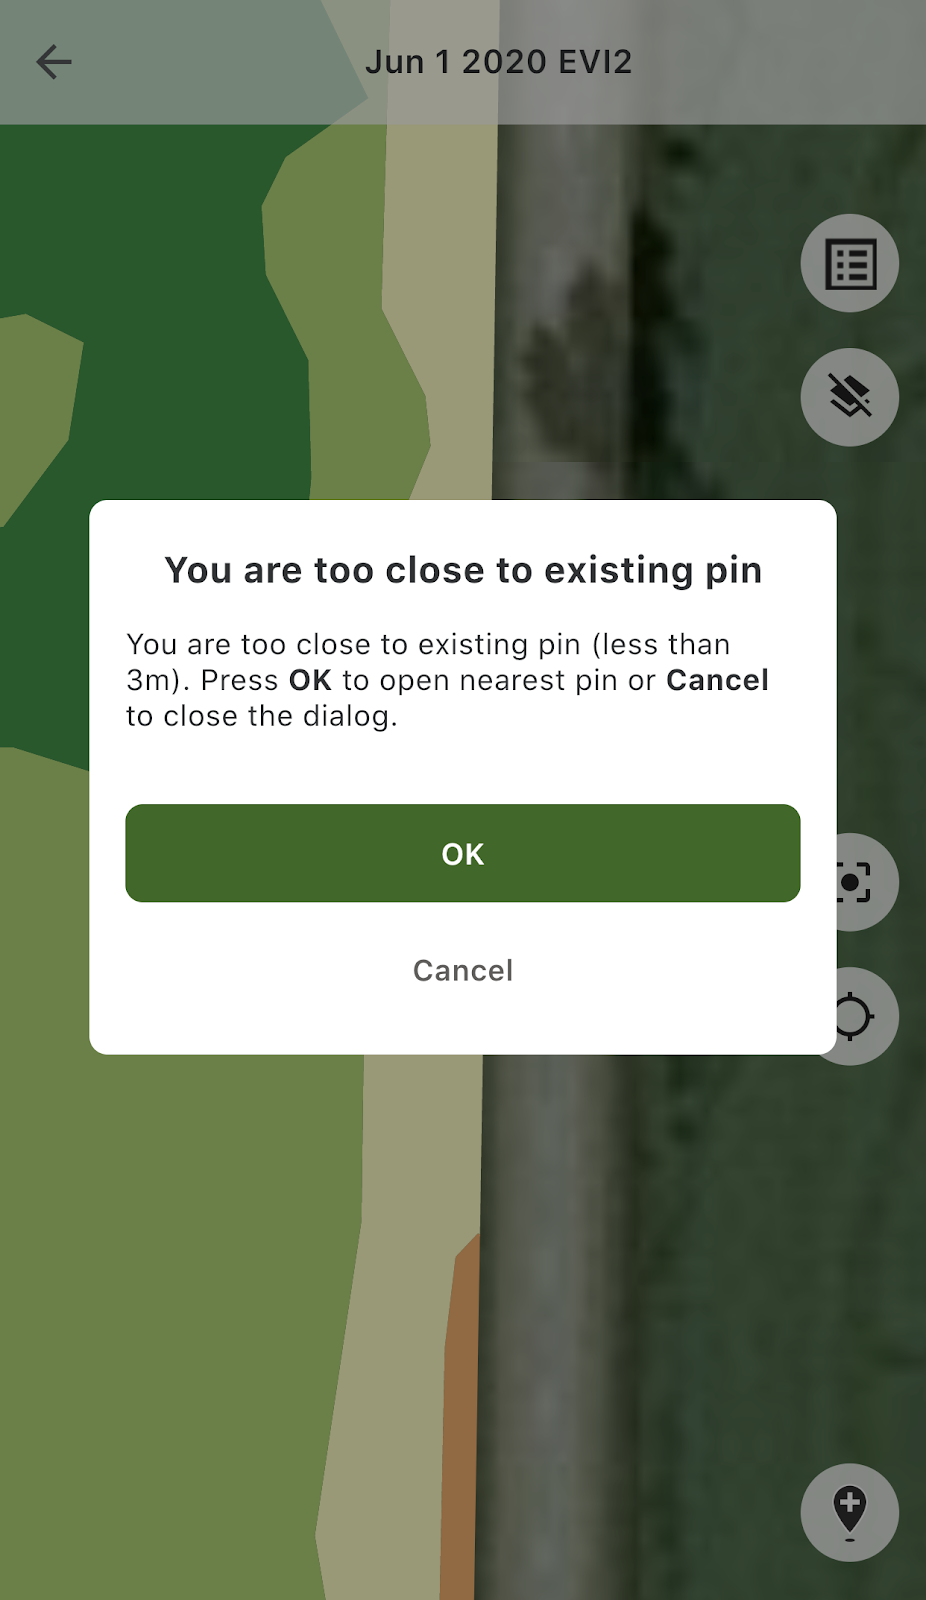
Si vous vous trouvez à proximité d’un repère existant et que vous essayez d’en ajouter un nouveau, le message suivant s’affiche :
Dans ce cas, vous pouvez appuyer sur « OK » pour ouvrir le repère le plus proche, ou sur « Annuler » pour fermer le message contextuel.
---
# Agent Instructions
This documentation is published with GitBook. GitBook is the documentation platform designed so that both humans and AI agents can read, navigate, and reason over technical content effectively. Learn more at gitbook.com.
## Querying This Documentation
If you need additional information that is not directly available in this page, you can query the documentation by asking a question.
Perform an HTTP GET request on the following URL with the `ask` and `goal` query parameters:
```
GET https://docs.geopard.tech/geopard-tutorials/fr/visite-guidee-du-produit-application-mobile/working-offline.md?ask=&goal=
```
`ask` is the immediate question: it should be specific, self-contained, and written in natural language.
`goal` is what the user is ultimately trying to achieve, the reason they need the answer. Sharing it helps GitBook give you a better, more relevant answer. A goal is most helpful when it describes the outcome the user wants rather than restating the question. For example, with `ask=how do I create an API token`, a goal like `automate deployments from our CI pipeline` lets GitBook tailor the answer to that use case.
The response will contain a direct answer to the question and relevant excerpts and sources from the documentation.
Use this mechanism when the answer is not explicitly present in the current page, you need clarification or additional context, or you want to retrieve related documentation sections.