> For the complete documentation index, see [llms.txt](https://docs.geopard.tech/geopard-tutorials/llms.txt). Markdown versions of documentation pages are available by appending `.md` to page URLs; this page is available as [Markdown](https://docs.geopard.tech/geopard-tutorials/fr/astuces-rapides-sig/qgis-split-multi-field-shapefiles.md).

# QGIS : découper un shapefile en un fichier par parcelle

Utilisez l’outil Split Vector Layer de QGIS pour découper un shapefile de limites ou de rendement couvrant toute l’exploitation en un fichier par parcelle, nommé d’après l’attribut de la parcelle.

Exécutez Vecteur > Outils de gestion des données > Diviser une couche vectorielle, choisissez l’attribut du nom de champ comme ID unique, et QGIS écrit un fichier par champ dans le dossier de sortie. Vérifiez d’abord que chaque champ a un nom unique, sinon deux champs portant le même nom se retrouveront dans un seul fichier.

{% hint style="success" %}
Importez les limites ainsi créées et affichez tous les champs sur une même carte : [Commencer gratuitement](https://app.geopard.tech/auth/sign-up?utm_source=docs\&utm_medium=cta\&utm_campaign=qgis-split-multi-field-shapefiles)
{% endhint %}

Si un shapefile contient plusieurs polygones de champs, divisez-le avant l’importation. GeoPard importe une limite de champ par shapefile. Ce processus dans QGIS vous aide à préparer rapidement des fichiers propres et à éviter les problèmes d’importation.

### Avant de commencer

* Assurez-vous que la couche comporte un nom de champ ou un ID unique.
* Créez à l’avance un dossier de sortie vide.
* Supprimez `/`, `\`et les caractères spéciaux similaires des noms de champ.

### Diviser un shapefile contenant plusieurs champs dans QGIS

#### 1. Ouvrir le shapefile dans QGIS

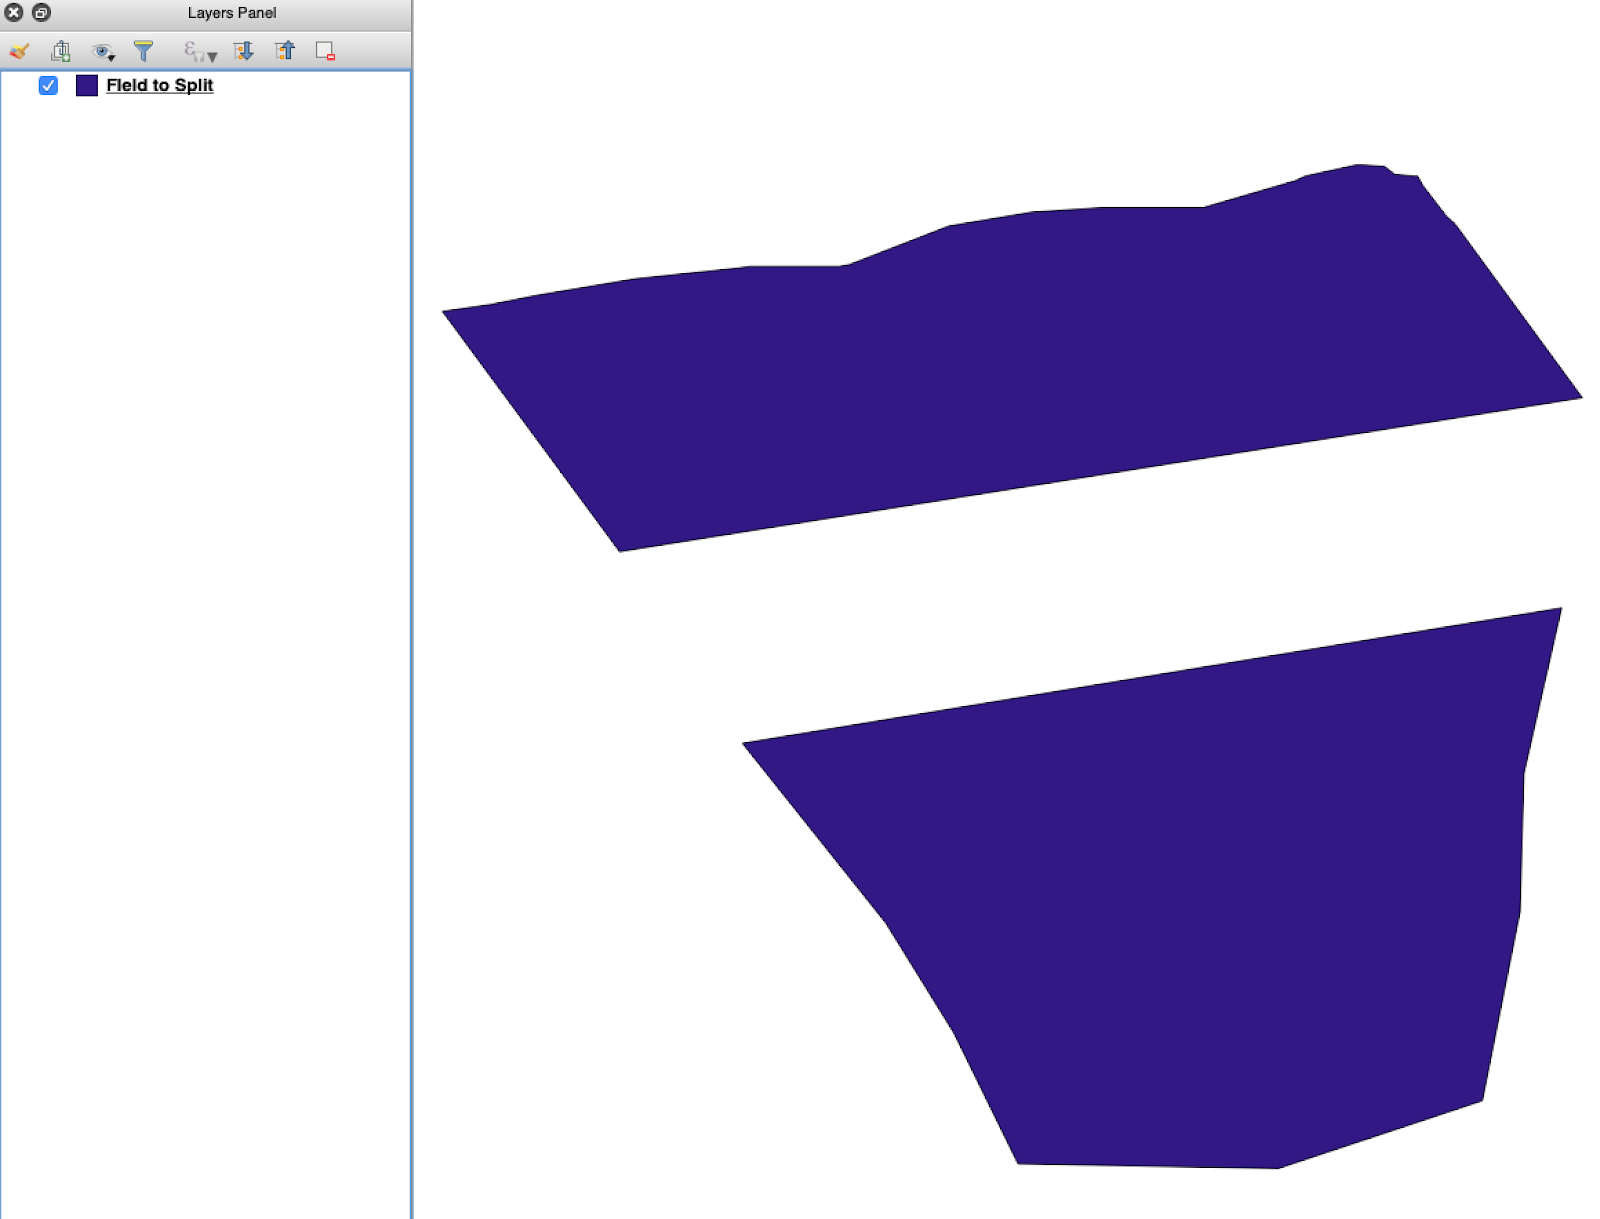
Ouvrez le shapefile source dans QGIS. Vérifiez qu’il contient plusieurs polygones de champs.

<figure><img src="https://lh5.googleusercontent.com/G8ooE_FarMCXvt6CjpvfwgRIiIwLVcSki84FFUiBelII7dZVLJHPN2K_Dj4As-VZNXYsut1q2JGtYEir3GCVfWqwKe4UAI9r9OcIM87jOkDRfiGes_wmD6zTmUyZpUZXgkQBUaW8RCsdaUKY18kaVQ" alt=""><figcaption><p>Couche initiale de limites de champs contenant plusieurs polygones.</p></figcaption></figure>

#### 2. Ouvrir l’outil de division

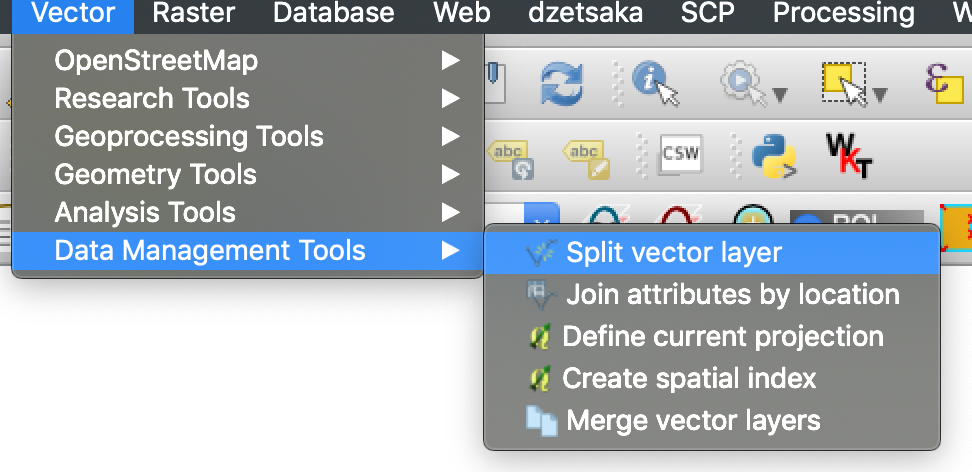
Ouvrez les options de la couche et choisissez **Diviser une couche vectorielle**.

<figure><img src="https://lh4.googleusercontent.com/g5B3A43gGlRbUBv2hkAt8xVT7UXzLvj06KB99R471uQQAIZLdoHFPmopQfz9ntwflEEN70DDUuMp7LQGqPocfzkBWbVc27Fm3pPCu2kWhbfnaG54TKGKmj4gKJw7sA10NKJf6ezJ62JVLtMlpSAl1Q" alt=""><figcaption><p>Ouvrez le processus de division.</p></figcaption></figure>

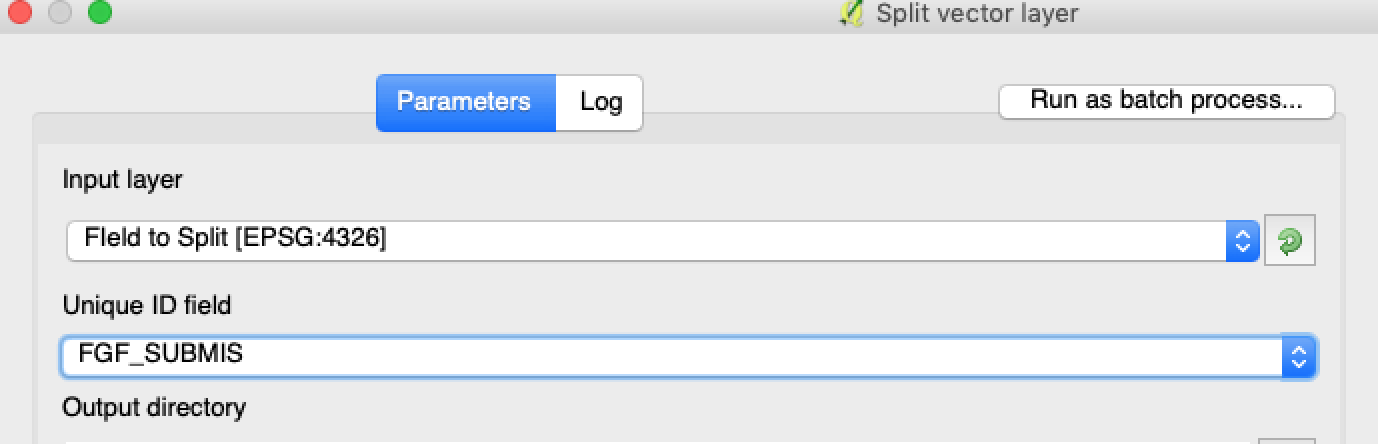
#### 3. Choisir la couche, l’attribut et le dossier de sortie

Définissez :

1. La couche à diviser.
2. Un attribut unique pour chaque champ.
3. Le répertoire de sortie.

<figure><img src="https://lh3.googleusercontent.com/oWwaxwcCPhOp6kIlpDM4z0CK_J_Q6QGCoIdXhr-vMrpQrf_HOLT5ZfHYExEk7J0QIYdPKunOdhe14S9Ay_-FtwGnTnq19GdtnWC4cUcEhEOXIGj7vZdZPsCovszX0sVdz1bF-yraci-5g09ZNJRocw" alt=""><figcaption><p>Sélectionnez la couche source et l’attribut de division.</p></figcaption></figure>

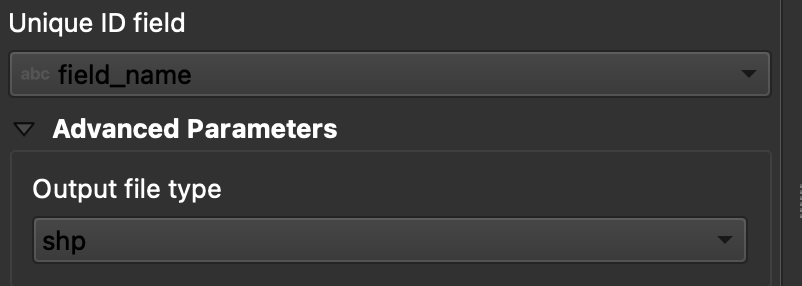
#### 4. Définir le format de sortie

Choisissez **ESRI Shapefile** comme format de sortie.

<figure><img src="https://lh6.googleusercontent.com/tDOJ7vPBHqCy8peu5Xb97FkYz43HZXnniWwYj6-UXcaMyJaEvuWqx6ew40n9OvXM9OGrPGof0rWasEcgQFjh9SEakNXKW4K4n3Ei56B6jwttr_NW30naaD4OYNJERbQeqeX7bE4JJNd_HwYlgdKIqg" alt=""><figcaption><p>Définissez le dossier de sortie et le format shapefile.</p></figcaption></figure>

#### 5. Lancer la division

Cliquez sur **Exécuter**. QGIS crée un fichier par polygone. Chaque polygone devient un shapefile de limite de champ distinct.

#### 6. Convertir les fichiers `.gpkg` en fichiers `.shp` si nécessaire

Certaines configurations de QGIS créent d’abord des fichiers `.gpkg` . Si c’est le cas, ouvrez chaque fichier et enregistrez-le de nouveau au format **ESRI Shapefile**.

1. Faites un clic droit sur la couche.
2. Sélectionnez **Exporter** → **Enregistrer les entités sous**.
3. Choisissez **ESRI Shapefile**.
4. Définissez le nom et l’emplacement du fichier.
5. Supprimez les attributs inutiles si nécessaire.

### Résultat

Vous disposez désormais d’un fichier shapefile par parcelle. Chaque fichier est prêt à être importé dans GeoPard comme limite de parcelle. Vous gagnez ainsi du temps lors de la configuration et évitez les retouches d’importation superflues.

### Guides QGIS associés

* [QGIS : convertir un fichier CSV en SHP](https://docs.geopard.tech/geopard-tutorials/fr/astuces-rapides-sig/qgis-convert-csv-to-shp.md)
* [QGIS : reprojeter un shapefile](https://docs.geopard.tech/geopard-tutorials/fr/astuces-rapides-sig/qgis-reproject-shapefile.md)

{% hint style="success" %}
Importez les limites ainsi créées et affichez tous les champs sur une même carte : [Commencer gratuitement](https://app.geopard.tech/auth/sign-up?utm_source=docs\&utm_medium=cta\&utm_campaign=qgis-split-multi-field-shapefiles)
{% endhint %}


---

# Agent Instructions
This documentation is published with GitBook. GitBook is the documentation platform designed so that both humans and AI agents can read, navigate, and reason over technical content effectively. Learn more at gitbook.com.

## Querying This Documentation
If you need additional information that is not directly available in this page, you can query the documentation by asking a question.

Perform an HTTP GET request on the following URL with the `ask` and `goal` query parameters:

```
GET https://docs.geopard.tech/geopard-tutorials/fr/astuces-rapides-sig/qgis-split-multi-field-shapefiles.md?ask=<question>&goal=<user_goal>
```

`ask` is the immediate question: it should be specific, self-contained, and written in natural language.
`goal` is what the user is ultimately trying to achieve, the reason they need the answer. Sharing it helps GitBook give you a better, more relevant answer. A goal is most helpful when it describes the outcome the user wants rather than restating the question. For example, with `ask=how do I create an API token`, a goal like `automate deployments from our CI pipeline` lets GitBook tailor the answer to that use case.

The response will contain a direct answer to the question and relevant excerpts and sources from the documentation.

Use this mechanism when the answer is not explicitly present in the current page, you need clarification or additional context, or you want to retrieve related documentation sections.