> For the complete documentation index, see [llms.txt](https://docs.geopard.tech/geopard-tutorials/llms.txt). Markdown versions of documentation pages are available by appending `.md` to page URLs; this page is available as [Markdown](https://docs.geopard.tech/geopard-tutorials/dnk/korte-gis-tips/qgis-split-multi-field-shapefiles.md).
# QGIS: Opdel én shapefile i én fil pr. mark
Brug Split Vector Layer i QGIS til at opdele en shapefile med markgrænser eller udbytte for hele bedriften i én fil pr. mark, navngivet efter markens attribut.
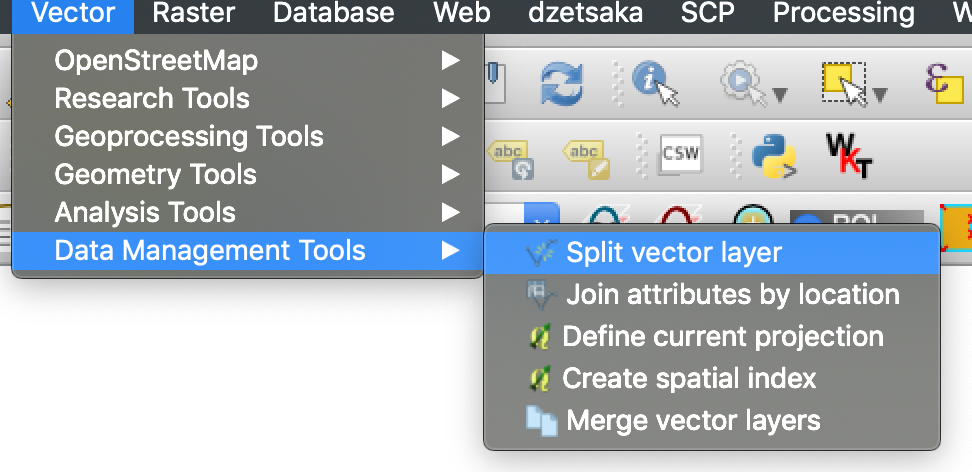
Kør Vektor, Datahåndteringsværktøjer, Opdel vektorlag, vælg feltet med feltnavnet som entydigt ID, så skriver QGIS én fil pr. felt til outputmappen. Kontrollér først, at hvert felt har et entydigt navn, ellers ender to felter med samme navn i én fil.
{% hint style="success" %}
Upload de opdelte markgrænser, og se alle markerne på ét kort: [Kom gratis i gang](https://app.geopard.tech/auth/sign-up?utm_source=docs\&utm_medium=cta\&utm_campaign=qgis-split-multi-field-shapefiles)
{% endhint %}
Hvis en shapefil indeholder polygoner for flere marker, skal du opdele den før import. GeoPard importerer én markgrænse pr. shapefil. Denne arbejdsgang i QGIS hjælper dig med at klargøre rene filer hurtigere og undgå importproblemer.
### Før du går i gang
* Sørg for, at laget har et entydigt marknavn eller ID.
* Opret en tom outputmappe på forhånd.
* Fjern `/`, `\`, og lignende specialtegn fra marknavne.
### Opdel en shapefil med flere marker i QGIS
#### 1. Åbn shapefilen i QGIS
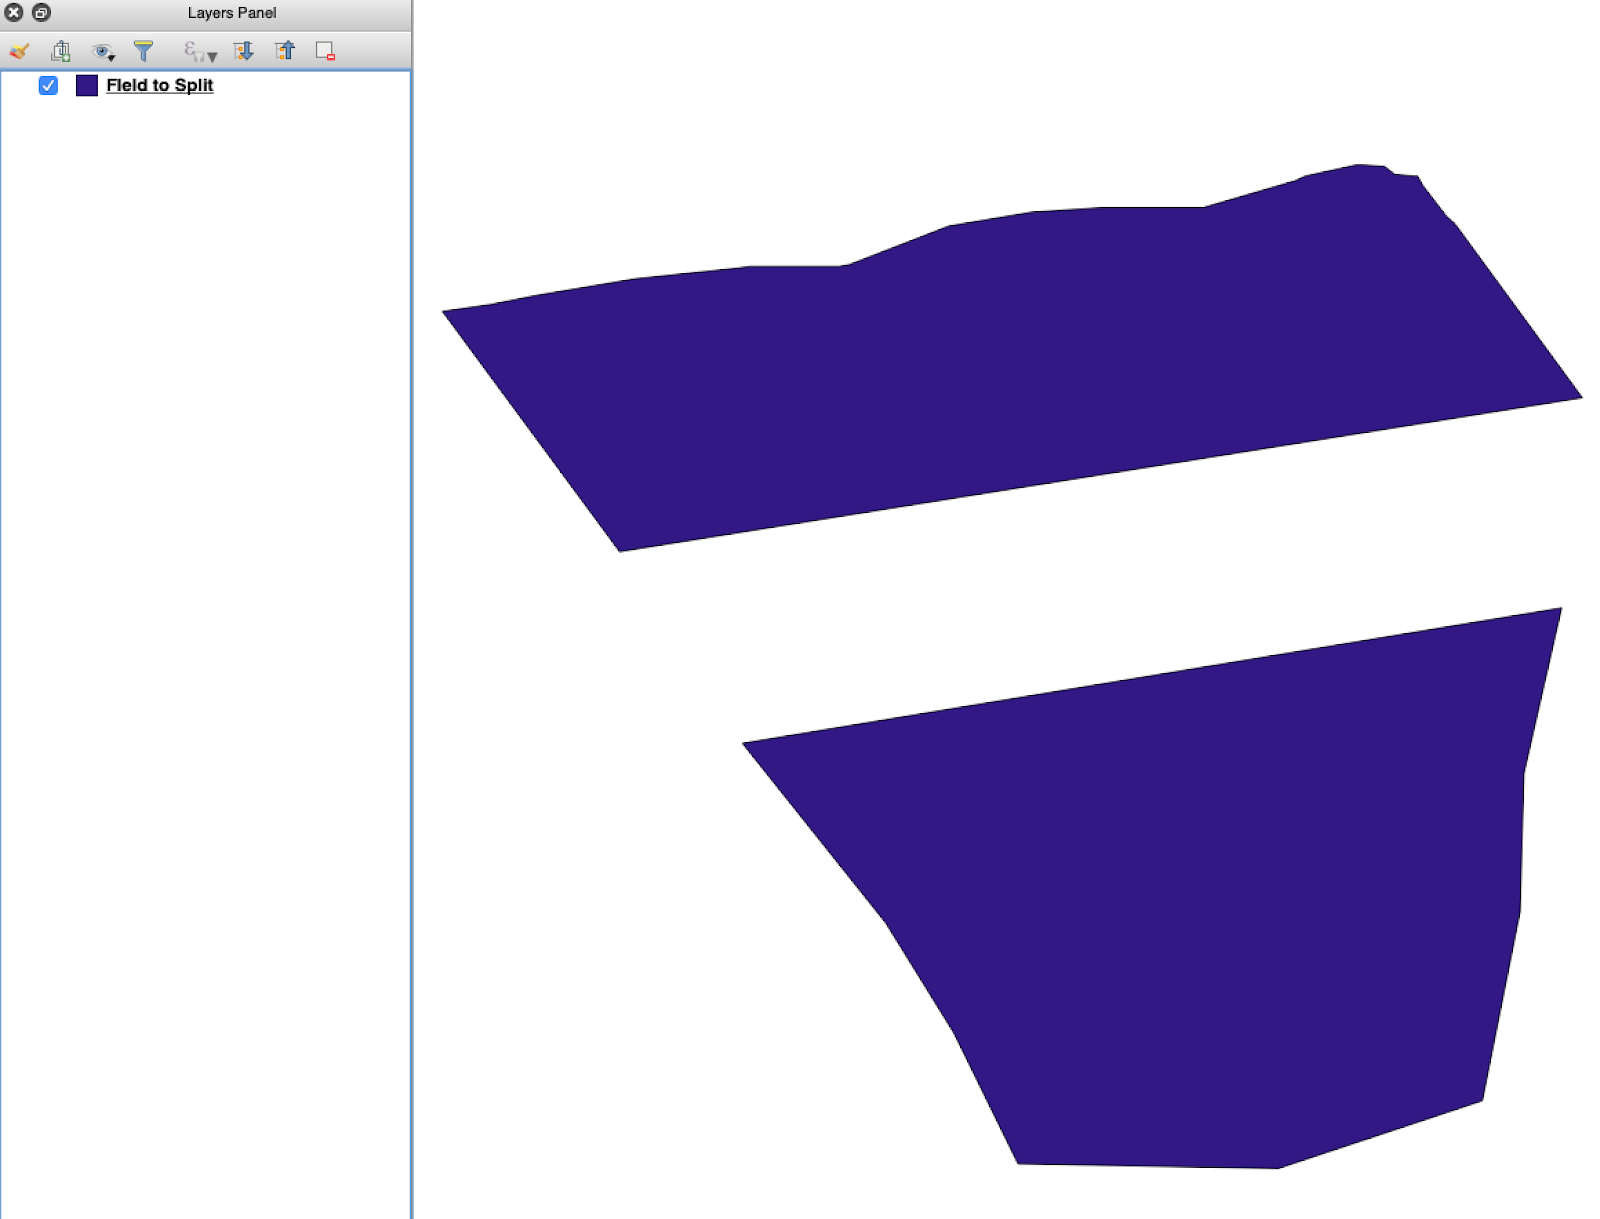
Åbn kildeshapefilen i QGIS. Kontrollér, at den indeholder polygoner for flere marker.
Oprindeligt lag med markgrænser, der indeholder flere polygoner.
#### 2. Åbn opdelingsværktøjet
Åbn lagindstillingerne, og vælg **Opdel vektorlag**.
Åbn arbejdsgangen til opdeling.
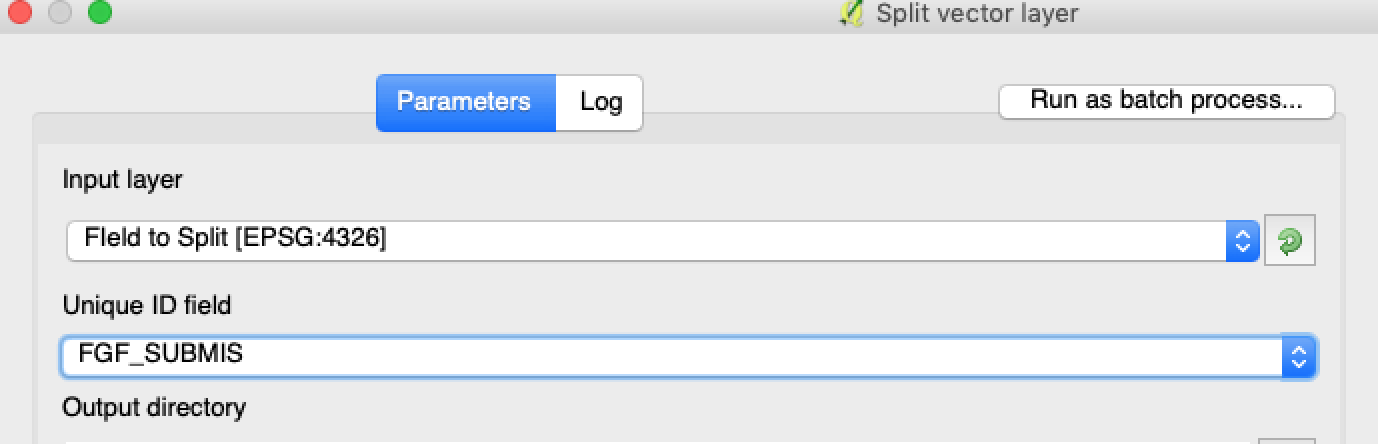
#### 3. Vælg lag, attribut og outputmappe
Angiv:
1. Laget, der skal opdeles.
2. En entydig attribut for hver mark.
3. Outputmappen.
Vælg kildelaget og opdelingsattributten.
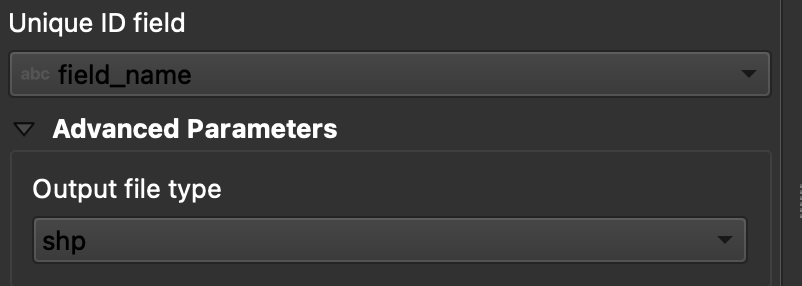
#### 4. Angiv outputformatet
Vælg **ESRI Shapefile** som outputformat.
Angiv outputmappen og shapefilformatet.
#### 5. Kør opdelingen
Klik på **Kør**. QGIS opretter én fil pr. polygon. Hver polygon bliver til en separat shapefil med en markgrænse.
#### 6. Konvertér `.gpkg` filer til `.shp` om nødvendigt
Nogle QGIS-installationer opretter først `.gpkg` filer. Hvis det sker, skal du åbne hver fil og gemme den igen som **ESRI Shapefile**.
1. Højreklik på laget.
2. Vælg **Eksportér** → **Gem objekter som**.
3. Vælg **ESRI Shapefile**.
4. Angiv filnavn og placering.
5. Fjern eventuelt attributter, du ikke har brug for.
### Resultat
Du har nu én shapefil pr. mark. Hver fil er klar til upload af markgrænser i GeoPard. Det sparer tid på opsætningen og mindsker unødigt ekstraarbejde ved import.
### Relaterede QGIS-vejledninger
* [QGIS: Konvertér CSV til SHP](https://docs.geopard.tech/geopard-tutorials/dnk/korte-gis-tips/qgis-convert-csv-to-shp.md)
* [QGIS: Omprojicér shapefil](https://docs.geopard.tech/geopard-tutorials/dnk/korte-gis-tips/qgis-reproject-shapefile.md)
{% hint style="success" %}
Upload de opdelte markgrænser, og se alle markerne på ét kort: [Kom gratis i gang](https://app.geopard.tech/auth/sign-up?utm_source=docs\&utm_medium=cta\&utm_campaign=qgis-split-multi-field-shapefiles)
{% endhint %}
---
# Agent Instructions
This documentation is published with GitBook. GitBook is the documentation platform designed so that both humans and AI agents can read, navigate, and reason over technical content effectively. Learn more at gitbook.com.
## Querying This Documentation
If you need additional information that is not directly available in this page, you can query the documentation by asking a question.
Perform an HTTP GET request on the following URL with the `ask` and `goal` query parameters:
```
GET https://docs.geopard.tech/geopard-tutorials/dnk/korte-gis-tips/qgis-split-multi-field-shapefiles.md?ask=&goal=
```
`ask` is the immediate question: it should be specific, self-contained, and written in natural language.
`goal` is what the user is ultimately trying to achieve, the reason they need the answer. Sharing it helps GitBook give you a better, more relevant answer. A goal is most helpful when it describes the outcome the user wants rather than restating the question. For example, with `ask=how do I create an API token`, a goal like `automate deployments from our CI pipeline` lets GitBook tailor the answer to that use case.
The response will contain a direct answer to the question and relevant excerpts and sources from the documentation.
Use this mechanism when the answer is not explicitly present in the current page, you need clarification or additional context, or you want to retrieve related documentation sections.