> For the complete documentation index, see [llms.txt](https://docs.geopard.tech/geopard-tutorials/llms.txt). Markdown versions of documentation pages are available by appending `.md` to page URLs; this page is available as [Markdown](https://docs.geopard.tech/geopard-tutorials/dnk/gis-kviktips/qgis-beregn-ndvi-for-drone-geotiff-filen.md).
# QGIS: Beregn NDVI for drone-GeoTIFF-filen
Nogle gange skal du beregne gennemsnitlig NDVI for en polygon inde i marken. Du kan gøre følgende i et QGIS-program.
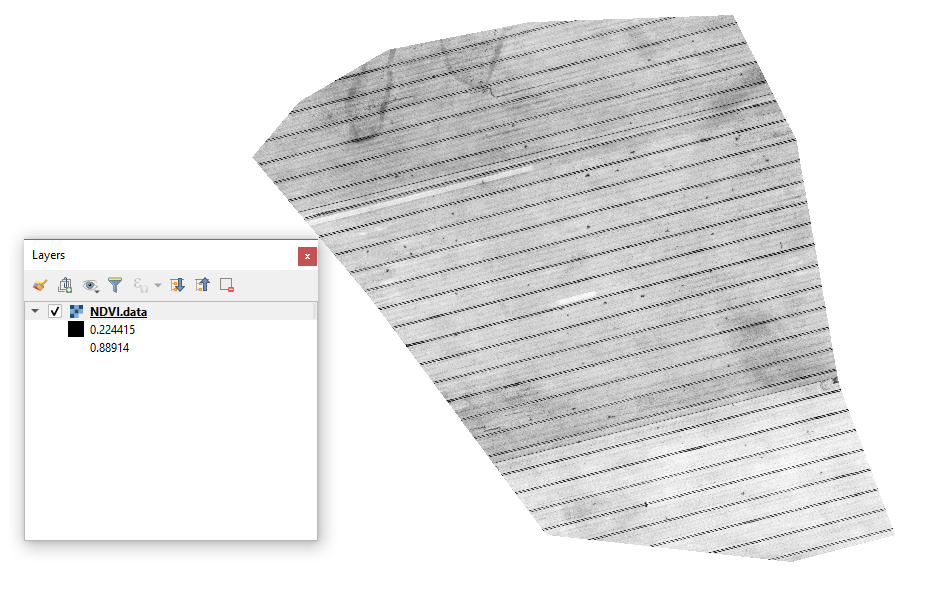
#### 1 - Visualisér det oprindelige drone-NDVI-geotiff
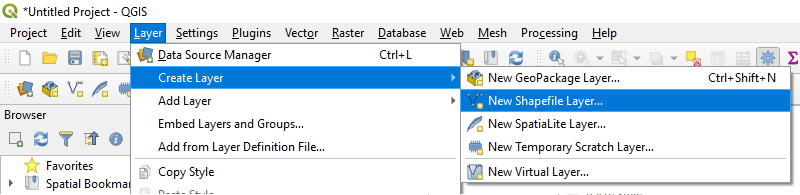
#### 2 - Opret et nyt lag
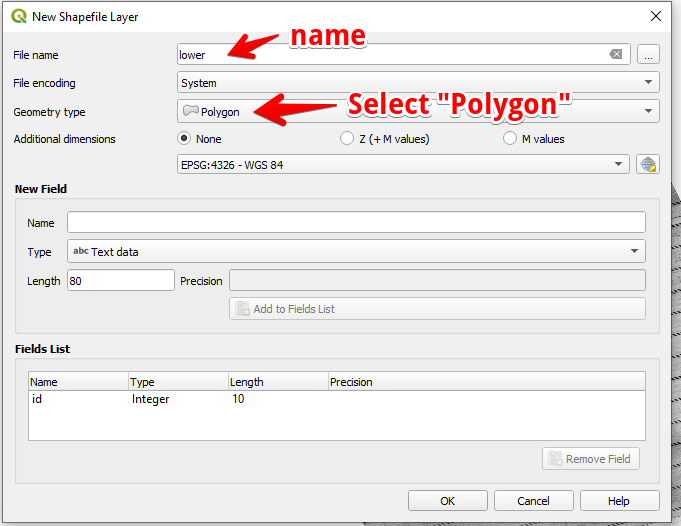
#### 3 - Opsæt lagnavn og geometritype, og tryk på OK
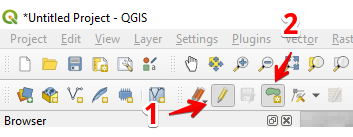
#### 4 - Vælg laget i lagpanelet
1. Vælg “Skift redigering” (1)
2. Vælg “Tilføj polygonobjekt” (2)
#### 5 - Tegn en polygon. For at afslutte tegningen skal du trykke på højre museknap og angive “id” i pop op-vinduet.
Afslut laget ved at trykke på “Skift redigering” igen og tryk på “Gem”.
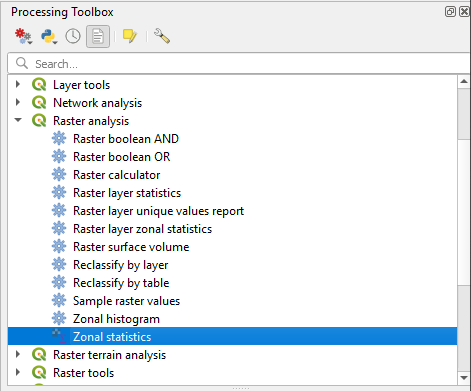
#### 6 - Vælg zonestatistik i panelet “Behandlingsværktøjskasse”.
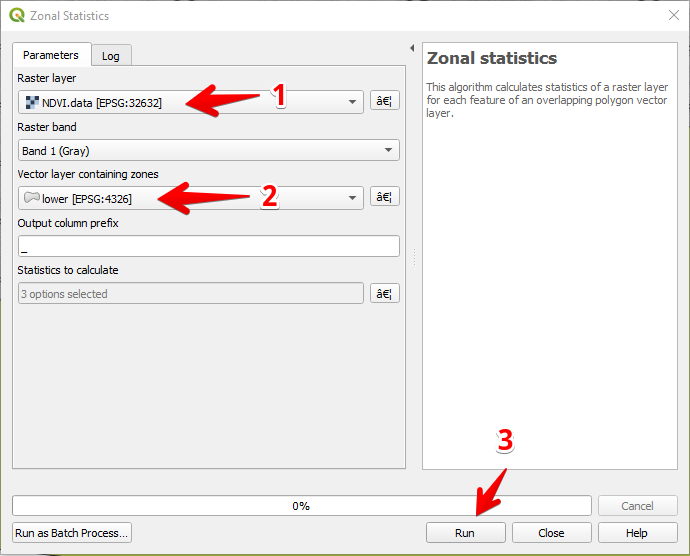
#### 7 - Vælg rasterlaget (1),
Vælg polygonlaget (2),
Tryk på “Kør” (3).
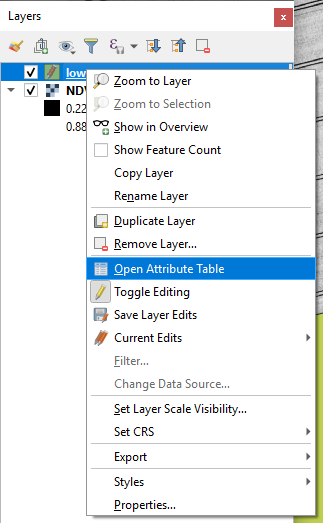
#### 8 - Vælg laget i lagpanelet og tryk på højre museknap; i genvejsmenuen vælg Åbn attributtabel.
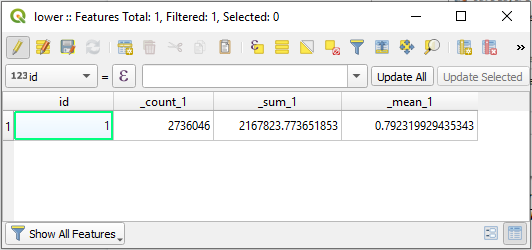
#### 9 - De beregnede statistikker vises i tabellen.
---
# Agent Instructions
This documentation is published with GitBook. GitBook is the documentation platform designed so that both humans and AI agents can read, navigate, and reason over technical content effectively. Learn more at gitbook.com.
## Querying This Documentation
If you need additional information that is not directly available in this page, you can query the documentation dynamically by asking a question.
Perform an HTTP GET request on the current page URL with the `ask` query parameter, and the optional `goal` query parameter:
```
GET https://docs.geopard.tech/geopard-tutorials/dnk/gis-kviktips/qgis-beregn-ndvi-for-drone-geotiff-filen.md?ask=&goal=
```
`ask` is the immediate question: it should be specific, self-contained, and written in natural language.
`goal` is optional and describes the broader end goal you are ultimately trying to accomplish on behalf of the user. GitBook uses it to tailor the answer towards what is most useful for that goal.
The response will contain a direct answer to the question and relevant excerpts and sources from the documentation.
Use this mechanism when the answer is not explicitly present in the current page, you need clarification or additional context, or you want to retrieve related documentation sections.