> For the complete documentation index, see [llms.txt](https://docs.geopard.tech/geopard-tutorials/llms.txt). Markdown versions of documentation pages are available by appending `.md` to page URLs; this page is available as [Markdown](https://docs.geopard.tech/geopard-tutorials/de/gis-kurzhinweise/qgis-shapefiles-mit-mehreren-feldern-aufteilen.md).

# QGIS: Shapefiles mit mehreren Feldern aufteilen

Teilen Sie ein Shapefile mit mehreren Feldern in QGIS in separate Feldgrenz-Shapefiles für den GeoPard-Import auf.

Wenn eine Shapefile mehrere Feldpolygone enthält, teilen Sie sie vor dem Import auf. GeoPard importiert pro Shapefile nur eine Feldgrenze. Dieser QGIS-Workflow hilft Ihnen, saubere Dateien schneller vorzubereiten und Importprobleme zu vermeiden.

### Vorbereitung

* Stellen Sie sicher, dass der Layer einen eindeutigen Feldnamen oder eine eindeutige ID hat.
* Erstellen Sie im Voraus einen leeren Ausgabeordner.
* Entfernen Sie `/`, `\`, und ähnliche Sonderzeichen aus Feldnamen.

### Eine Multi-Feld-Shapefile in QGIS aufteilen

#### 1. Öffnen Sie die Shapefile in QGIS

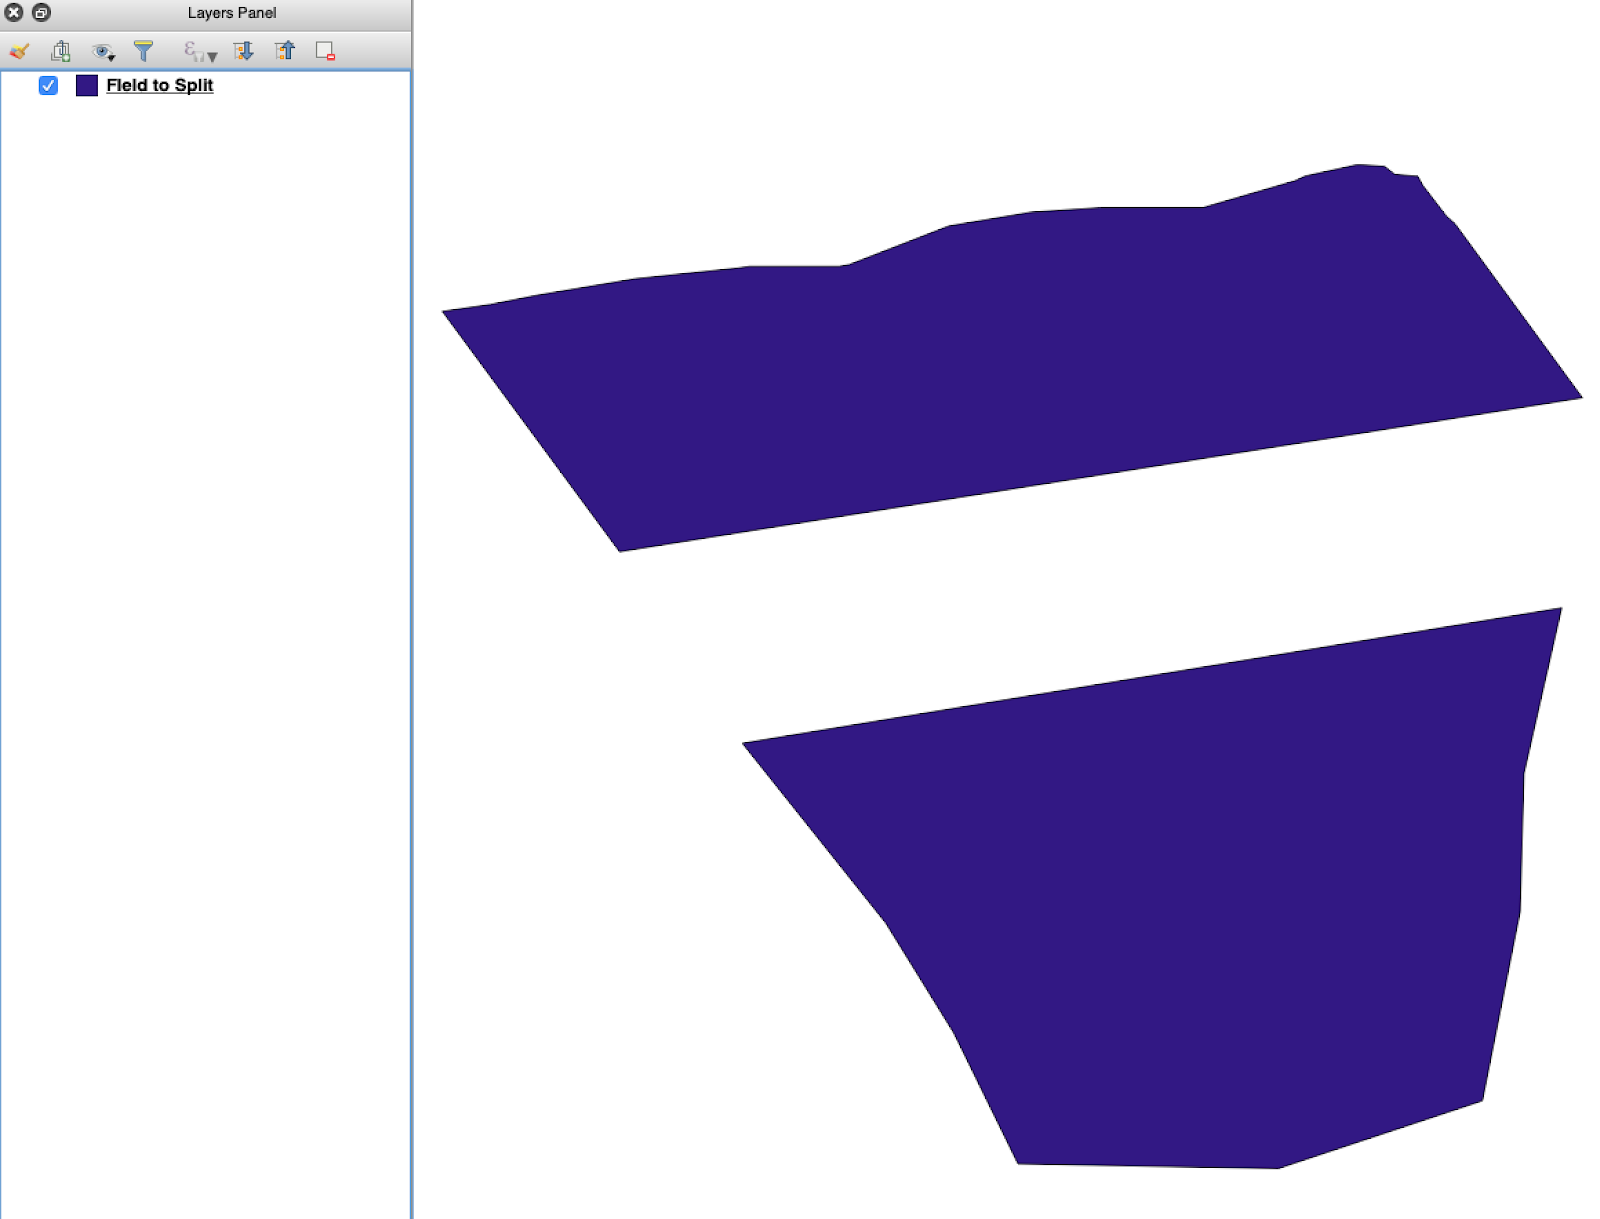
Öffnen Sie die Quel-Shapefile in QGIS. Bestätigen Sie, dass sie mehrere Feldpolygone enthält.

<figure><img src="https://lh5.googleusercontent.com/G8ooE_FarMCXvt6CjpvfwgRIiIwLVcSki84FFUiBelII7dZVLJHPN2K_Dj4As-VZNXYsut1q2JGtYEir3GCVfWqwKe4UAI9r9OcIM87jOkDRfiGes_wmD6zTmUyZpUZXgkQBUaW8RCsdaUKY18kaVQ" alt=""><figcaption><p>Initialer Feldgrenzen-Layer mit mehreren Polygonen.</p></figcaption></figure>

#### 2. Öffnen Sie das Aufteilungswerkzeug

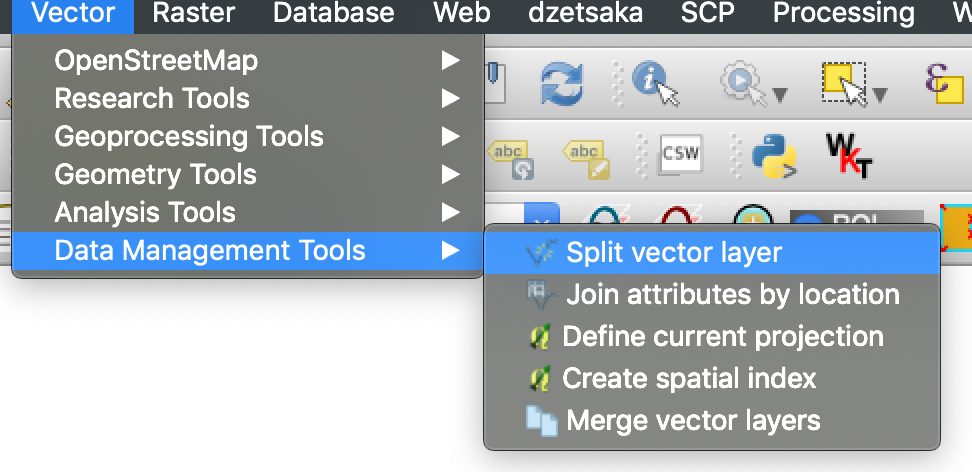
Öffnen Sie die Layereinstellungen und wählen Sie **Vektorlayer aufteilen**.

<figure><img src="https://lh4.googleusercontent.com/g5B3A43gGlRbUBv2hkAt8xVT7UXzLvj06KB99R471uQQAIZLdoHFPmopQfz9ntwflEEN70DDUuMp7LQGqPocfzkBWbVc27Fm3pPCu2kWhbfnaG54TKGKmj4gKJw7sA10NKJf6ezJ62JVLtMlpSAl1Q" alt=""><figcaption><p>Öffnen Sie den Aufteilungs-Workflow.</p></figcaption></figure>

#### 3. Wählen Sie den Layer, das Attribut und den Ausgabeordner

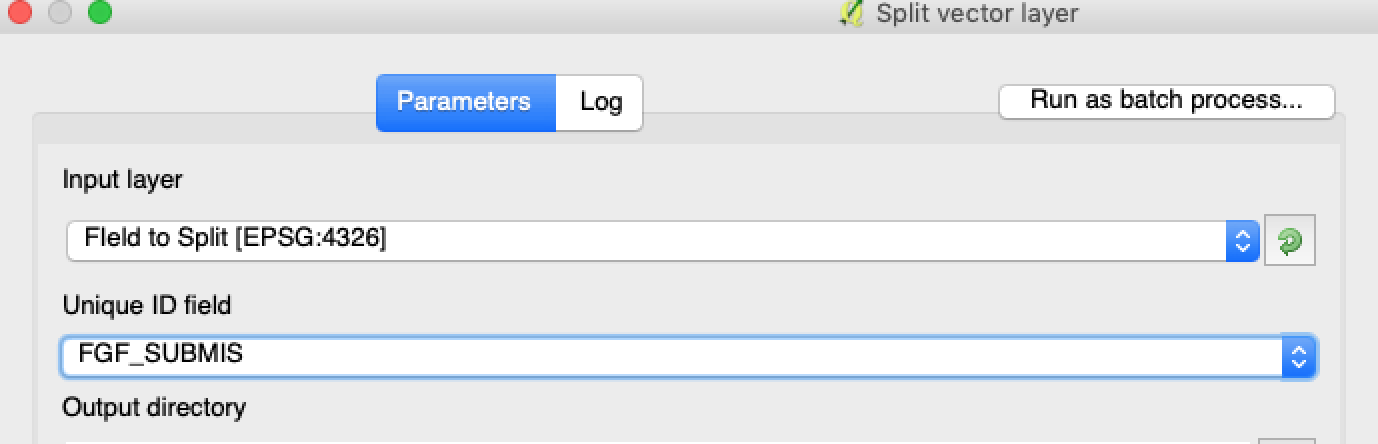
Festlegen:

1. Den zu teilenden Layer.
2. Ein eindeutiges Attribut für jedes Feld.
3. Das Ausgabeverzeichnis.

<figure><img src="https://lh3.googleusercontent.com/oWwaxwcCPhOp6kIlpDM4z0CK_J_Q6QGCoIdXhr-vMrpQrf_HOLT5ZfHYExEk7J0QIYdPKunOdhe14S9Ay_-FtwGnTnq19GdtnWC4cUcEhEOXIGj7vZdZPsCovszX0sVdz1bF-yraci-5g09ZNJRocw" alt=""><figcaption><p>Wählen Sie den Quelllayer und das Aufteilungsattribut aus.</p></figcaption></figure>

#### 4. Legen Sie das Ausgabeformat fest

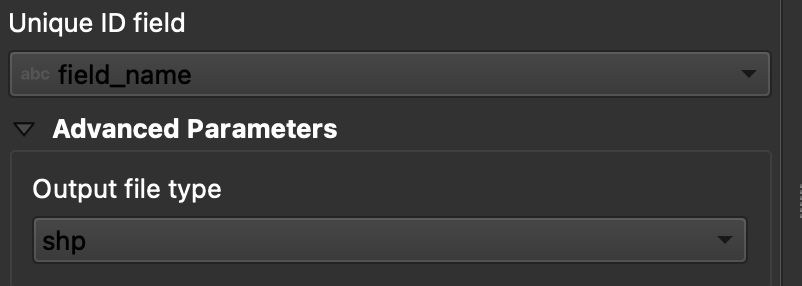
Wählen Sie **ESRI Shapefile** als Ausgabeformat.

<figure><img src="https://lh6.googleusercontent.com/tDOJ7vPBHqCy8peu5Xb97FkYz43HZXnniWwYj6-UXcaMyJaEvuWqx6ew40n9OvXM9OGrPGof0rWasEcgQFjh9SEakNXKW4K4n3Ei56B6jwttr_NW30naaD4OYNJERbQeqeX7bE4JJNd_HwYlgdKIqg" alt=""><figcaption><p>Legen Sie den Ausgabeordner und das Shapefile-Format fest.</p></figcaption></figure>

#### 5. Führen Sie die Aufteilung aus

Klicken Sie auf **Ausführen**. QGIS erstellt eine Datei pro Polygon. Jedes Polygon wird zu einer separaten Shapefile der Feldgrenze.

#### 6. Konvertieren Sie `.gpkg` -Dateien in `.shp` falls erforderlich

Einige QGIS-Installationen erstellen zuerst `.gpkg` -Dateien. Falls das passiert, öffnen Sie jede Datei und speichern Sie sie erneut als **ESRI Shapefile**.

1. Klicken Sie mit der rechten Maustaste auf den Layer.
2. Wählen Sie **Exportieren** → **Objekte speichern als**.
3. Wählen Sie **ESRI Shapefile**.
4. Legen Sie den Dateinamen und den Speicherort fest.
5. Entfernen Sie bei Bedarf nicht benötigte Attribute.

### Ergebnis

Sie haben nun eine Shapefile pro Feld. Jede Datei ist für den Upload der Feldgrenze in GeoPard bereit. Das spart Einrichtungszeit und reduziert vermeidbare Nacharbeit beim Import.

### Verwandte QGIS-Anleitungen

* [QGIS: CSV in SHP konvertieren](/geopard-tutorials/de/gis-kurzhinweise/qgis-csv-in-shp-umwandeln.md)
* [QGIS: Shapefile reprojizieren](/geopard-tutorials/de/gis-kurzhinweise/qgis-shapefile-reprojizieren.md)


---

# Agent Instructions
This documentation is published with GitBook. GitBook is the documentation platform designed so that both humans and AI agents can read, navigate, and reason over technical content effectively. Learn more at gitbook.com.

## Querying This Documentation
If you need additional information that is not directly available in this page, you can query the documentation dynamically by asking a question.

Perform an HTTP GET request on the current page URL with the `ask` query parameter, and the optional `goal` query parameter:

```
GET https://docs.geopard.tech/geopard-tutorials/de/gis-kurzhinweise/qgis-shapefiles-mit-mehreren-feldern-aufteilen.md?ask=<question>&goal=<endgoal>
```

`ask` is the immediate question: it should be specific, self-contained, and written in natural language.
`goal` is optional and describes the broader end goal you are ultimately trying to accomplish on behalf of the user. GitBook uses it to tailor the answer towards what is most useful for that goal.

The response will contain a direct answer to the question and relevant excerpts and sources from the documentation.

Use this mechanism when the answer is not explicitly present in the current page, you need clarification or additional context, or you want to retrieve related documentation sections.