> For the complete documentation index, see [llms.txt](https://docs.geopard.tech/geopard-tutorials/llms.txt). Markdown versions of documentation pages are available by appending `.md` to page URLs; this page is available as [Markdown](https://docs.geopard.tech/geopard-tutorials/ar/tlmyhat-sryah-l-gis/qgis-hsab-ndvi-lmlf-geotiff-alkhas-baltaerh-almsy-rh.md).
# QGIS: حساب NDVI لملف GeoTIFF الخاص بالطائرة المسيّرة
أحيانًا تحتاج إلى حساب متوسط NDVI لبعض المضلع داخل الحقل. يمكنك تنفيذ ما يلي في برنامج QGIS.
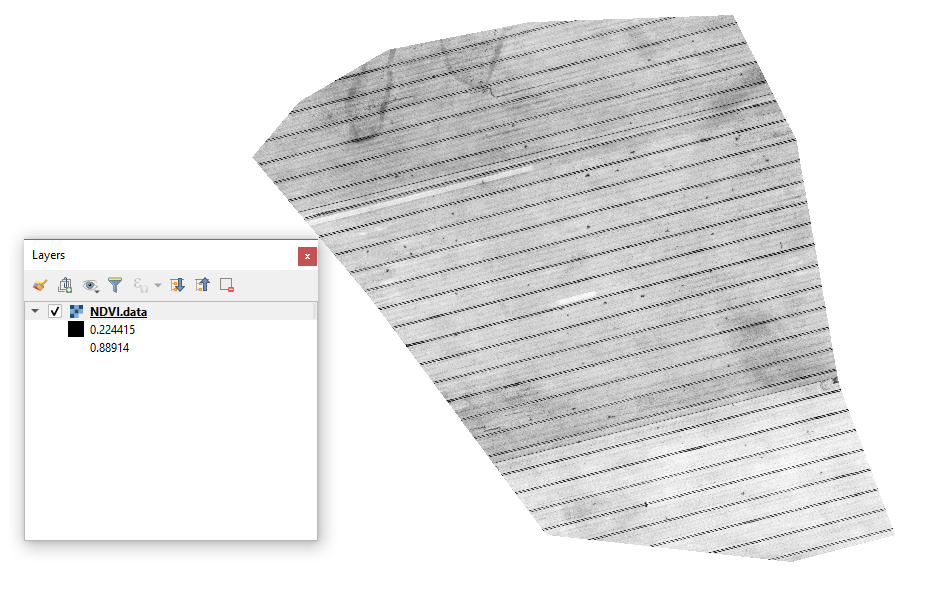
#### 1 - عرض ملف geotiff الخاص بـ NDVI الأولي من الطائرة المُسيّرة
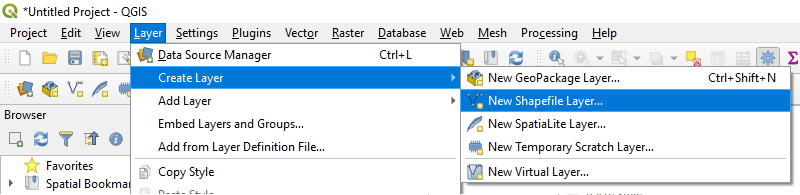
#### 2 - إنشاء طبقة جديدة
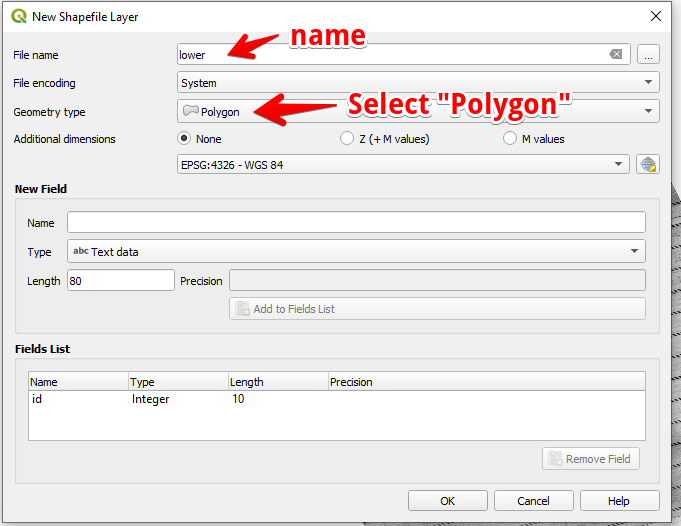
#### 3 - إعداد اسم الطبقة ونوع الهندسة، ثم اضغط على موافق
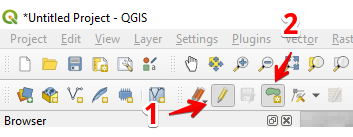
#### 4 - اختر الطبقة في لوحة الطبقات
1. اختر «تبديل التحرير» (1)
2. اختر «إضافة معلم مضلع» (2)
#### 5 - ارسم مضلعًا. لإنهاء الرسم اضغط بزر الفأرة الأيمن واضبط «id» في النافذة المنبثقة.
أنهِ الطبقة بالضغط مرة أخرى على «تبديل التحرير» ثم اضغط «حفظ».
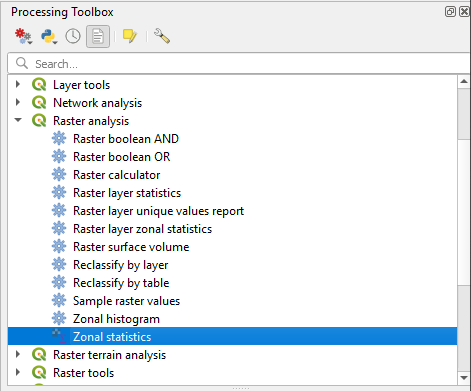
#### 6 - اختر الإحصاءات المكانية في لوحة «أدوات المعالجة».
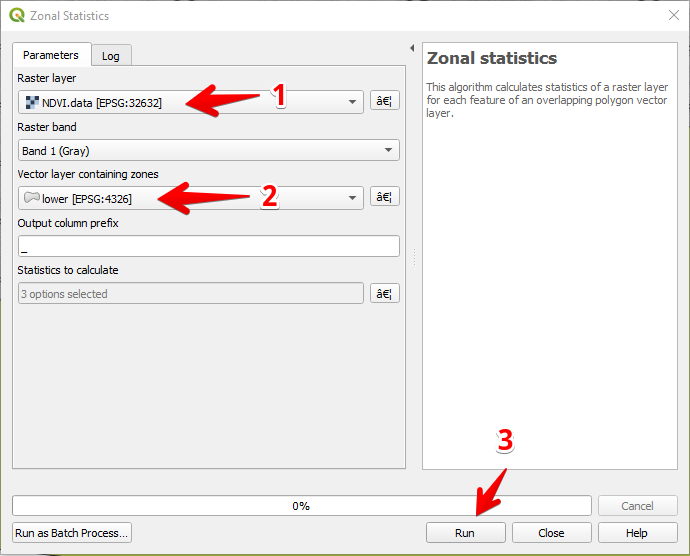
#### 7 - اختر طبقة الراستر (1)،
اختر طبقة المضلع (2)،
اضغط «تشغيل» (3).
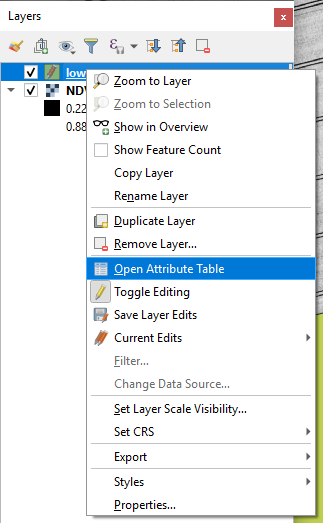
#### 8 - اختر الطبقة في لوحة الطبقات واضغط بزر الفأرة الأيمن، وفي قائمة السياق اختر فتح جدول السمات.
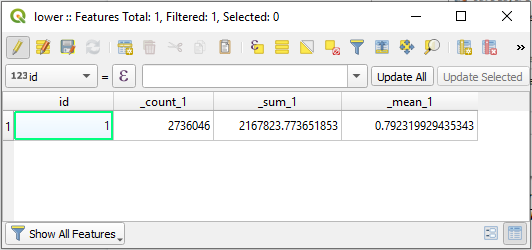
#### 9 - ستظهر الإحصاءات المحسوبة في الجدول.
---
# Agent Instructions
This documentation is published with GitBook. GitBook is the documentation platform designed so that both humans and AI agents can read, navigate, and reason over technical content effectively. Learn more at gitbook.com.
## Querying This Documentation
If you need additional information that is not directly available in this page, you can query the documentation dynamically by asking a question.
Perform an HTTP GET request on the current page URL with the `ask` query parameter, and the optional `goal` query parameter:
```
GET https://docs.geopard.tech/geopard-tutorials/ar/tlmyhat-sryah-l-gis/qgis-hsab-ndvi-lmlf-geotiff-alkhas-baltaerh-almsy-rh.md?ask=&goal=
```
`ask` is the immediate question: it should be specific, self-contained, and written in natural language.
`goal` is optional and describes the broader end goal you are ultimately trying to accomplish on behalf of the user. GitBook uses it to tailor the answer towards what is most useful for that goal.
The response will contain a direct answer to the question and relevant excerpts and sources from the documentation.
Use this mechanism when the answer is not explicitly present in the current page, you need clarification or additional context, or you want to retrieve related documentation sections.